With Zoho CRM software, you can manage all your business processes from a single system. You can automate and speed up all the activities of sales, marketing, customer service, and so on because of this WordPress Zoho integration.
With MetForm Pro, WordPress Zoho CRM integration is hassle-free. You can connect Zoho and start working within short time.
Get Started with WordPress Zoho CRM Integration #
The very first things you have to do are –
- Install MetForm Pro: Download MetForm now 👉 https://wpmet.com/plugin/metform/pricing/
- Open a Zoho account: Log in to your Zoho account, if you don’t have an account, open an account. Go to 👉 https://accounts.zoho.com/signin
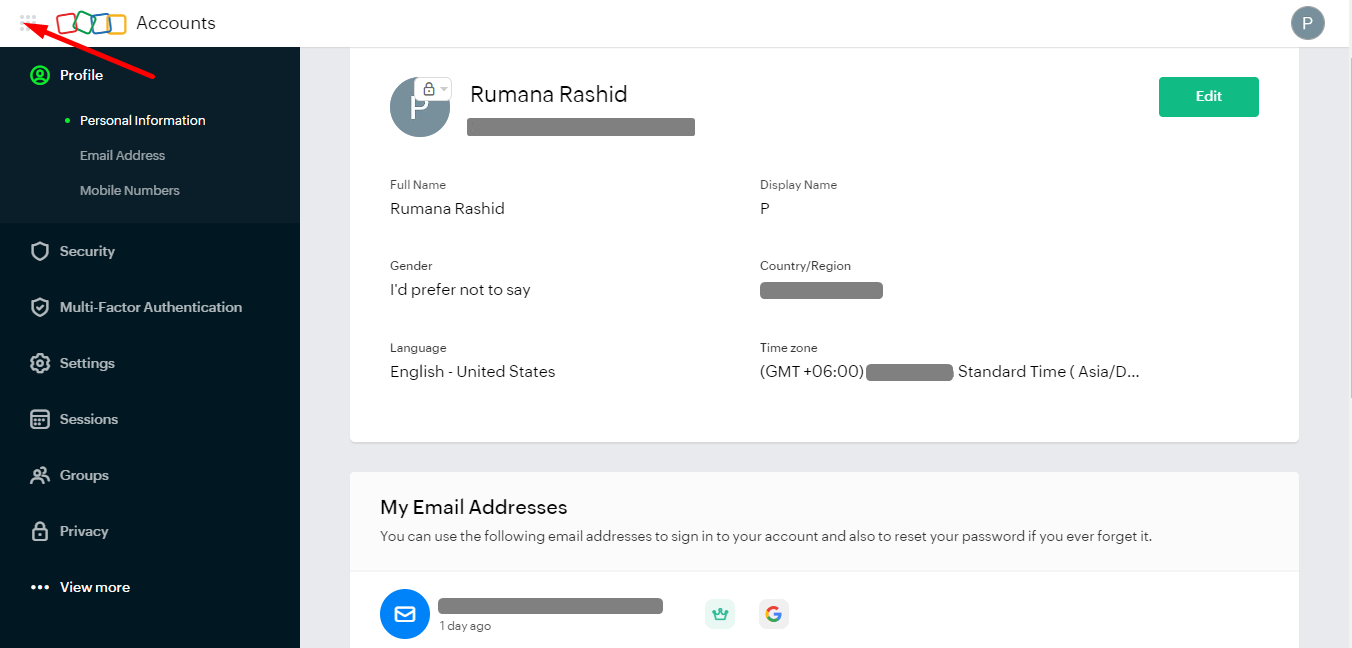
Setting Zoho Account #
With your Zoho account you have to connect CRM. So, you need to click beside the Zoho logo 👇
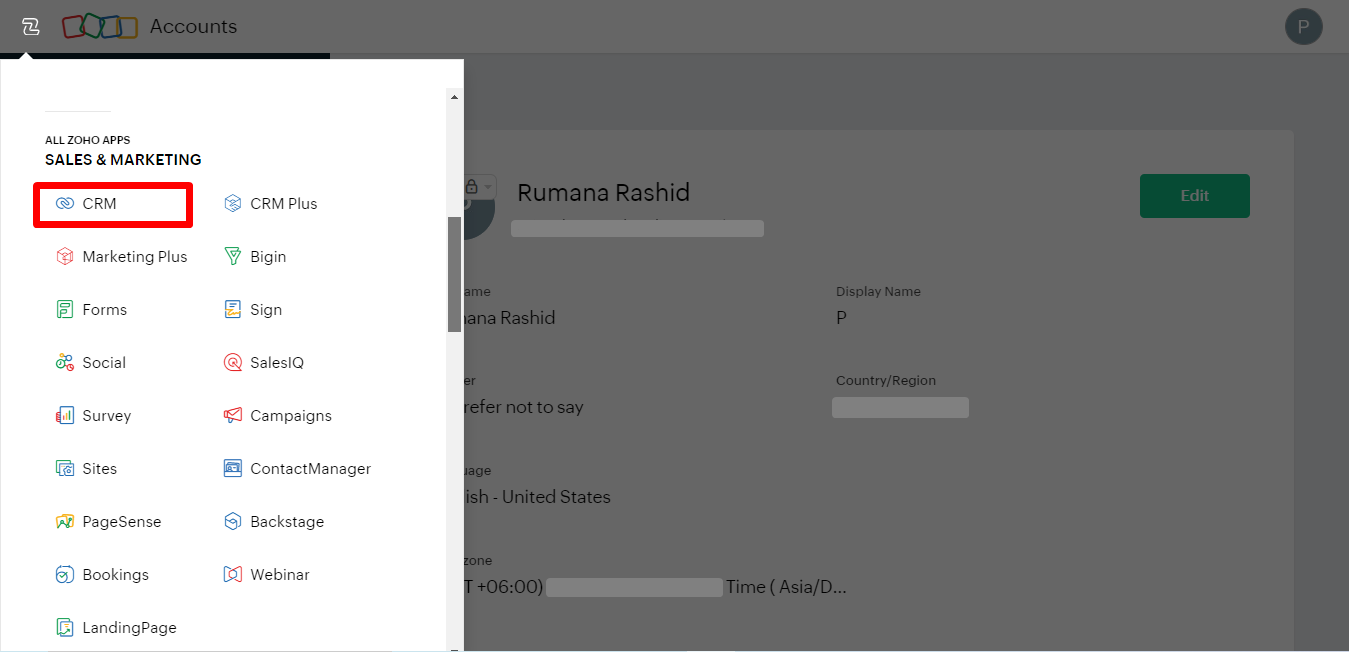
Find CRM and click
Here, a window will be pop up where you need to provide your company name and phone number.
Click Get Started.
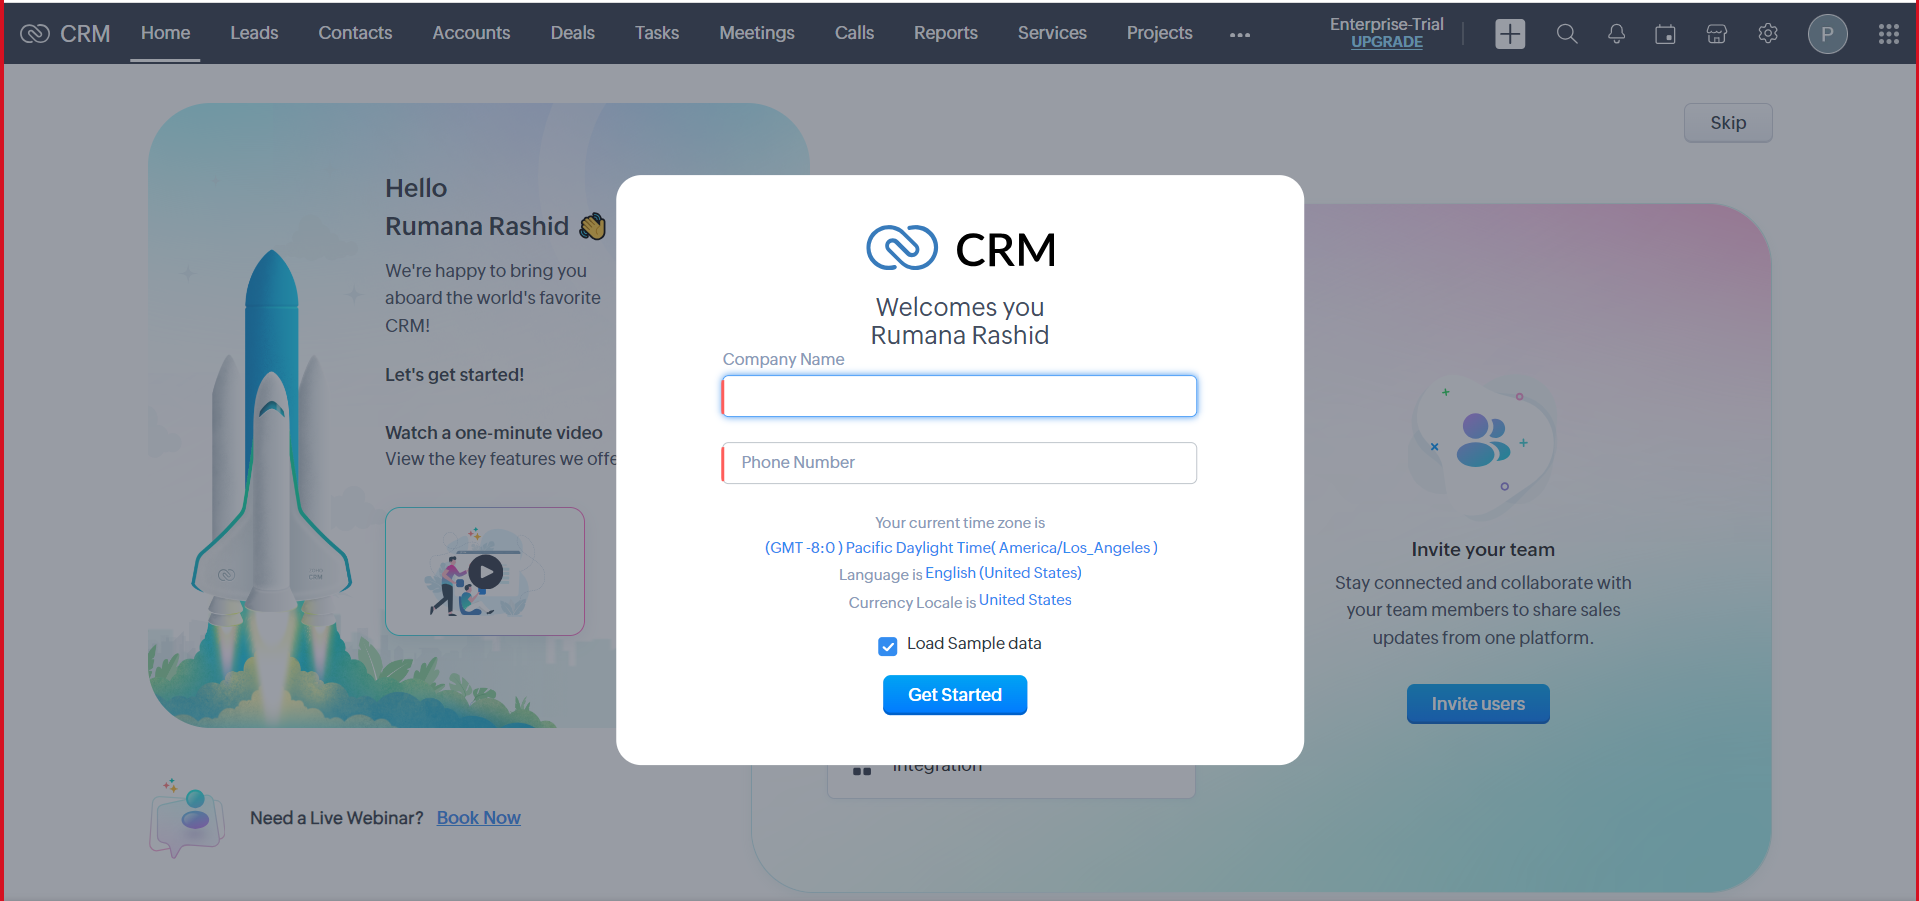
After login to your Zoho account you can provide necessary information to upgrade your account or skip those steps.
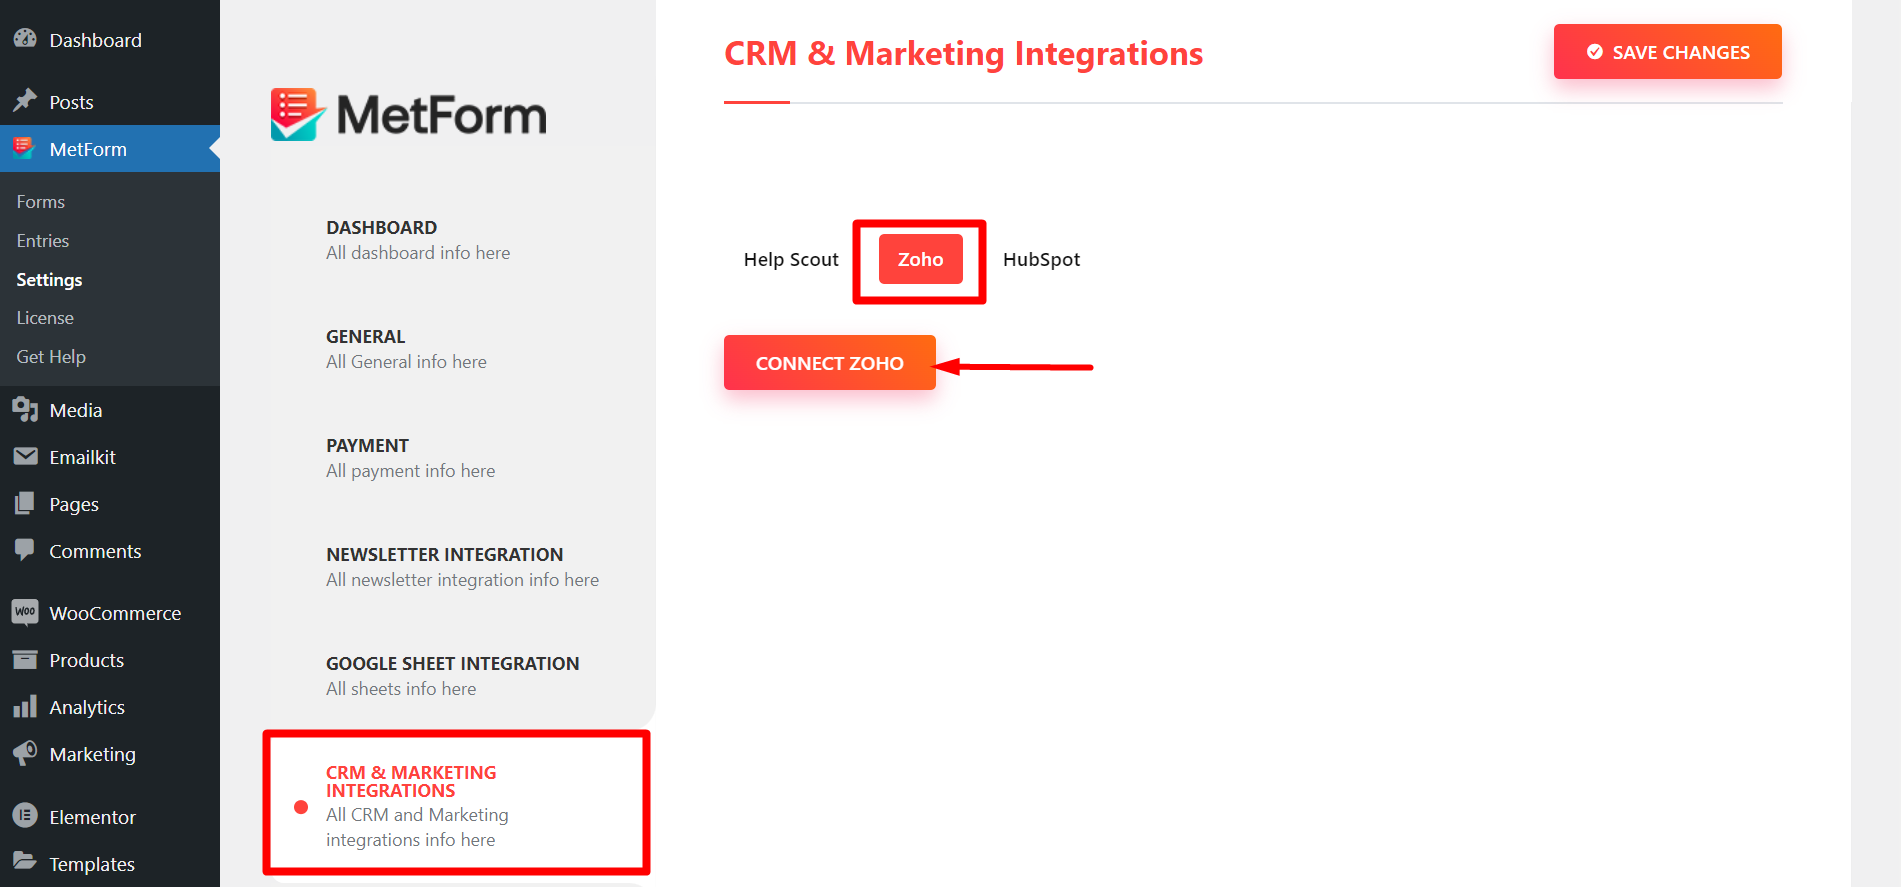
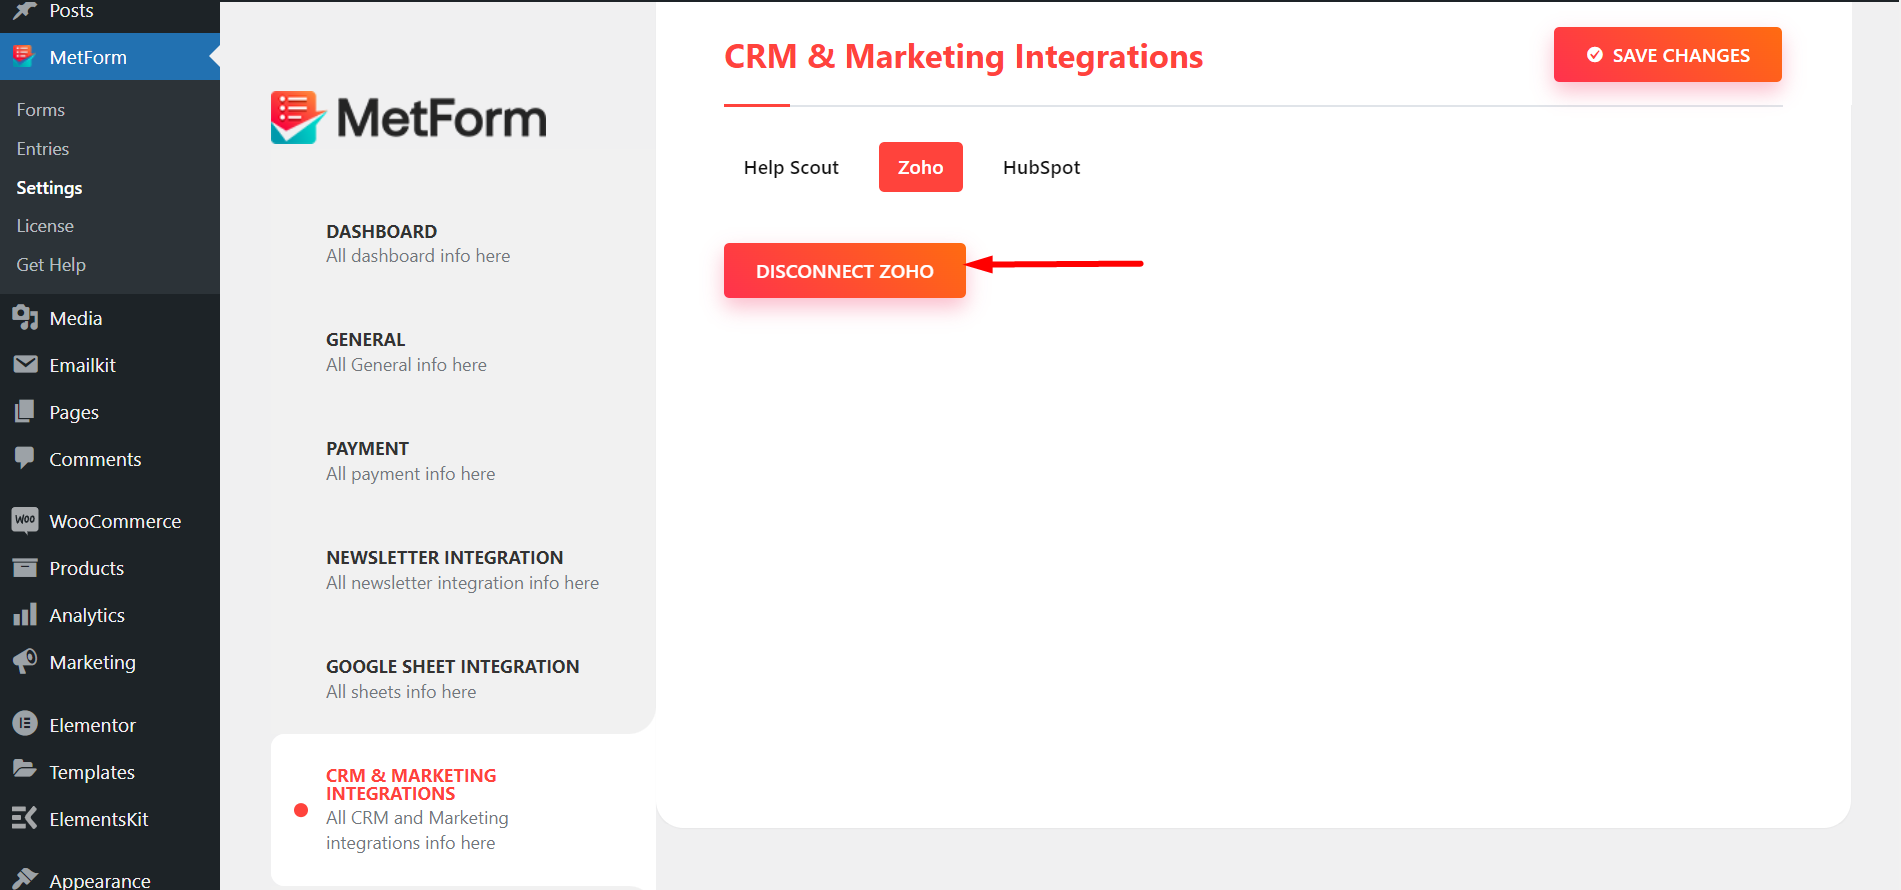
Next, from your WordPress dashboard go to MetForm -> Settings -> CRM & Marketing Integrations -> Zoho -> Click Connect Zoho
You will be directed to the below page, click Accept
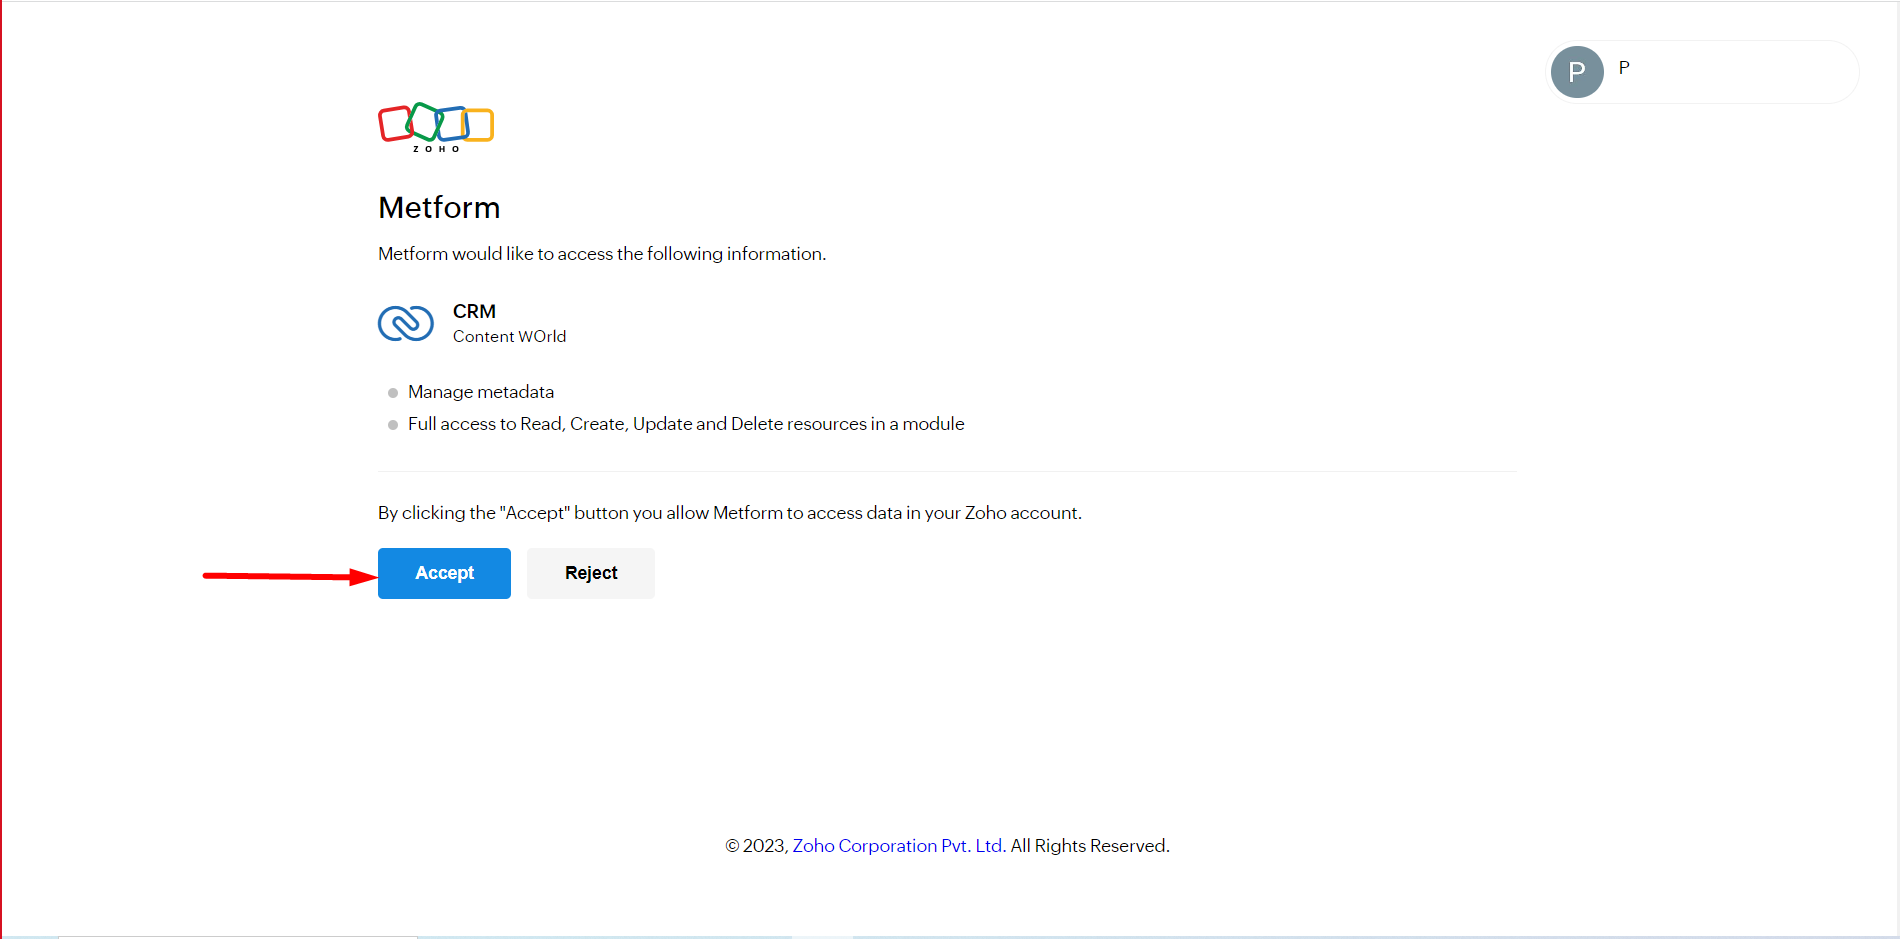
You are successfully connected to CRM.
Utilizing Zoho with a Form #
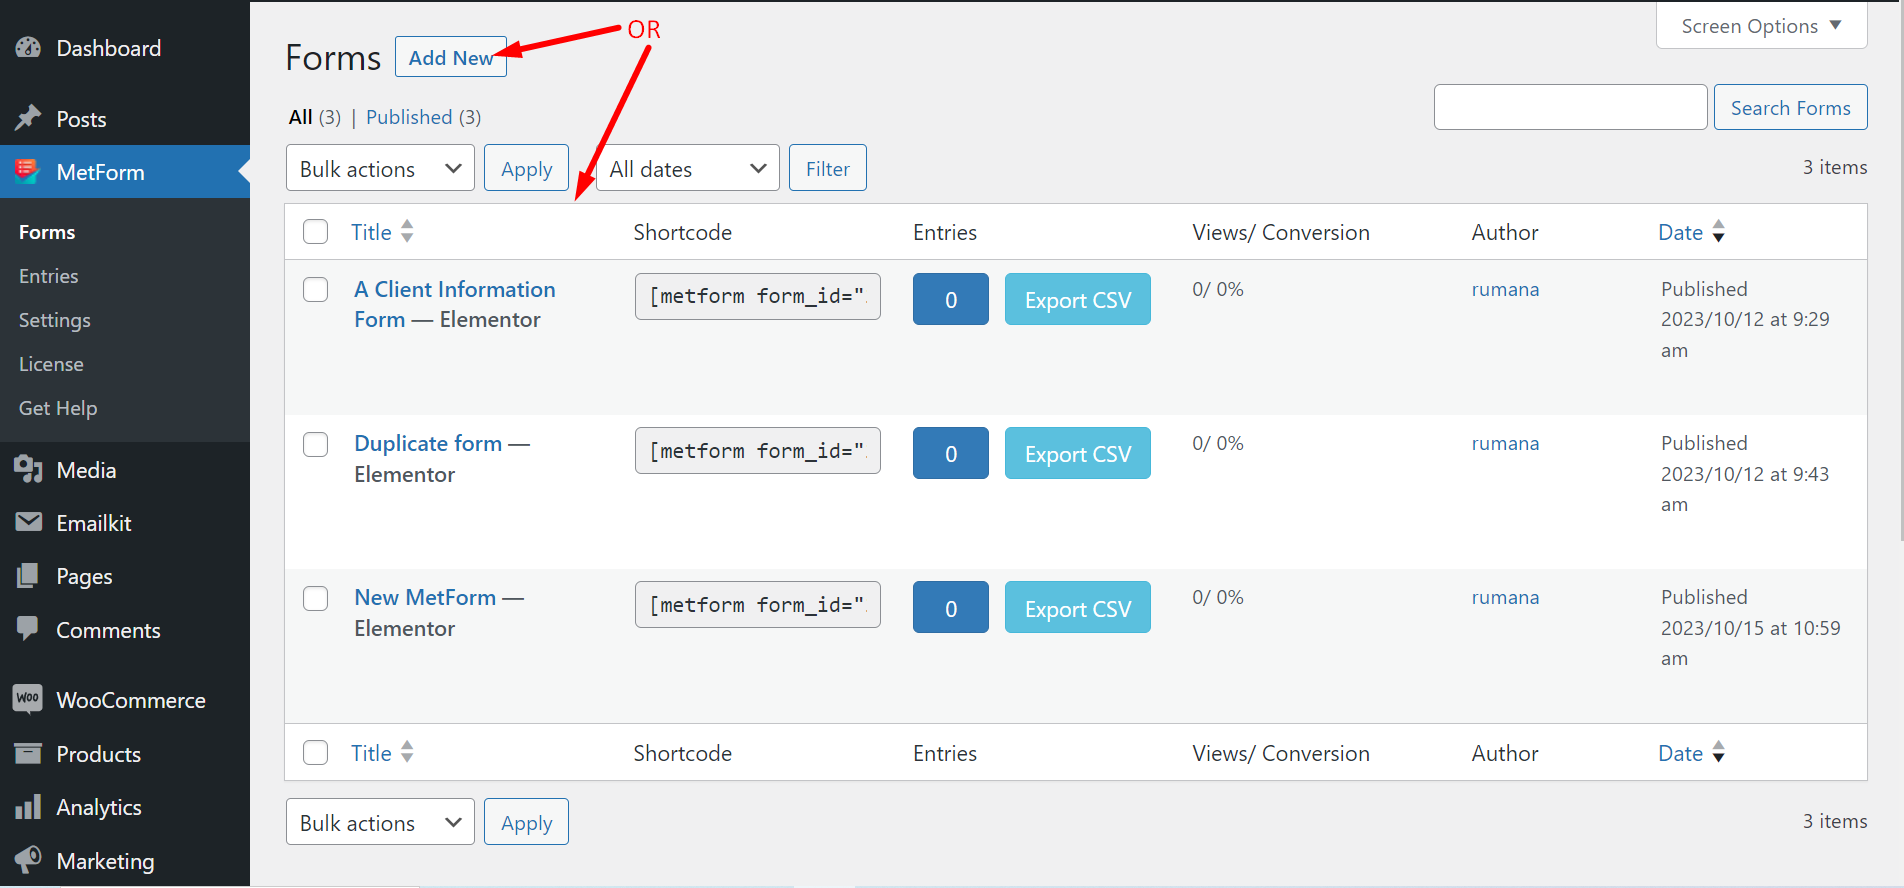
Go to the form settings and find CRM. Now, you you have to follow the steps –
- Enable Zoho Contact
- Match Metform field with Zoho form field
- Add more fields (Select the fields of your choice. You will see these data after a form submission)
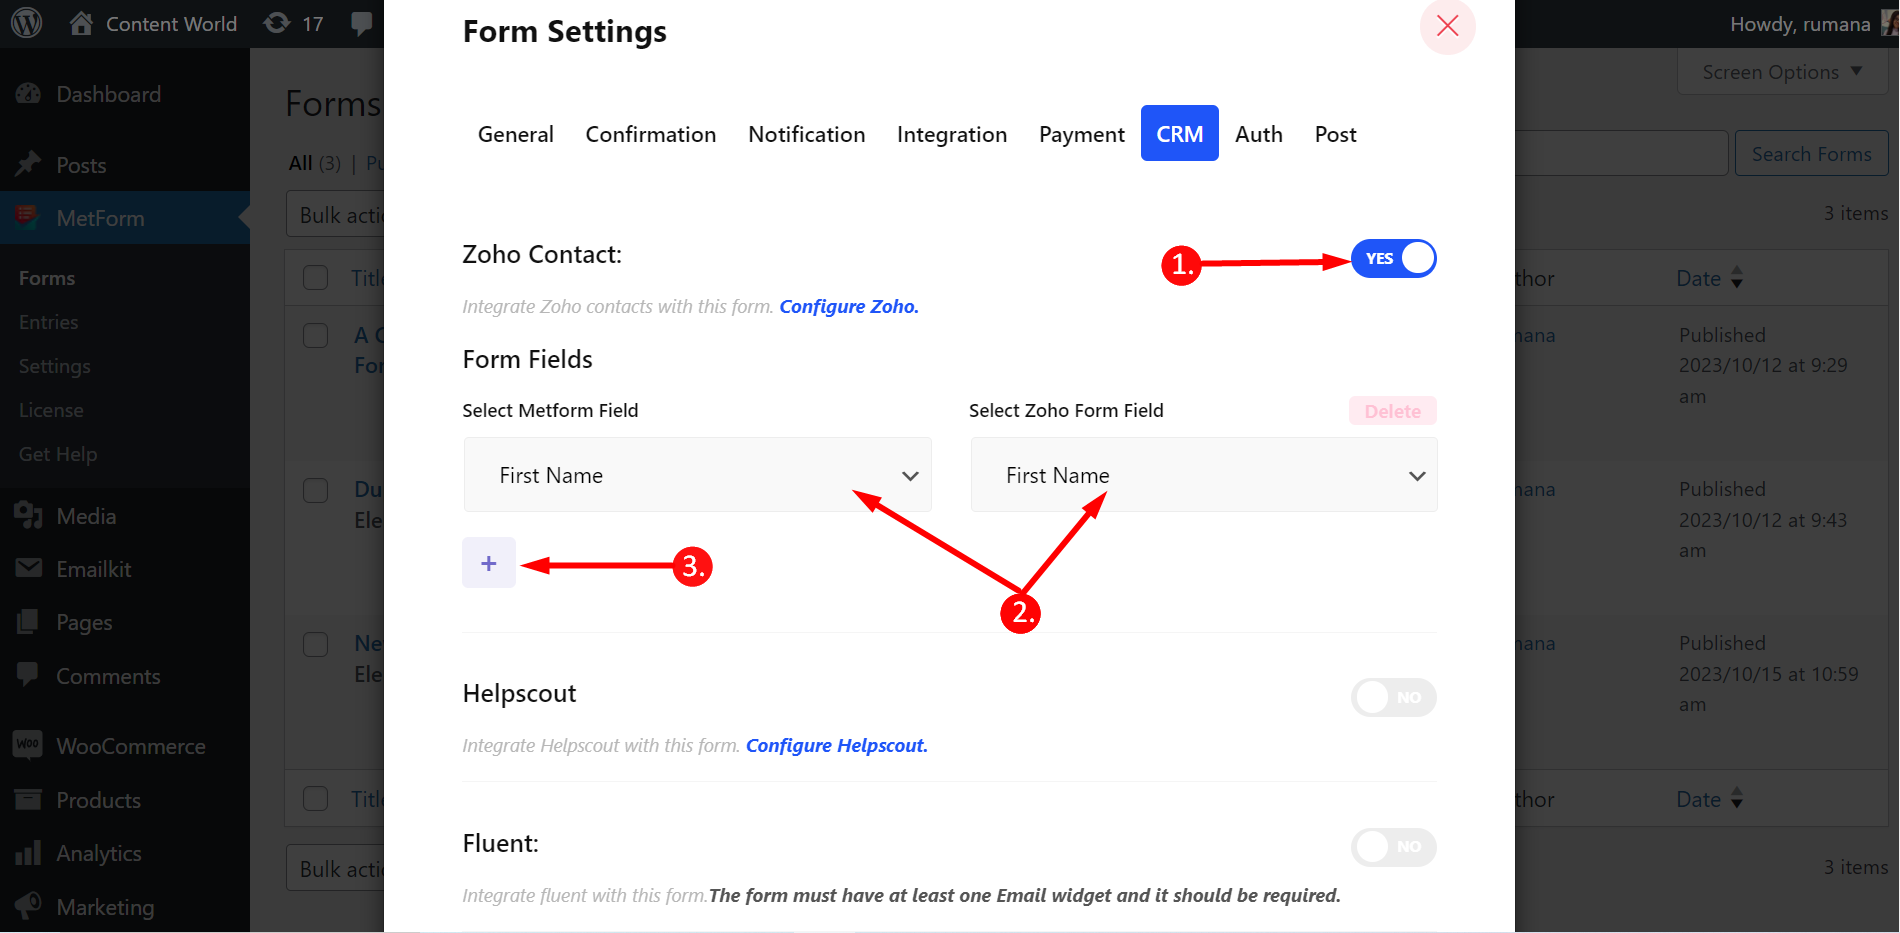
Scroll down and save changes.
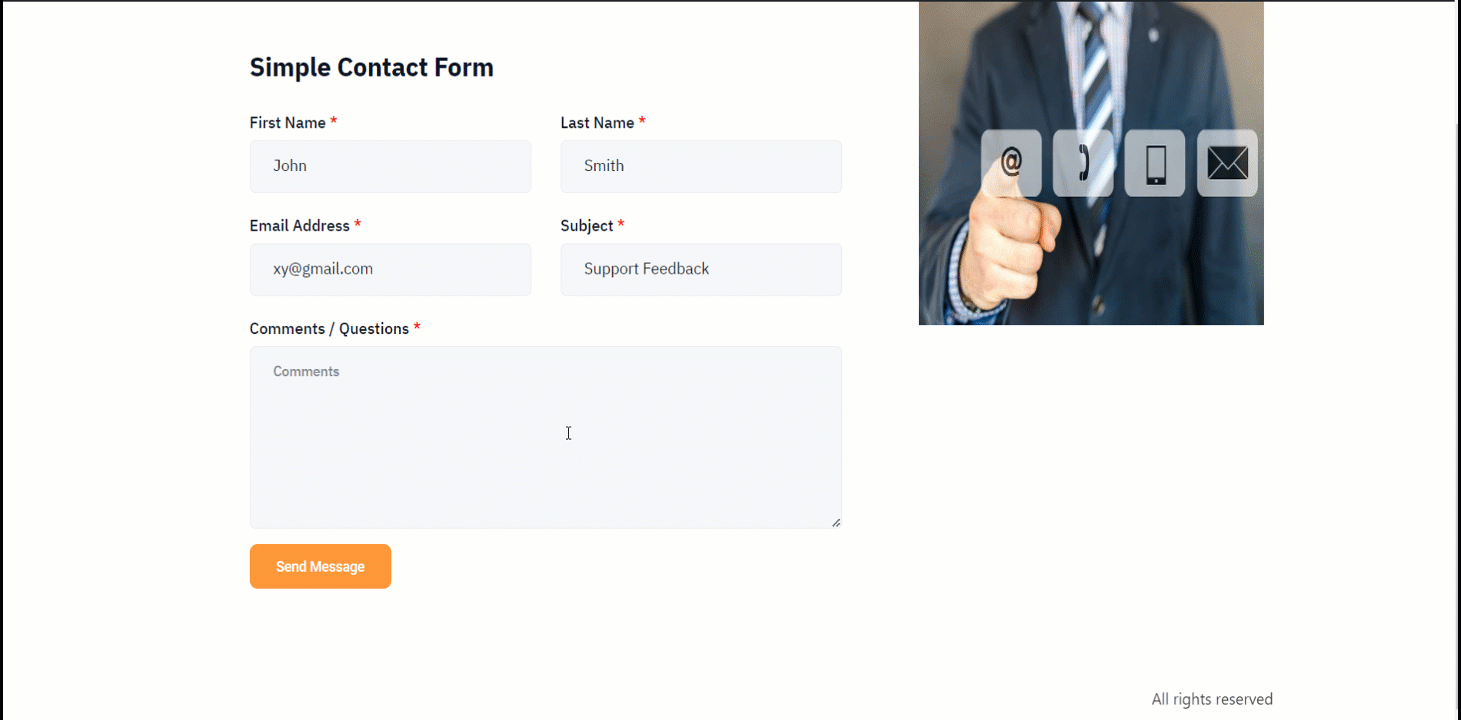
Next, fill up the form -> Submit -> Go to CRM -> Contacts -> Find the submitted email -> Check the data
You can now disconnect Zoho whenever you want.
This is how you can do WordPress Zoho CRM integration with MetForm without spending much time and effort.


