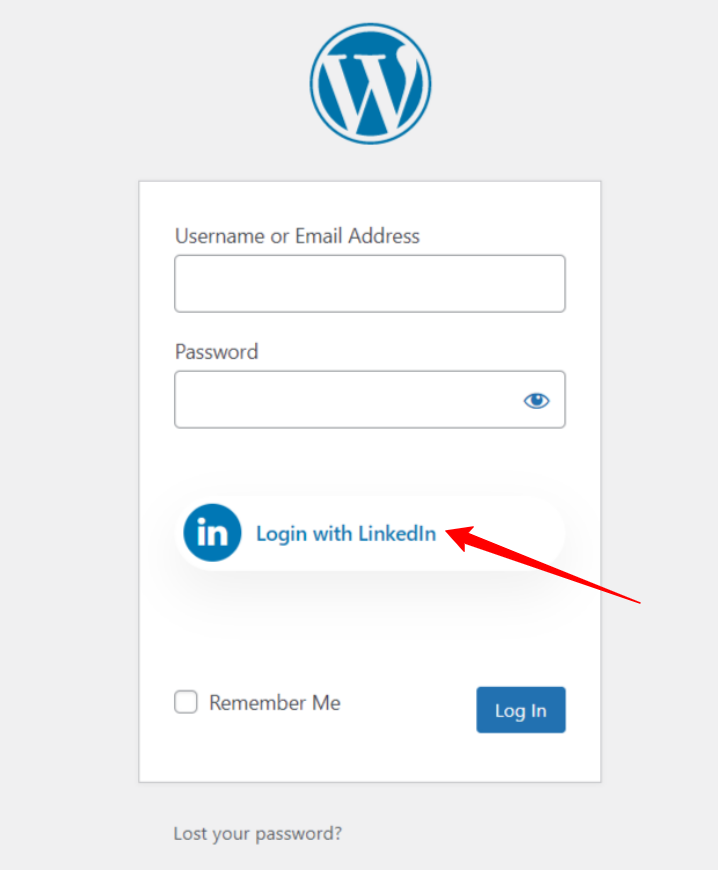
WP Social is the ultimate WordPress social media plugin that integrates with all the social media platforms including LinkedIn social login integration for WordPress. You can add one-click social login options on the website and let the users log in to your website using their social accounts.
Read this documentation to learn how to add a LinkedIn login option on your site and let the users log in with their accounts.
Getting Started #
In order to allow your visitors to log in with their LinkedIn accounts, you must create a LinkedIn App. The following guide will help you through the LinkedIn App creation process. After you complete creating the LinkedIn app, head over to “Settings” and configure the given “APP ID Key” and “APP Secret Key” generated by your LinkedIn App to complete the process of LinkedIn social login integration for WordPress.
Create LinkedIn App #
To start the process of LinkedIn social login integration for WordPress:
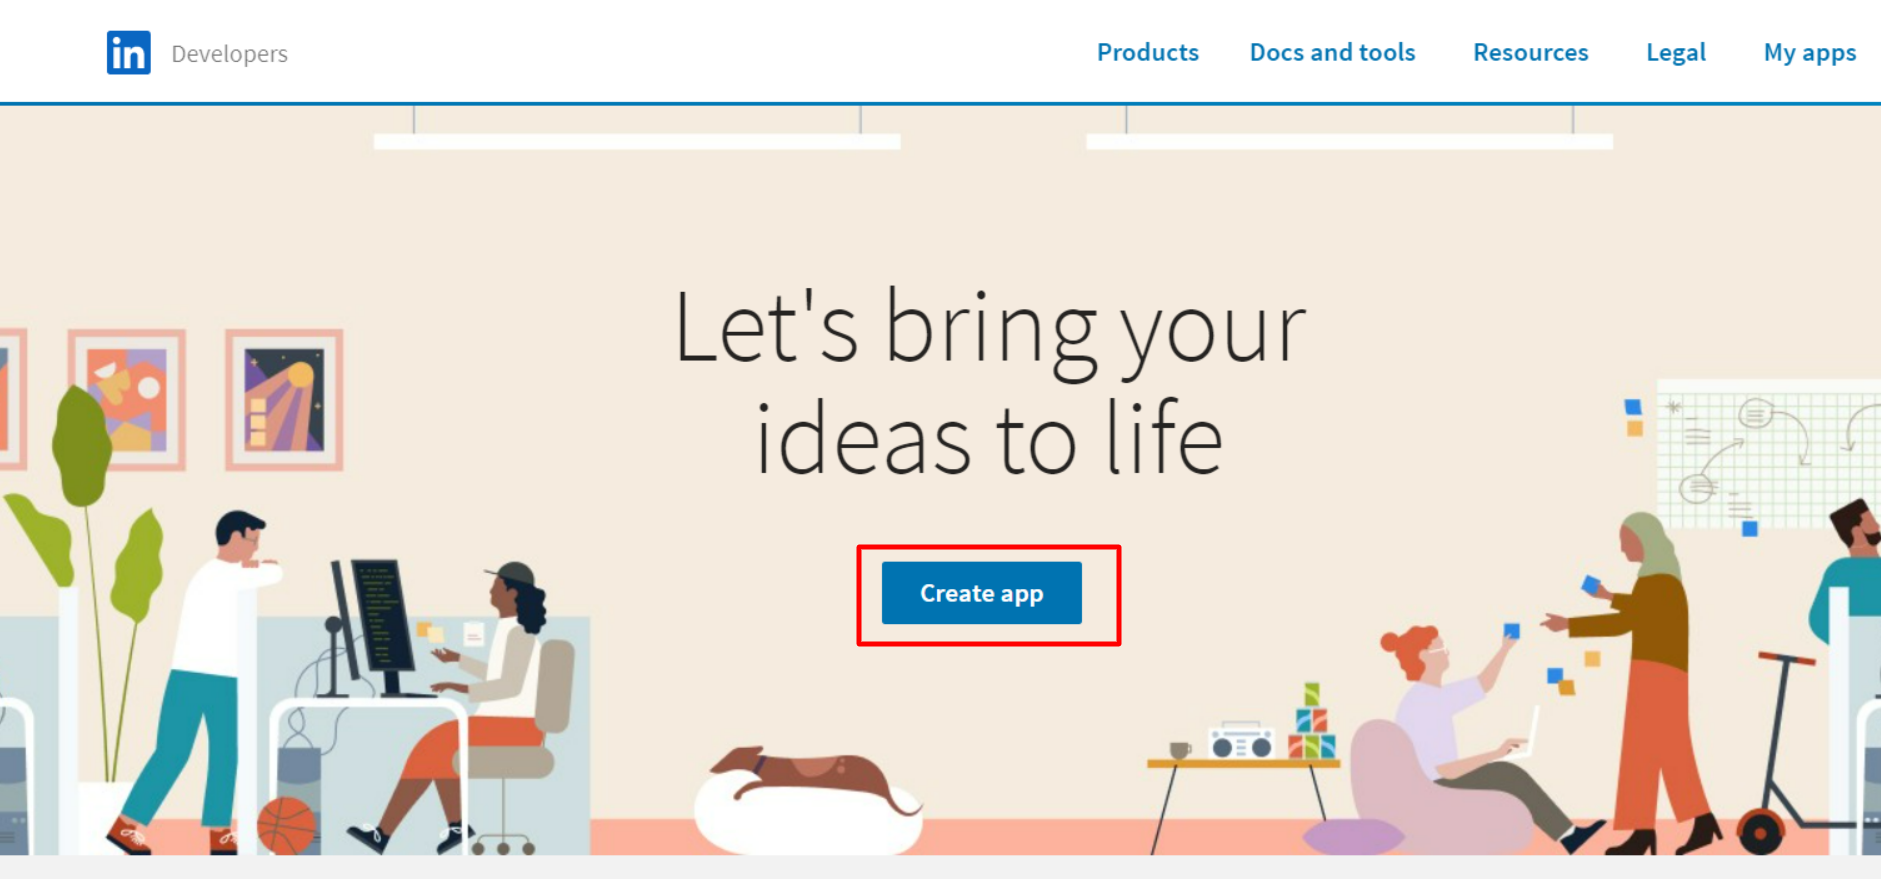
- Go to https://www.linkedin.com/developers/
- Log in with your LinkedIn Account ( if you are not logged in )
- Click Create App button. It will take you to the app creation page.
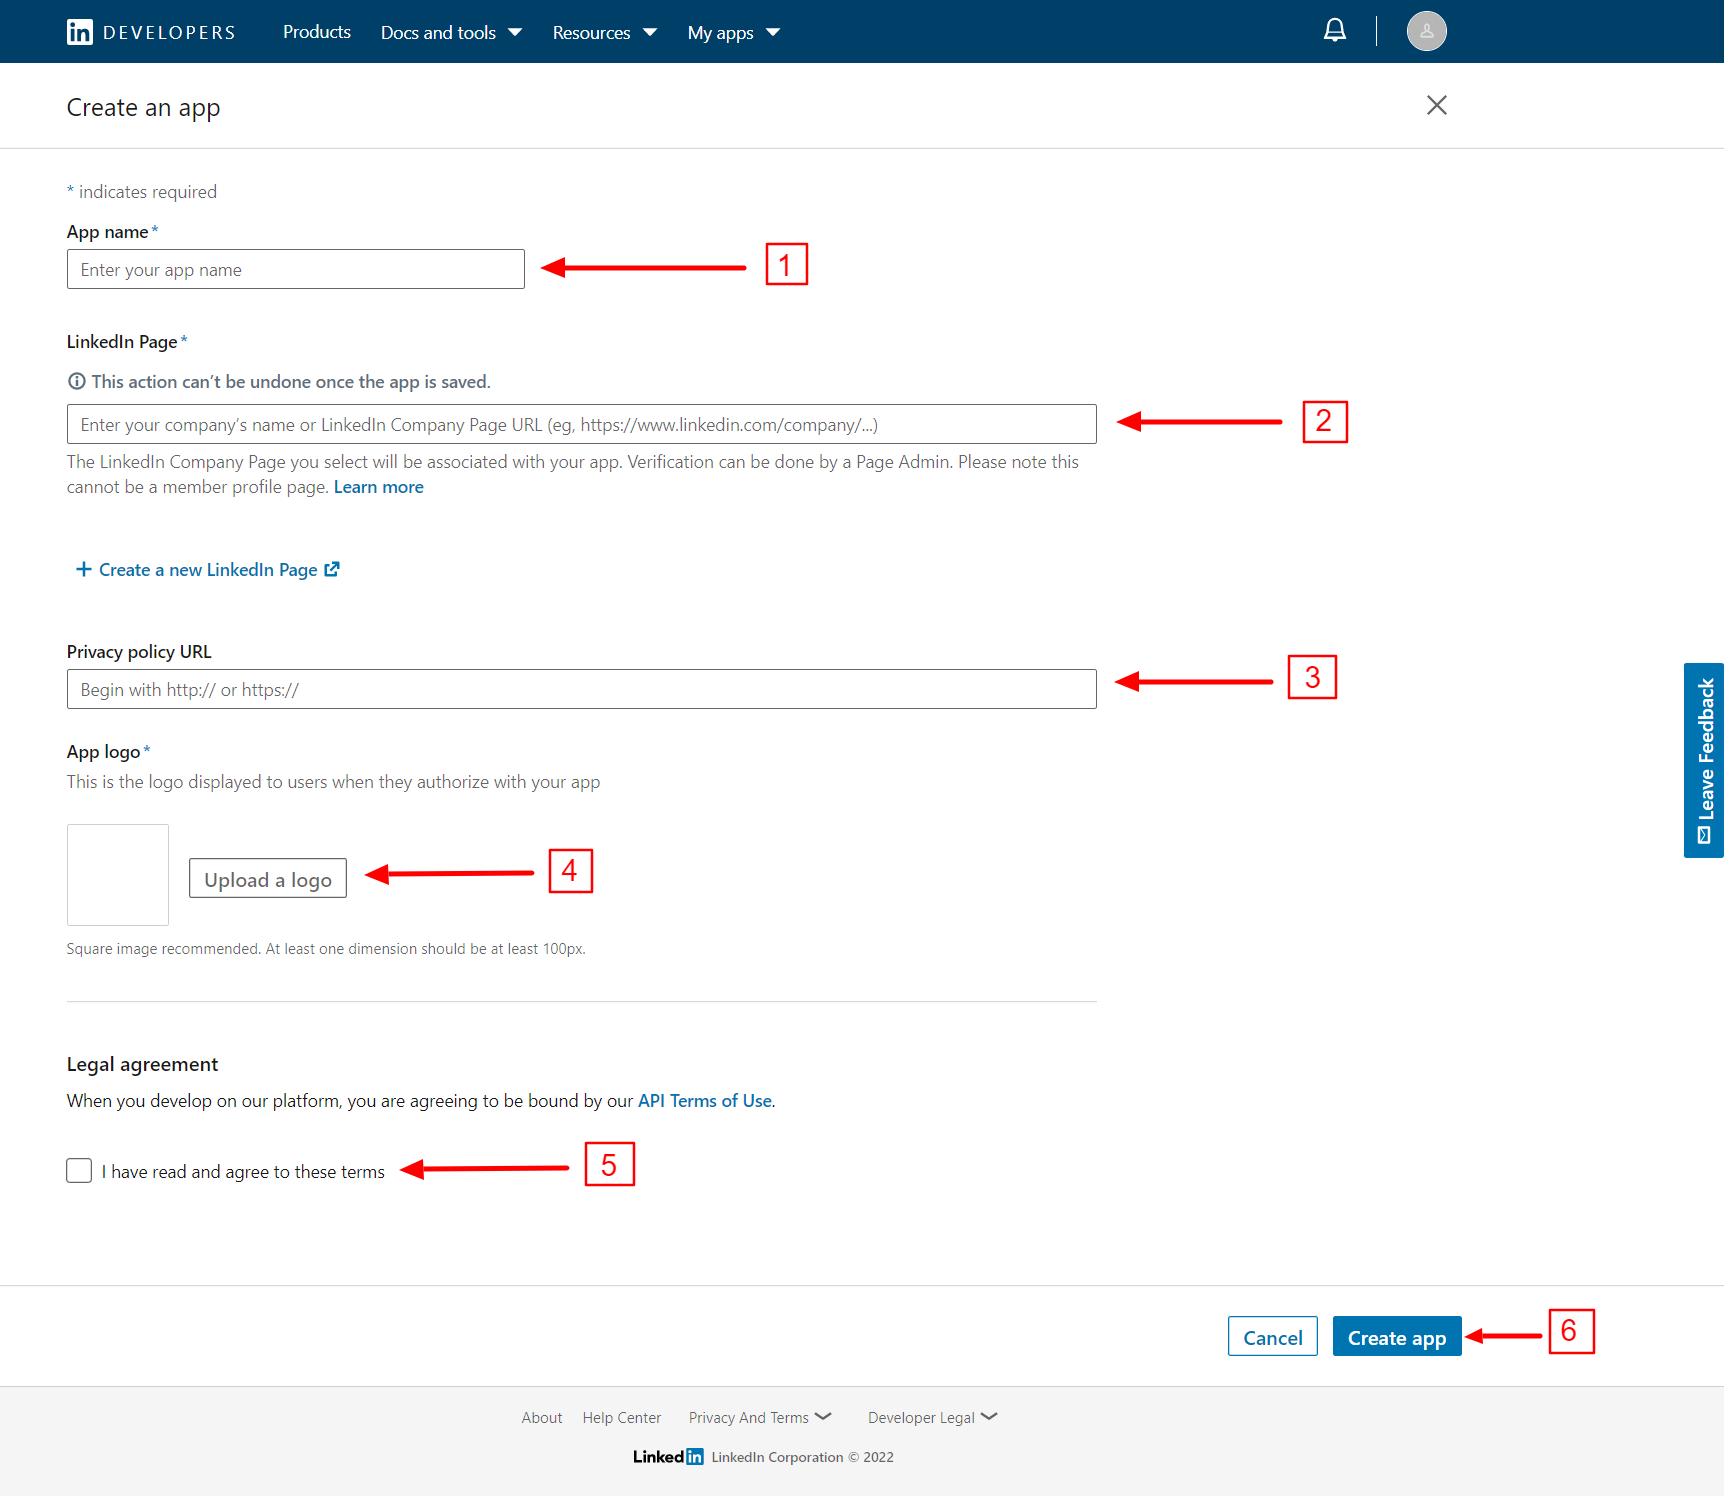
- Enter App Name.
- Search the name of your company in the company field. If you don’t have one yet, create a new one from: https://www.linkedin.com/company/setup/new/
- Enter your Privacy policy URL.
- Upload an App logo (Logo must be squire and minimum 100px*100px in size).
- Read and agree to the “API Terms of Use under Legal agreement.
- Finally, click the Create App button. It will take you to the App settings area.
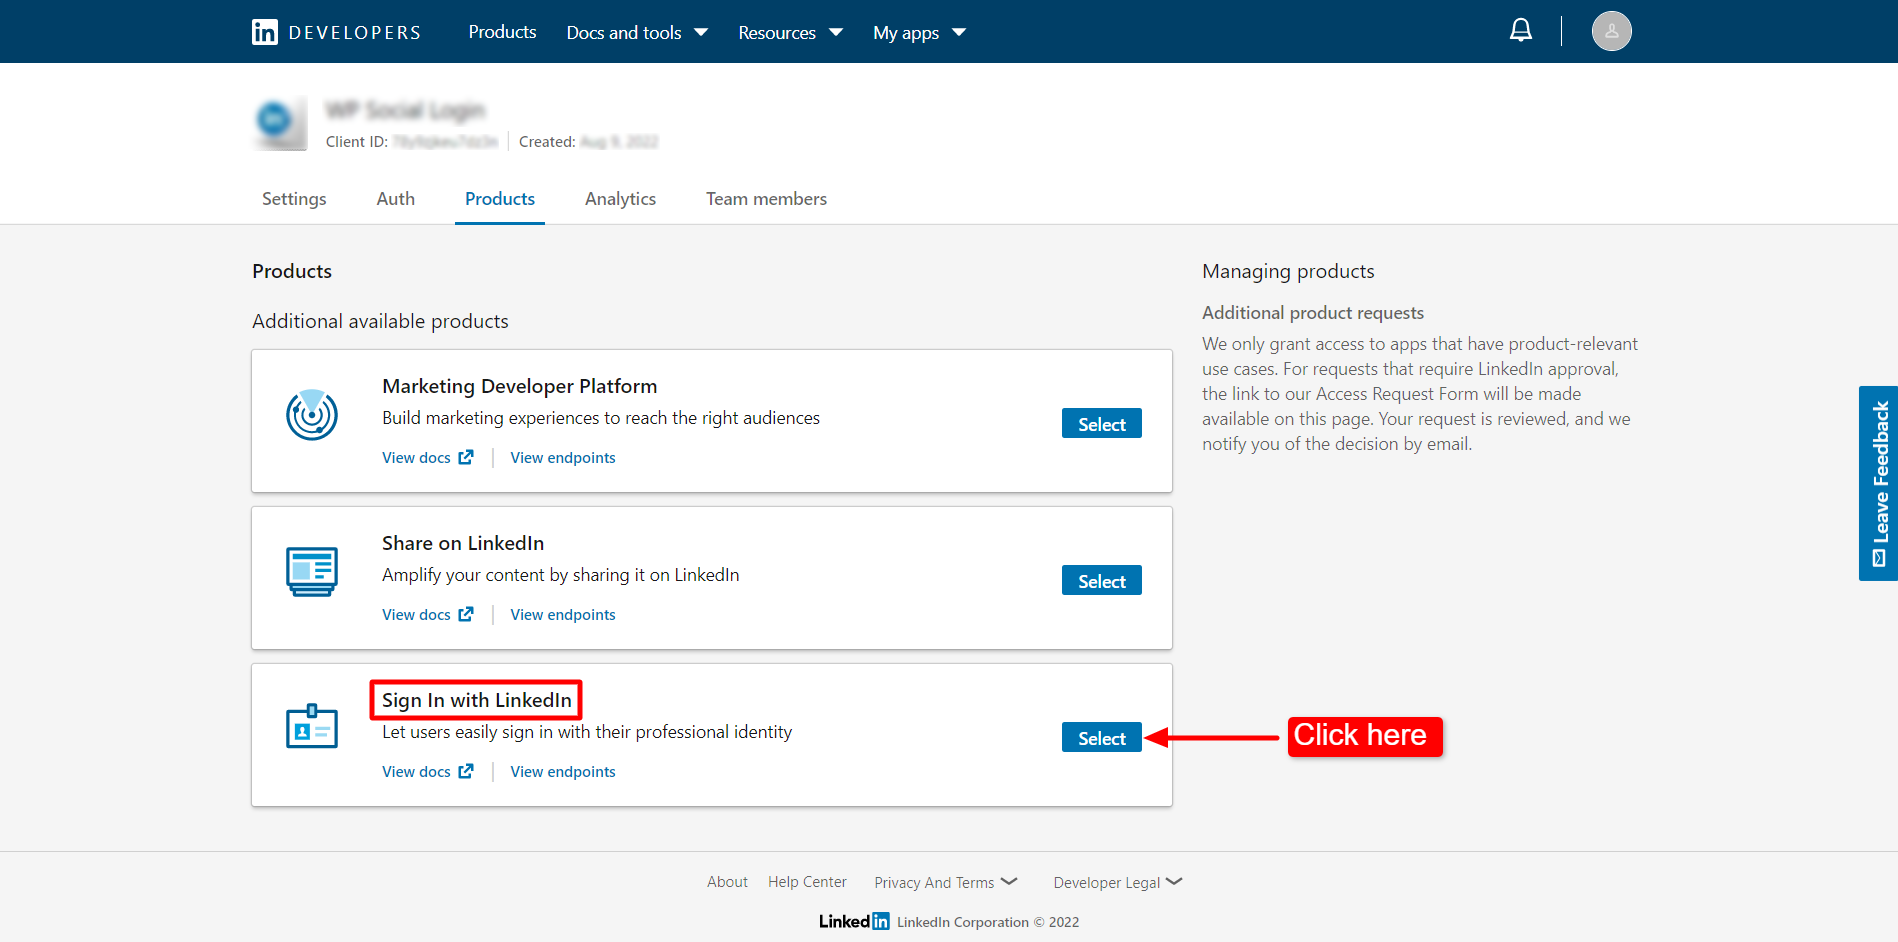
- From App setting area click Products tab.
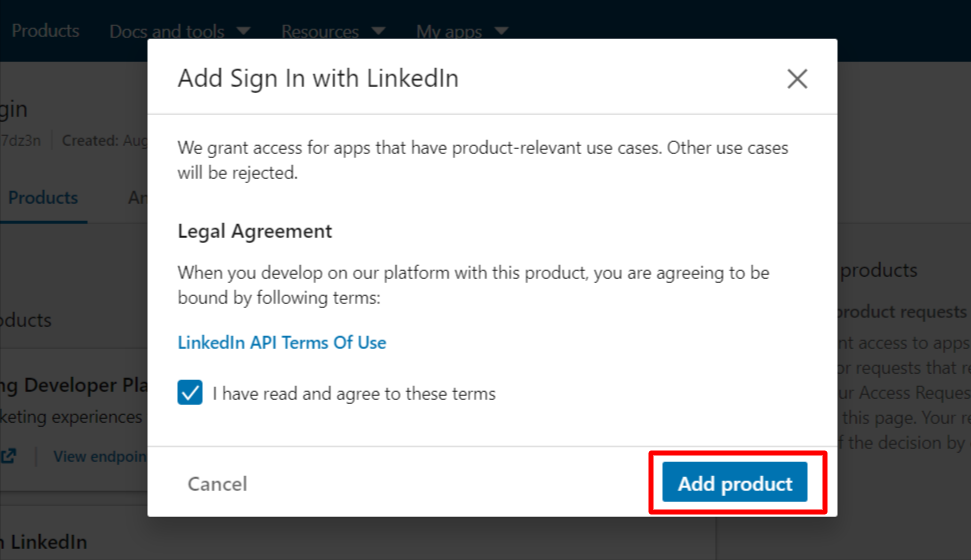
- Select Sign In with LinkedIn from the list.
- A pop-up will appear where you need to tick the I have read and agree to these terms.
- Click Add product button.
- You will end up in the App setting area once again.
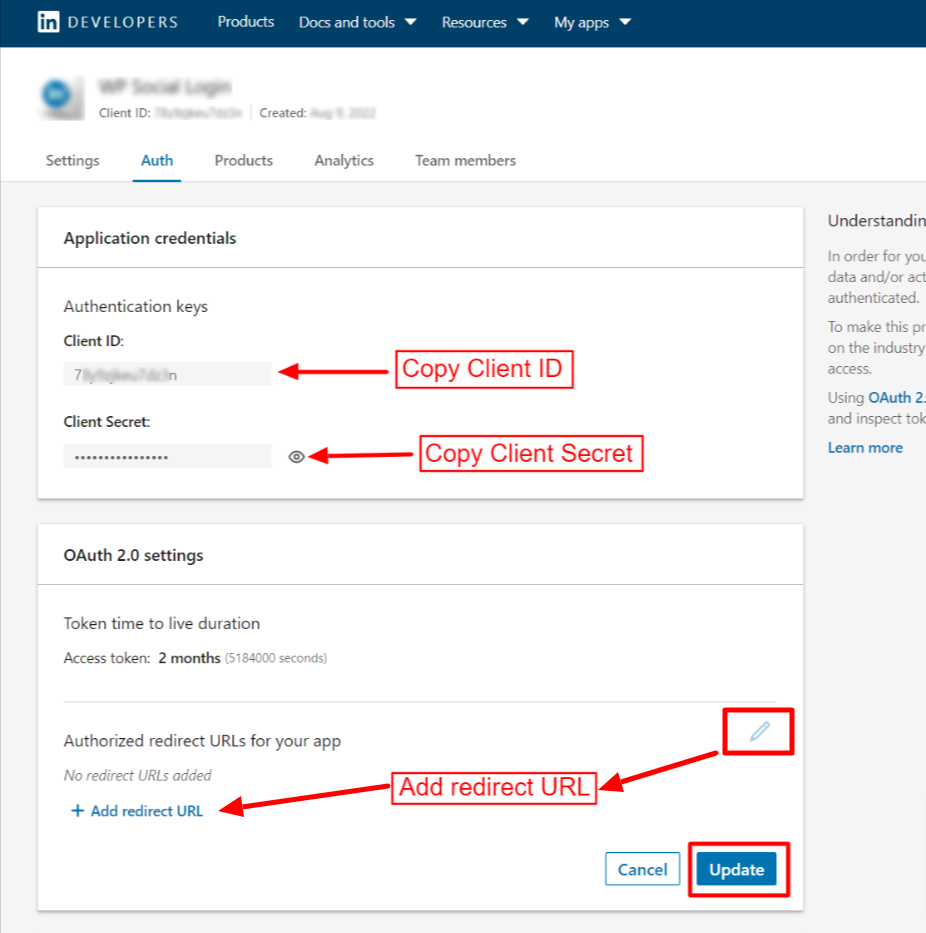
- Move to Auth tab.
- Application Keys (Client ID & Client Secret) under Application credentials.
- Click the Edit icon for Authorized redirect URLs under OAuth 2.0 settings.
- Then click on the “+ Add redirect URLs” to enter the URL (To find the URL, follow the next step).
You will find the Authorized redirect URLs from WP Social Plugin.
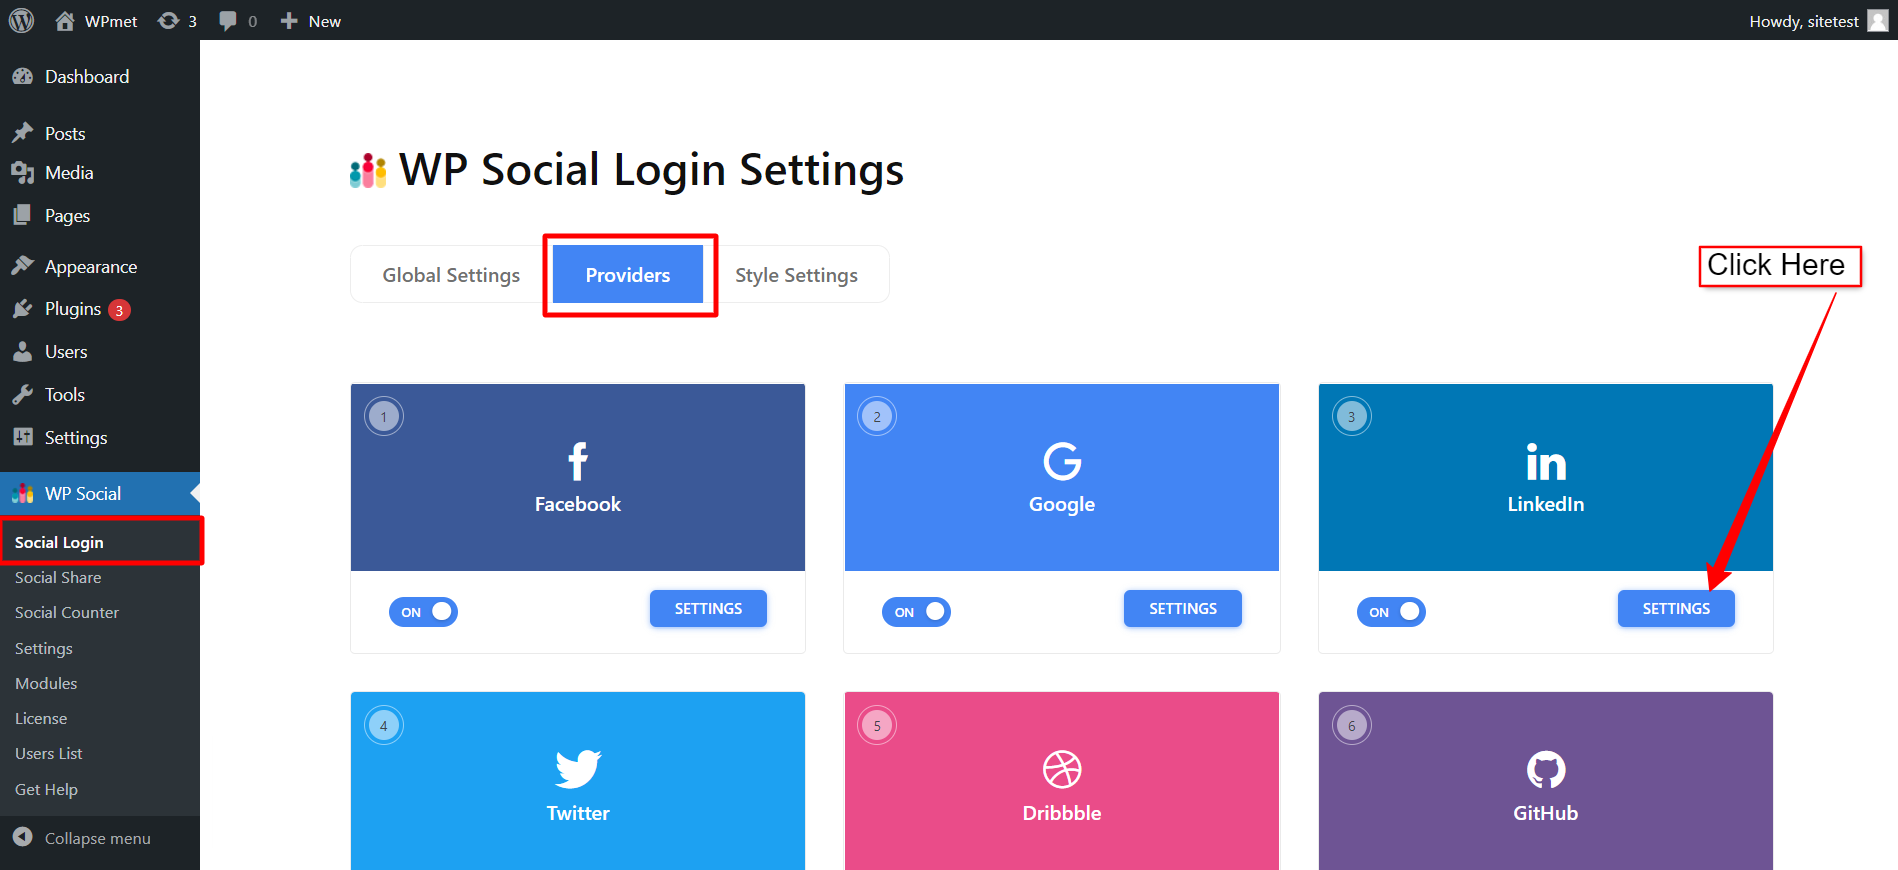
- Navigate to WP Social > Social Login > Providers from your WordPress dashboard.
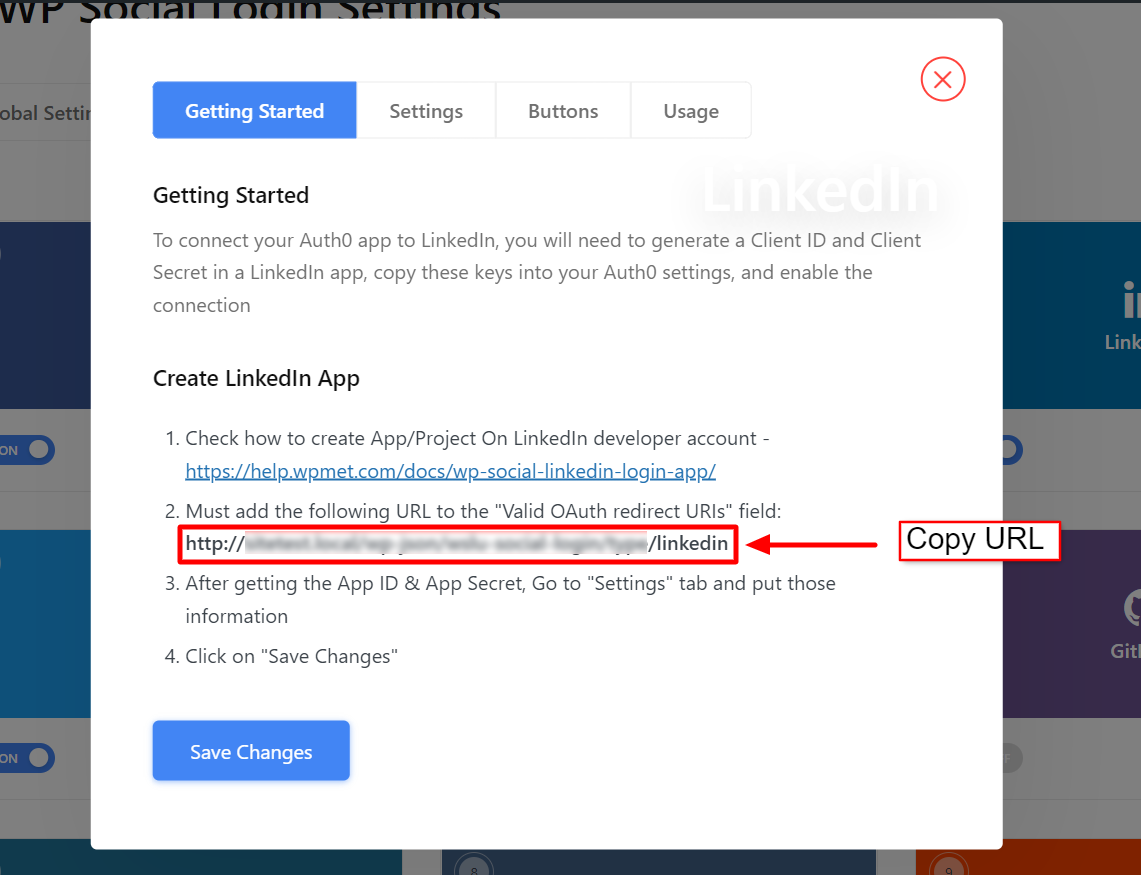
- Open the LinkedIn App settings.
- Click the Getting Started button on LinkedIn login.
- Copy the “Valid OAuth redirect URL“.
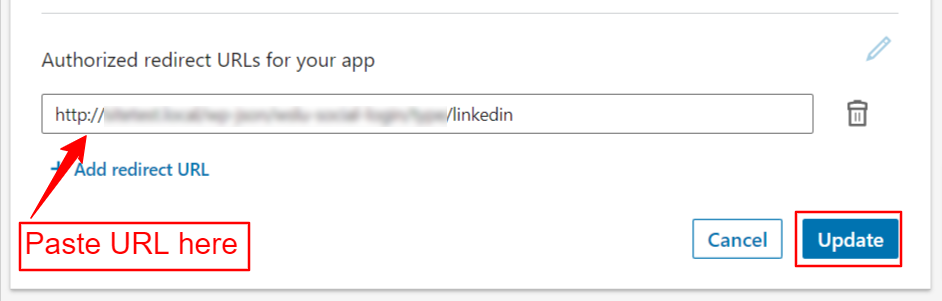
- Now go back to your App Auth page on the LinkedIn Developer site.
- Paste the redirect URL on the required field.
- Click the Update button to save your changes.
Set up WordPress LinkedIn Social Login on WP Social #
After the successful LinkedIn app creation, the next step of LinkedIn social login integration for WordPress is to add LinkedIn with credentials (APP ID and APP Secret key) to your site. For that, first log in to your WordPress site, then,
- Navigate to WP Social > Social Login from your dashboard.
- Switch to the Providers tab.
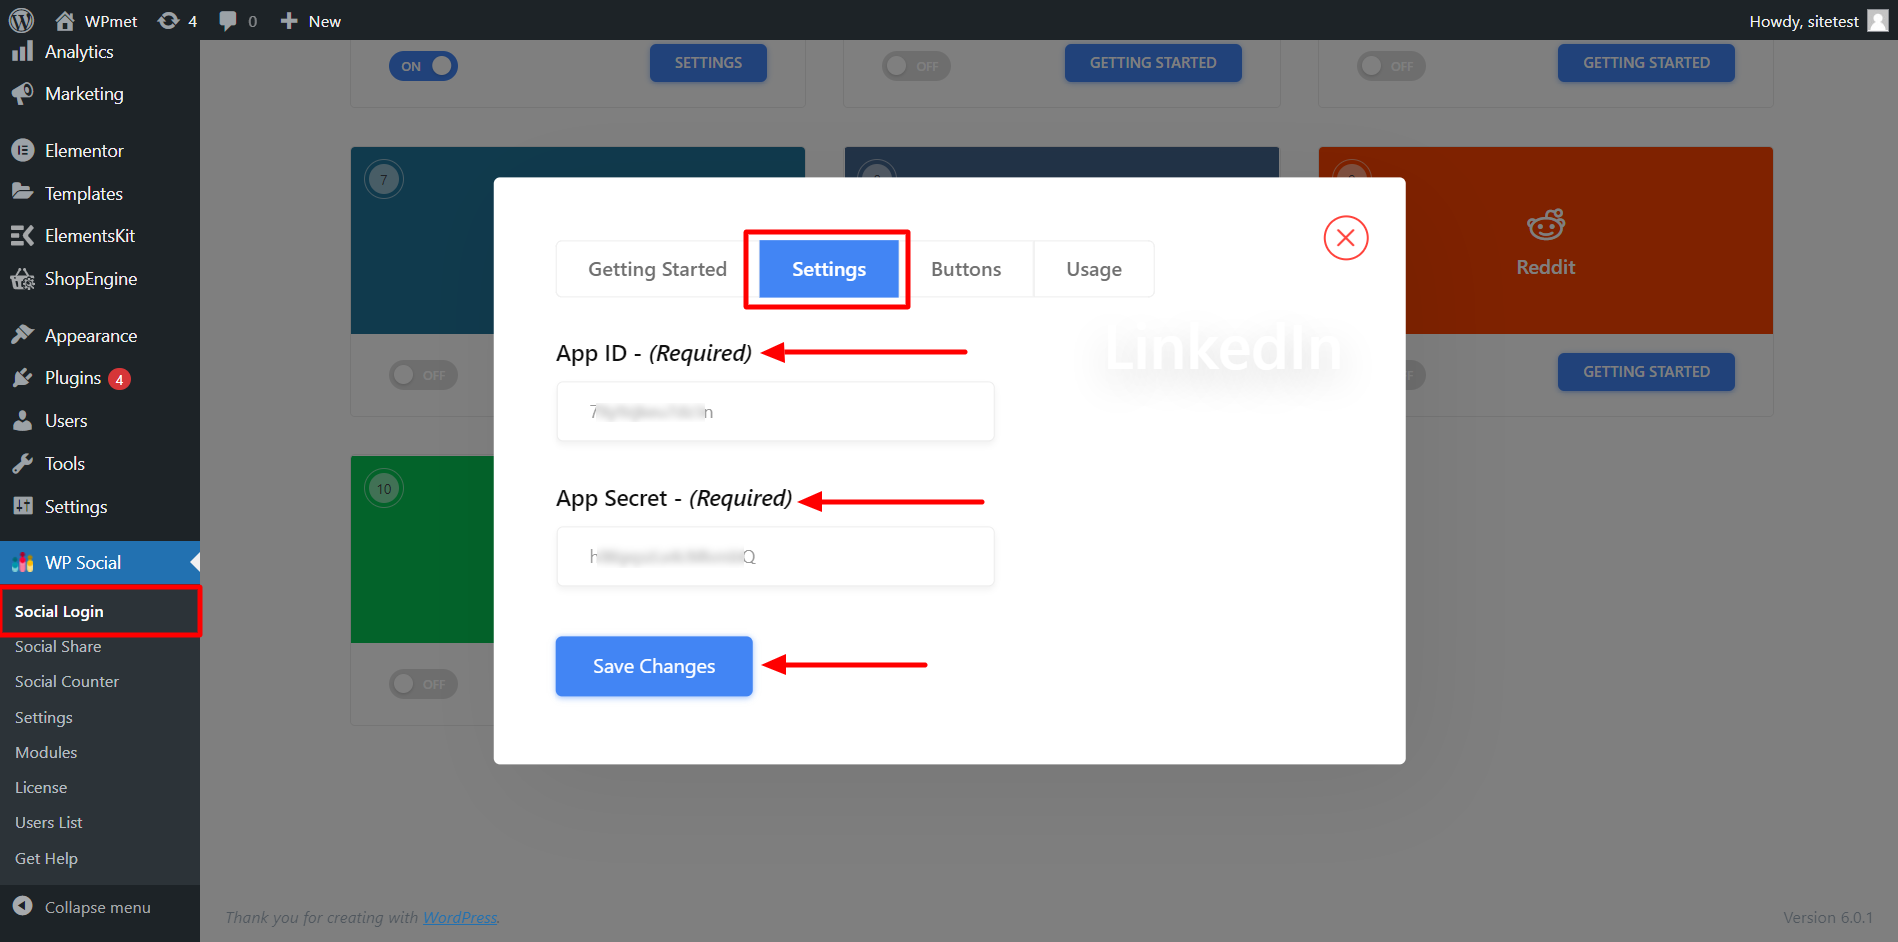
- Click to Settings under LinkedIn.
- In the popup, move to the Settings tab.
- Enter the App ID in the required field.
- Enter the App Secret in the required field.
- Then click Save Changes button.
Add Login Button Label #
You can customize the button label for LinkedIn Login. To add/change the button label,
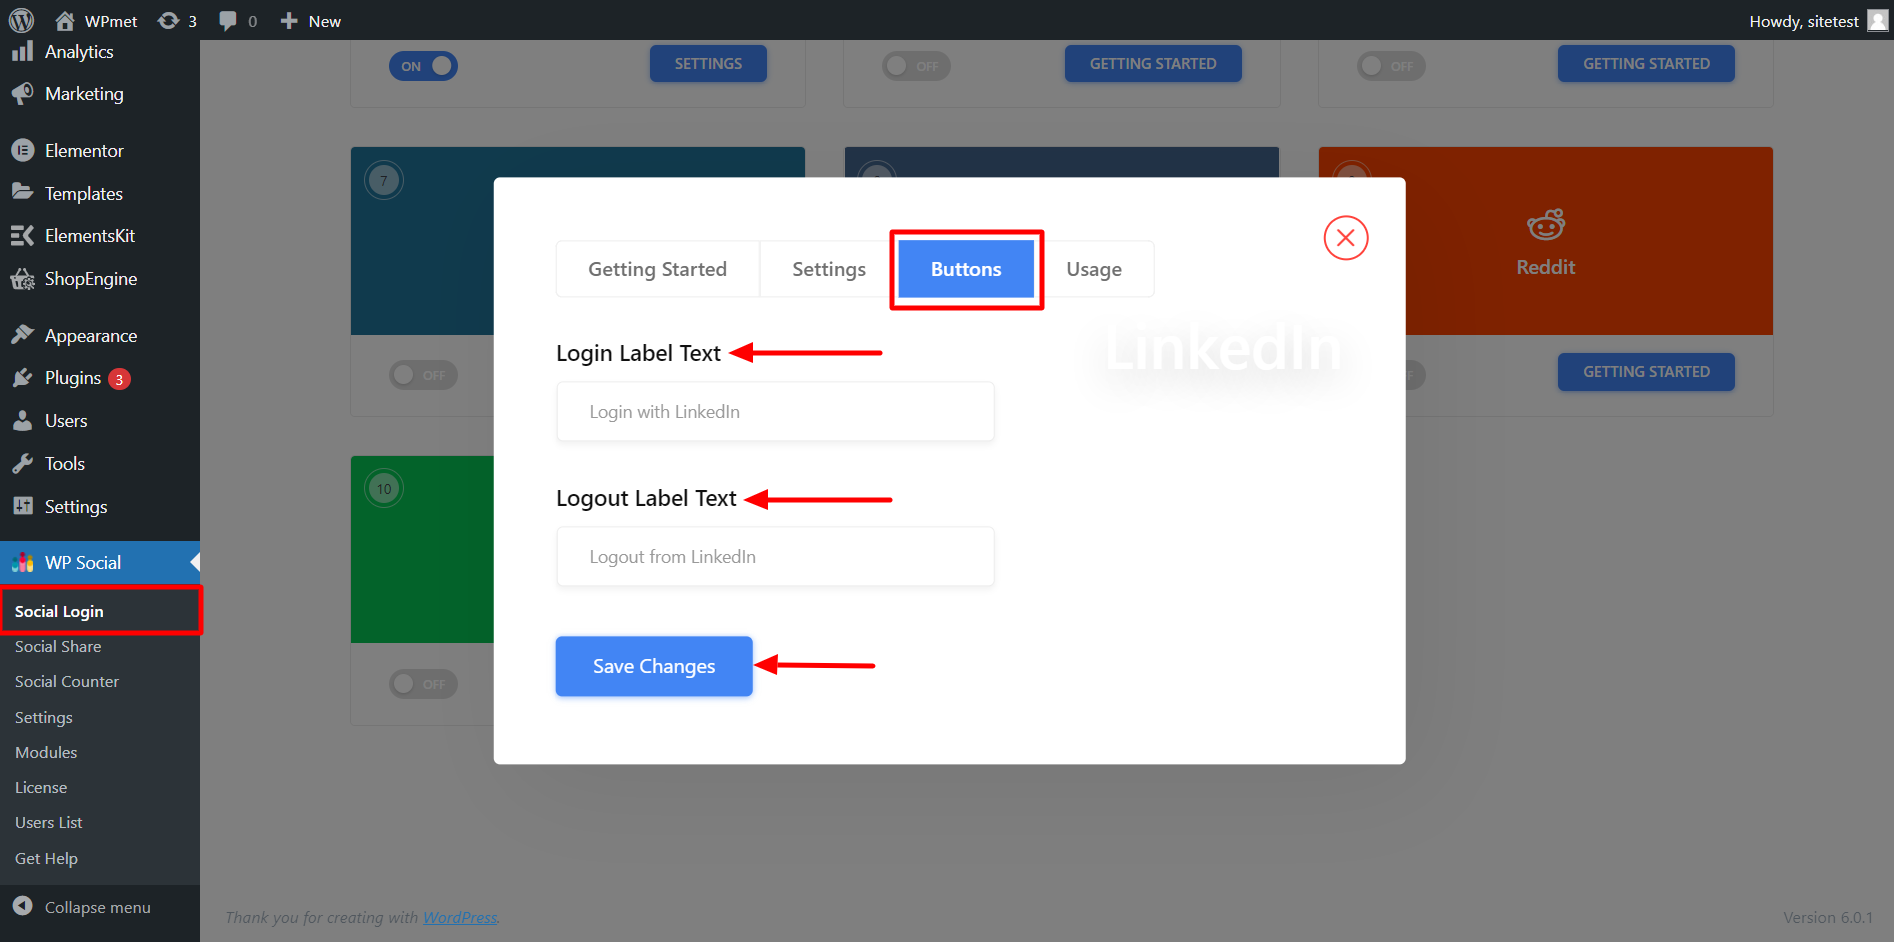
- Move to the Buttons tab.
- Enter Login Label Text.
- Enter Logout Label Text.
- Then Save Changes.
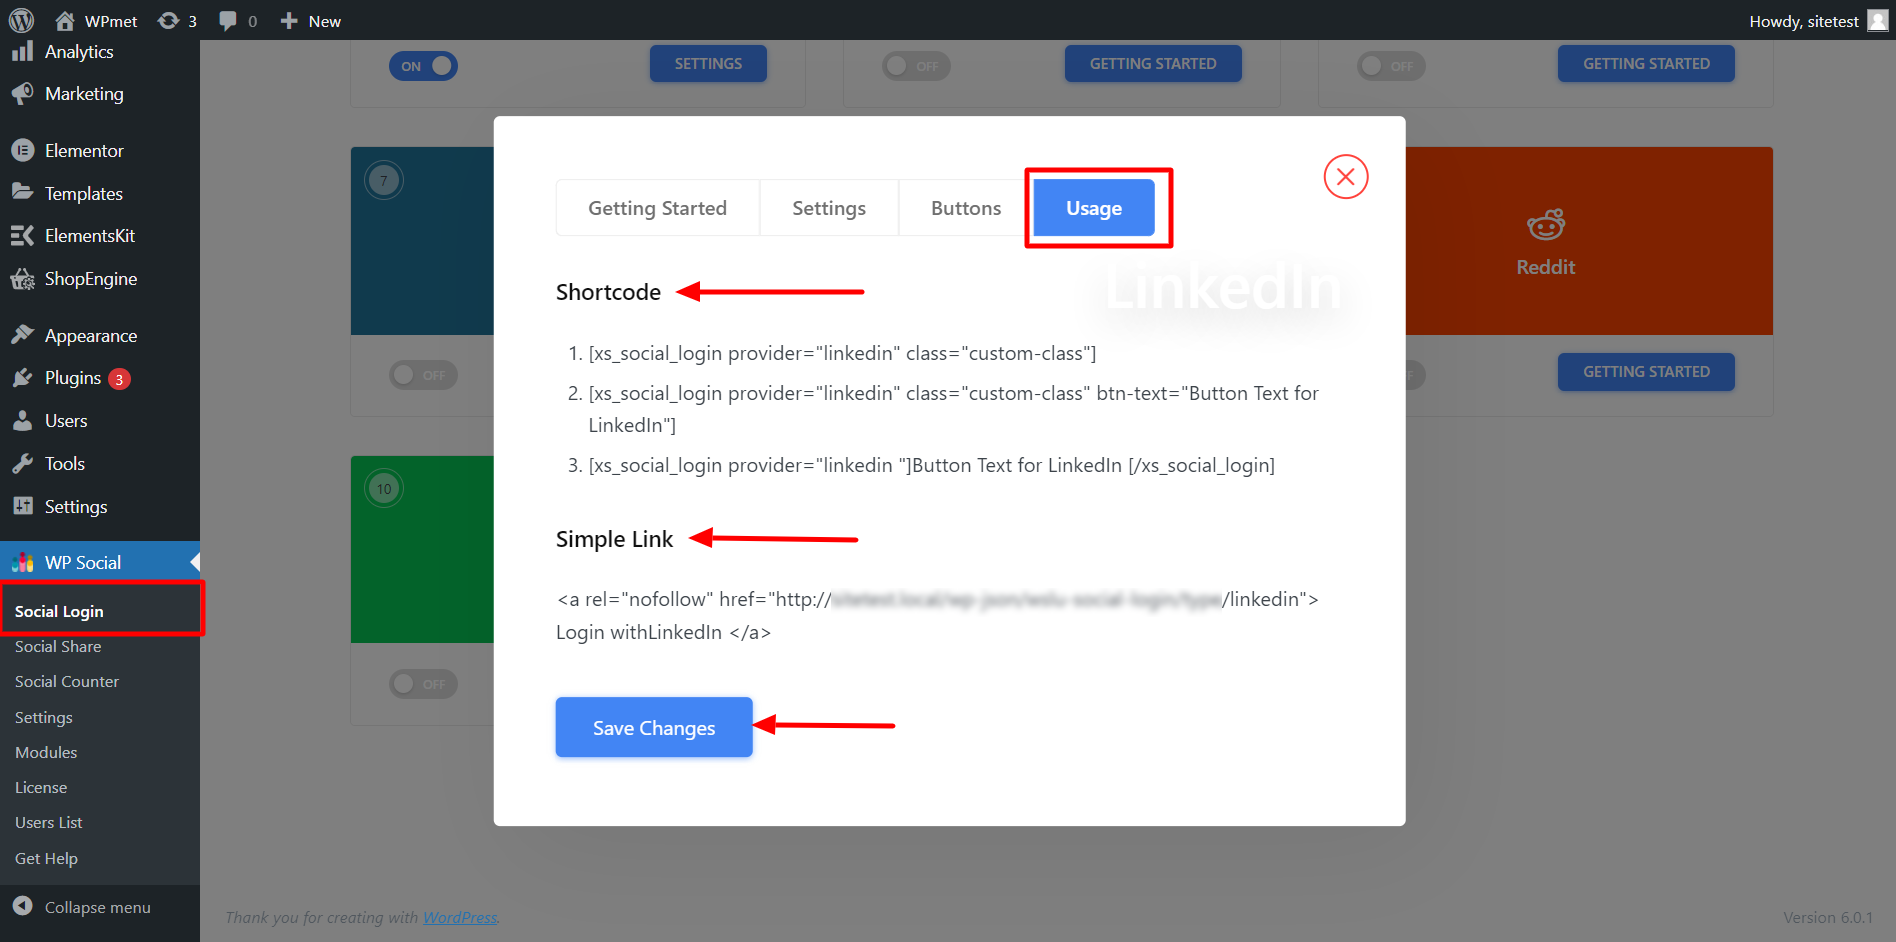
Find Shortcodes and Simple Link #
You can use Shortcodes to add LinkedIn Login on any page. You can find the shortcodes in the Usage tab. Read the documentation of WP Social Shortcodes Usage to learn how to use those shortcodes.
You also find a Simple Link for the LinkedIn Login button.
Finally, the process of LinkedIn social login integration for WordPress is complete. Now you are able to add a LinkedIn Login button to your website and let the user log in to the website using their LinkedIn account.