Payment Method #
Make your WP FundEngine payment method easy with WooCommerce payments set up. we are proving so many options for payment including Check payments, Direct Bank Transfer, Cash on Delivery, and many more.
- You can access Payment method in two ways
First Way
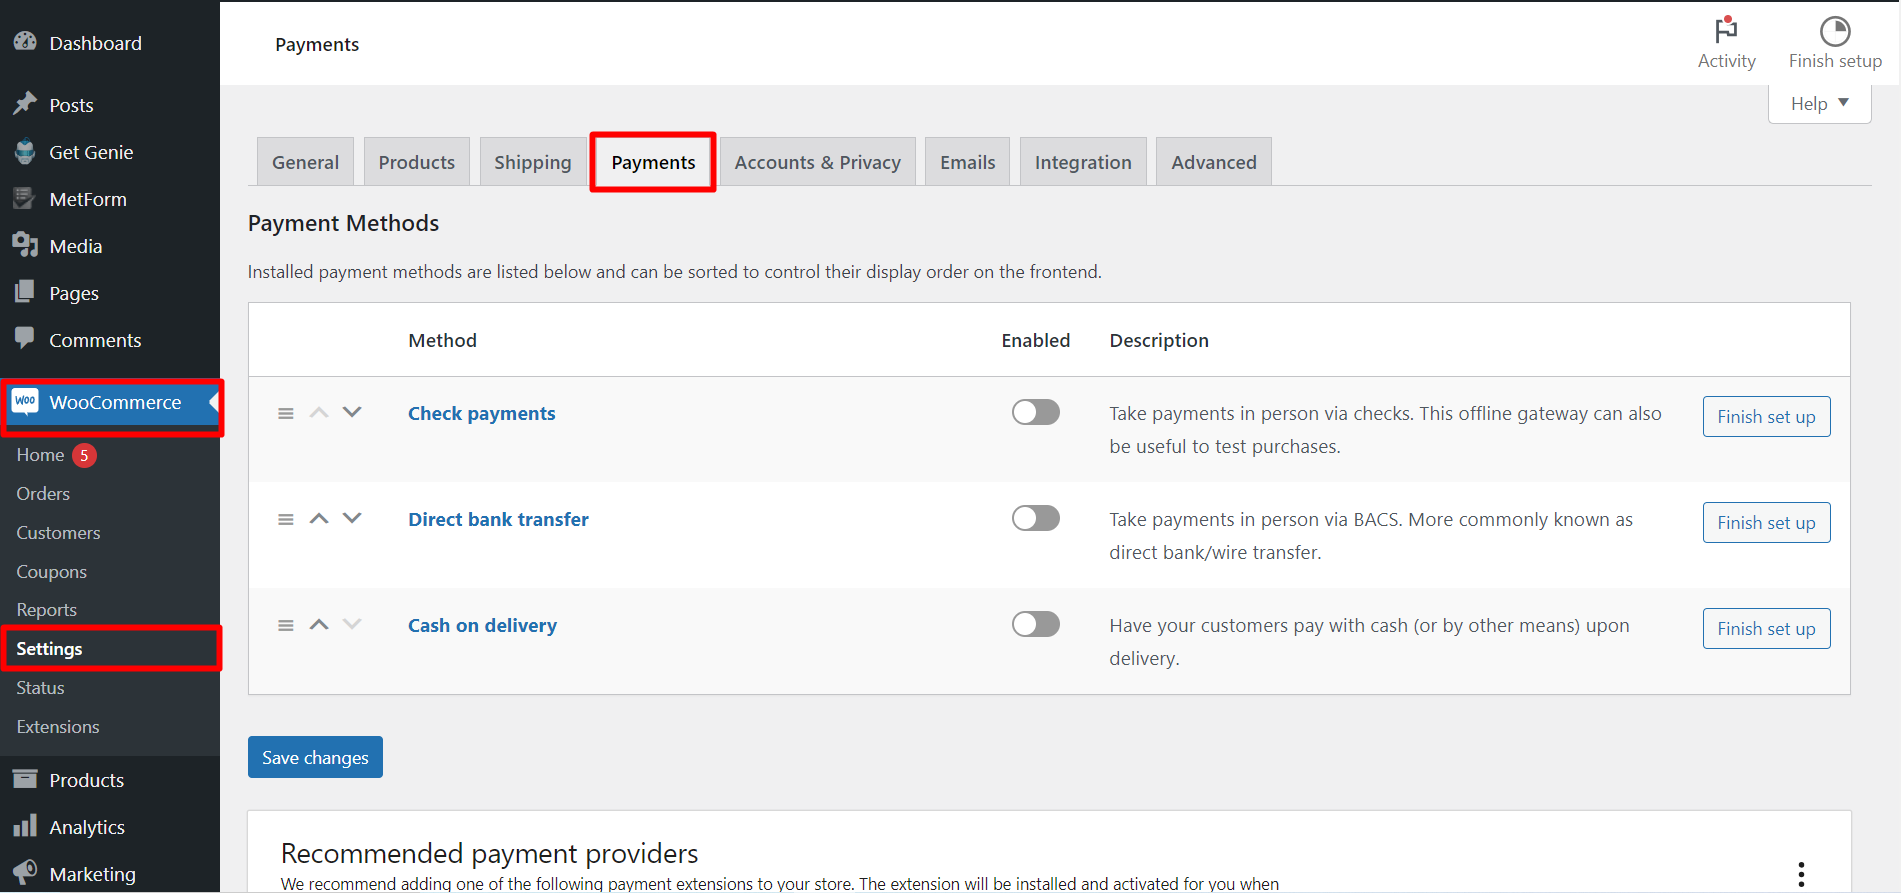
- Step:1: Go to WooCommerce => Settings => Payment method
Second Way
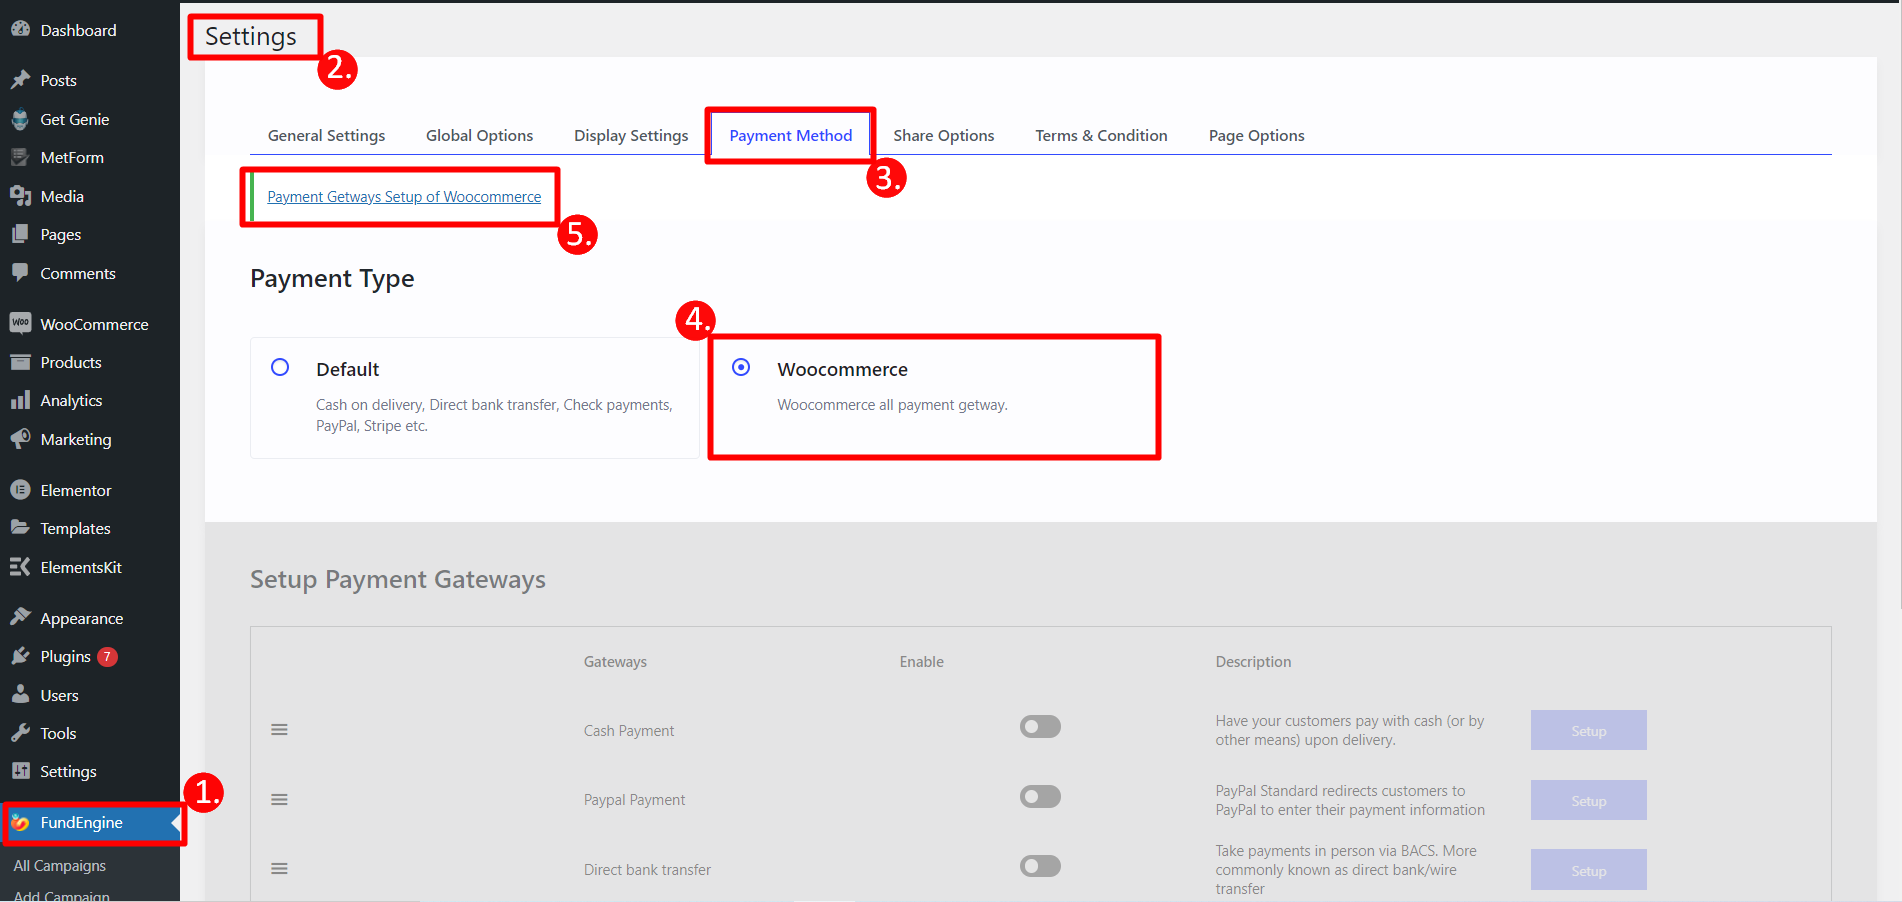
1. Go to WP FundEngine => 2. Settings=> 3. Payment Method 4. Select Payment Type: WooCommerce 5. Click on Payment Gateways Setup of WooCommerce
PayPal Payment Set Up #
PayPal is basically a worldwide online money transfer system. By using PayPal payment gateway for your default payment will make your money transaction easy. Here is the step by step process that how you can set up PayPal for your payment.
Step->1: Enable PayPal payment to pay via PayPal method=> Set Up

Step->2: Click on Set Up
Basic Information
Step=>3: CheckBox Enable PayPal Standard
- Title — Fill it in with page heading.
- Description — Add a payment description or a message that you want to provide your customers.
- PayPal email — Input the PayPal email which you use to collect payments.
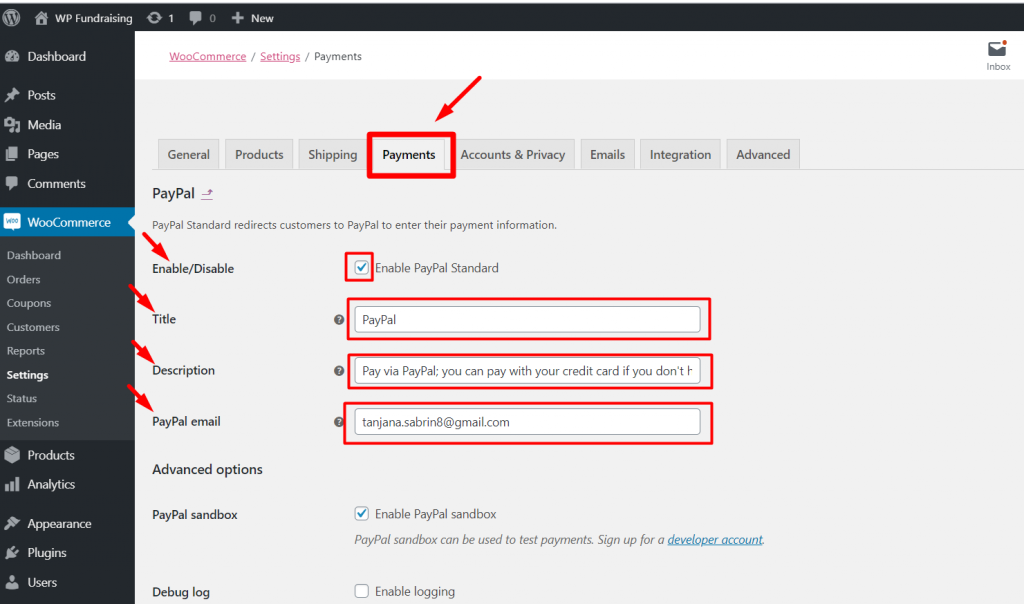
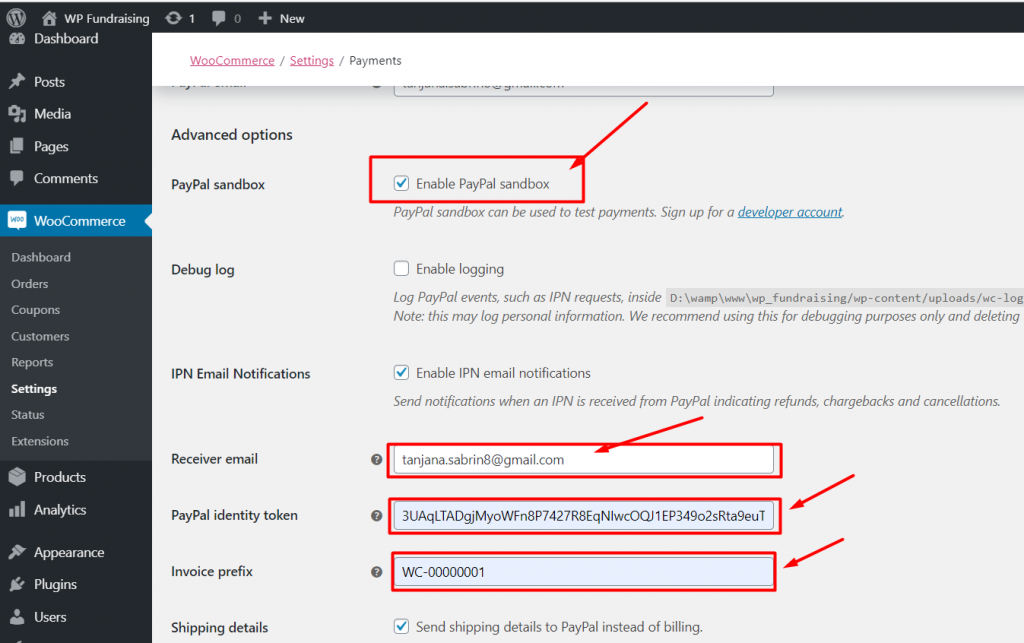
Advanced Options
- Checkbox Enable PayPal sandbox
- Provide Receiver Email which will get the notification
- PayPal Identify token
GET PayPal Identify Token #
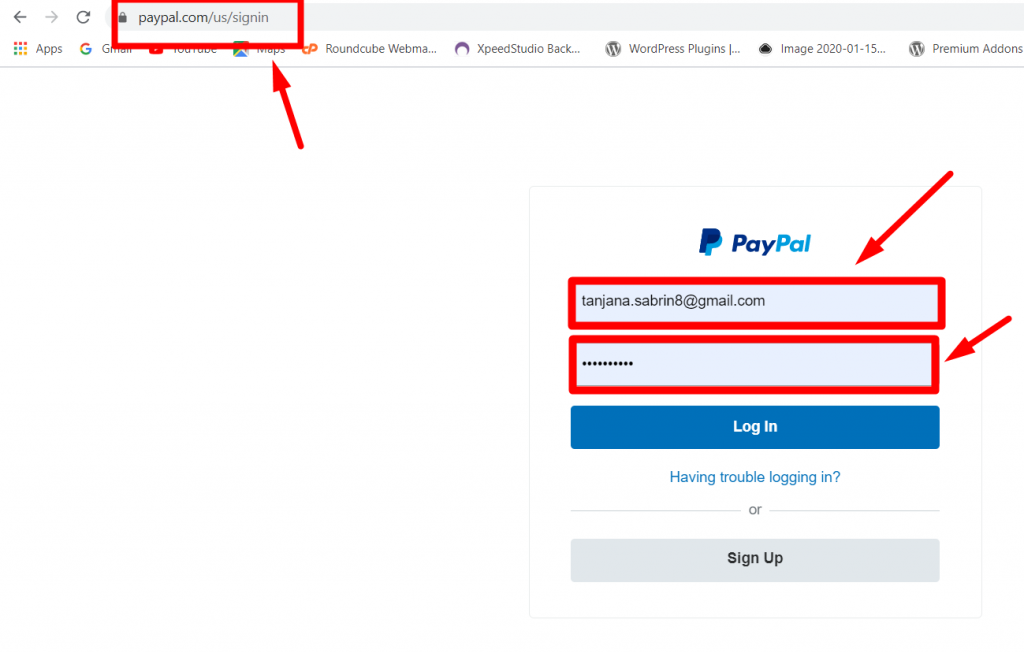
To get Identify token, Go to URL : https://www.paypal.com/us/signin
Step->1: Create a PayPal Business account
- Log in with your created PayPal Email and Password
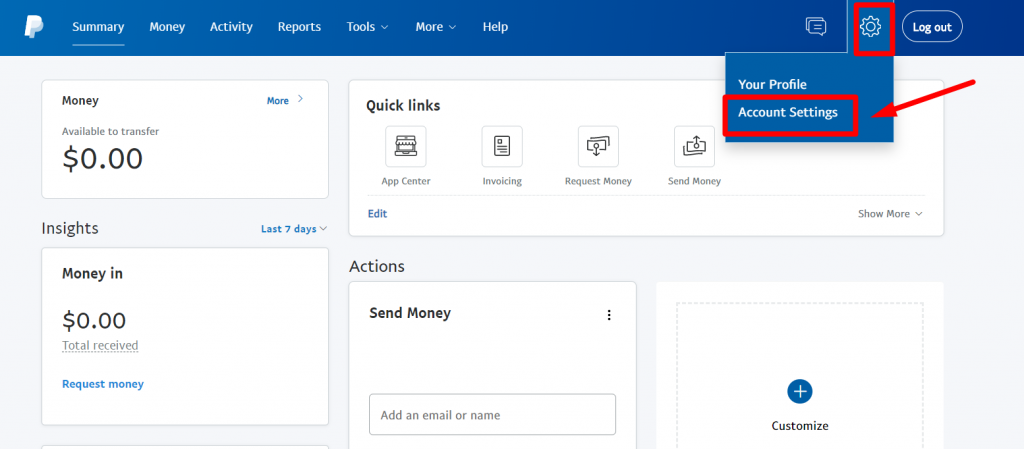
Step->2: Access your PayPal dashboard, then navigate to Settings-> Account Settings
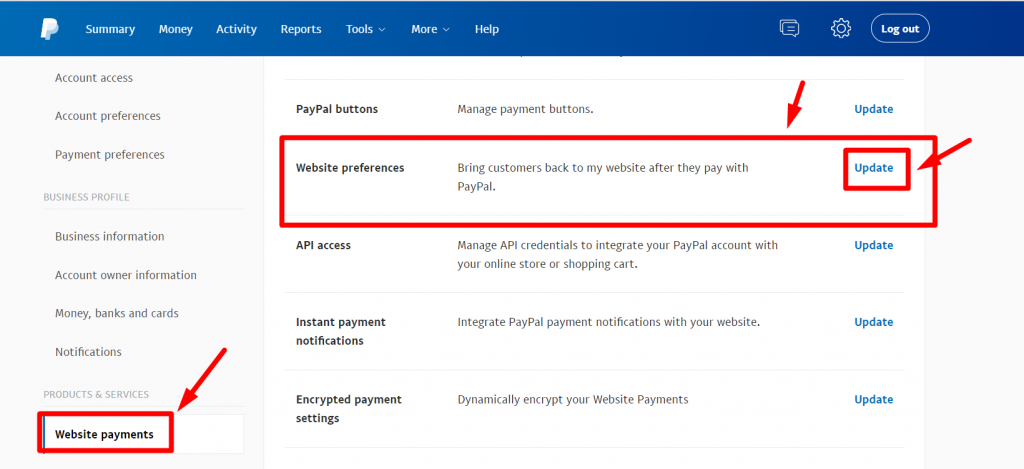
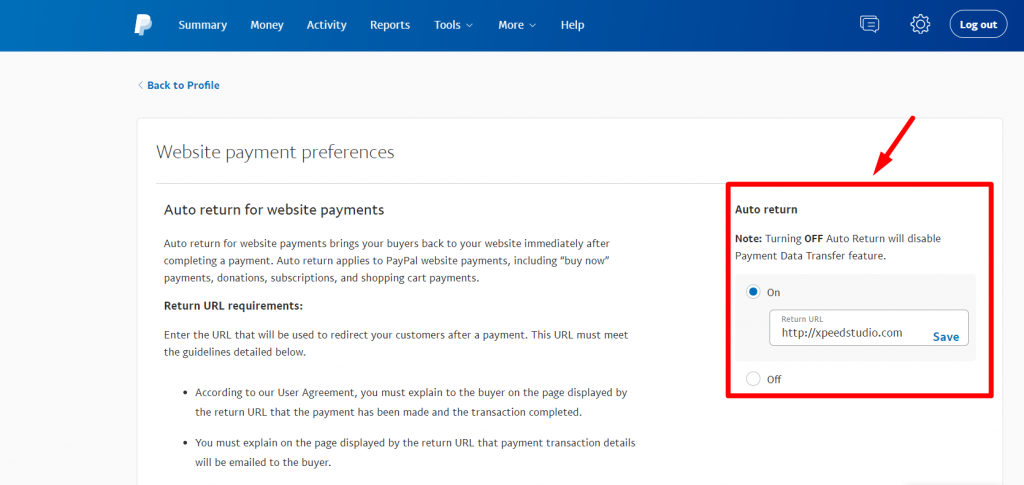
Step->3: Website payments. Tap the Update link next to the Website preferences option.Tap the Update link next to the Website preferences option.
Step->4: Enable the Auto return for website payments, then add your store’s thank you page link in the Return URL field.
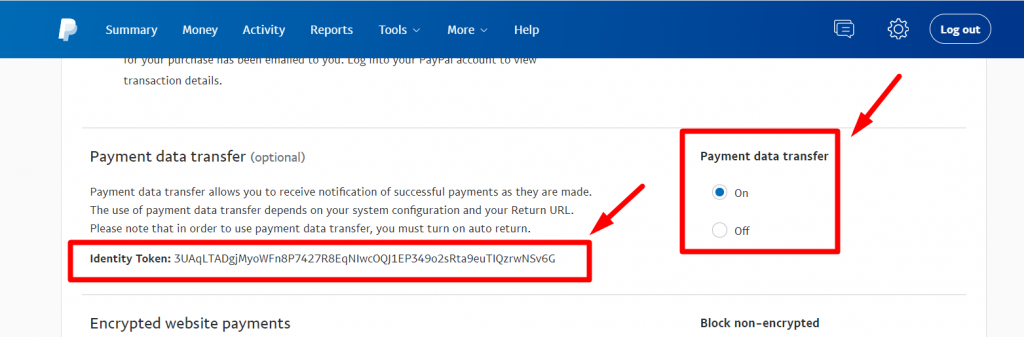
Step->5: Enable the Payment data transfer as well. The identity token should appear at the bottom of the section.
Step->6: Invoice prefix — if you connect the PayPal account to multiple stores, you can add a combination of letters and numbers to help you differentiate your invoices.

Once done, click Save Changes.
Checkout #
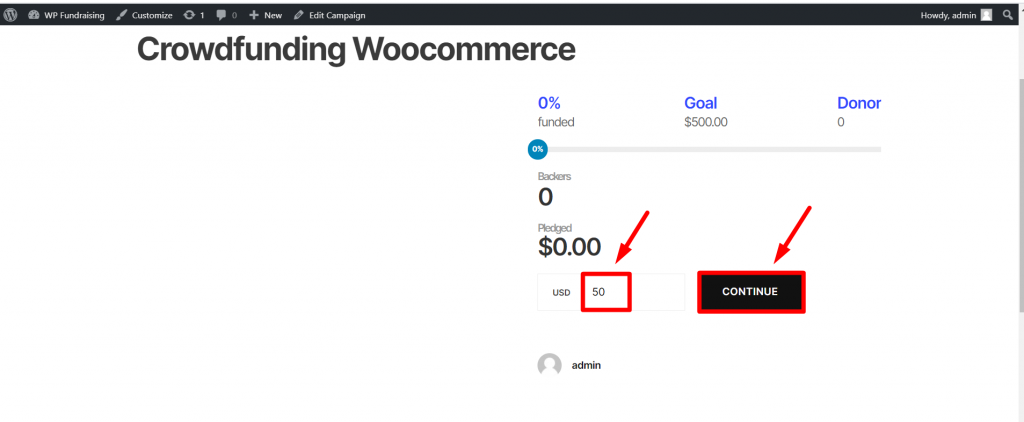
Step=>1: To checkout, we need to go to browser.
- Provide your Amount
- Click Continue
- Your Created Funds has been added to your Cart
- You can also change the quantity=> Update Cart
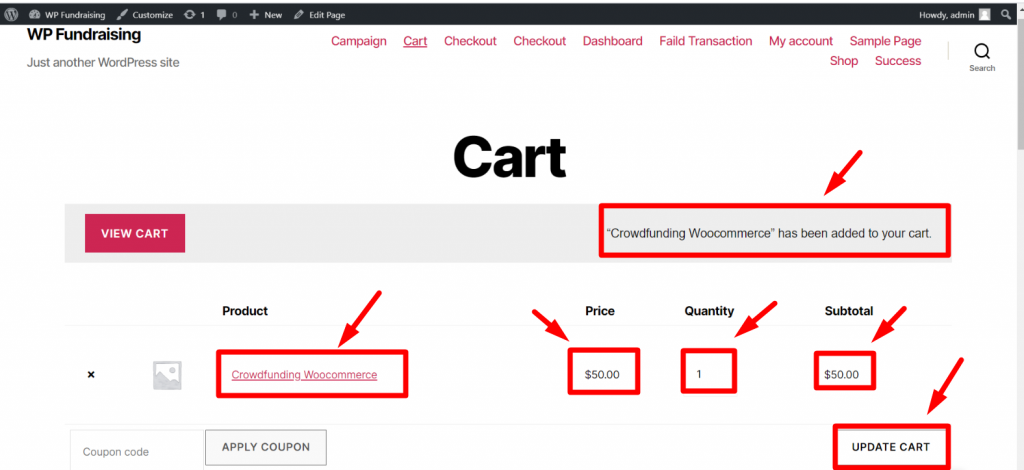
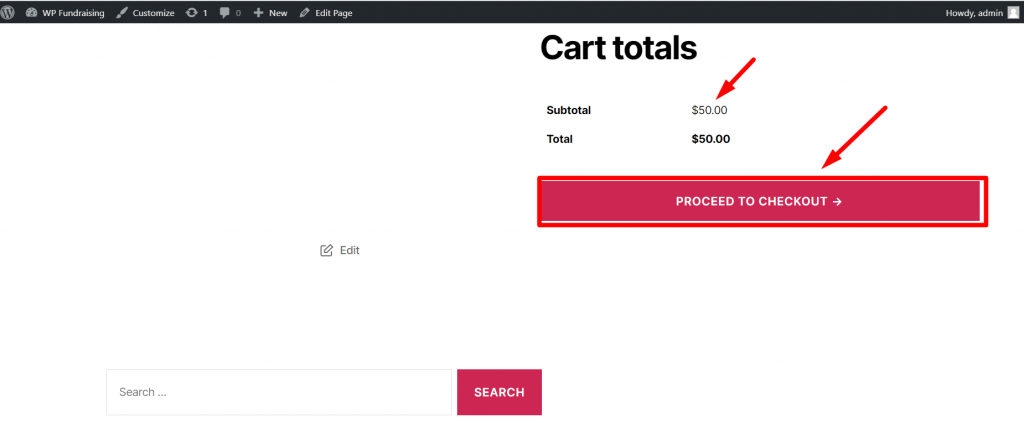
- Displays Cart Total
- Click On Proceed to Checkout
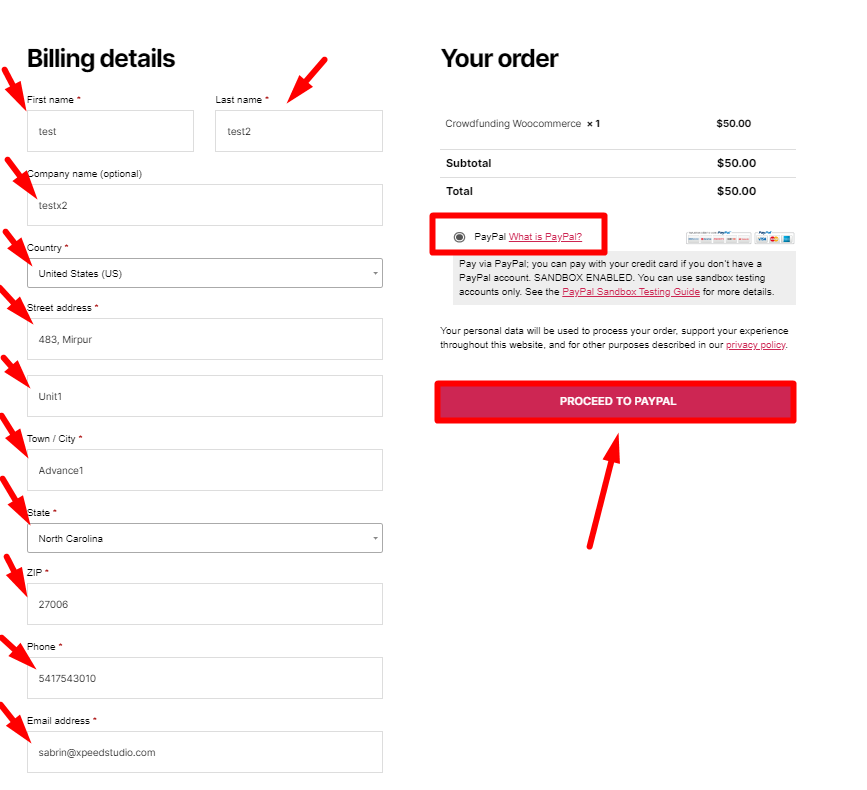
- Provide your Information and Fill the form
- Put the Email id associated with PayPal account.
- Choose PayPal as our payment method
- Then click Proceed to PayPal radio button
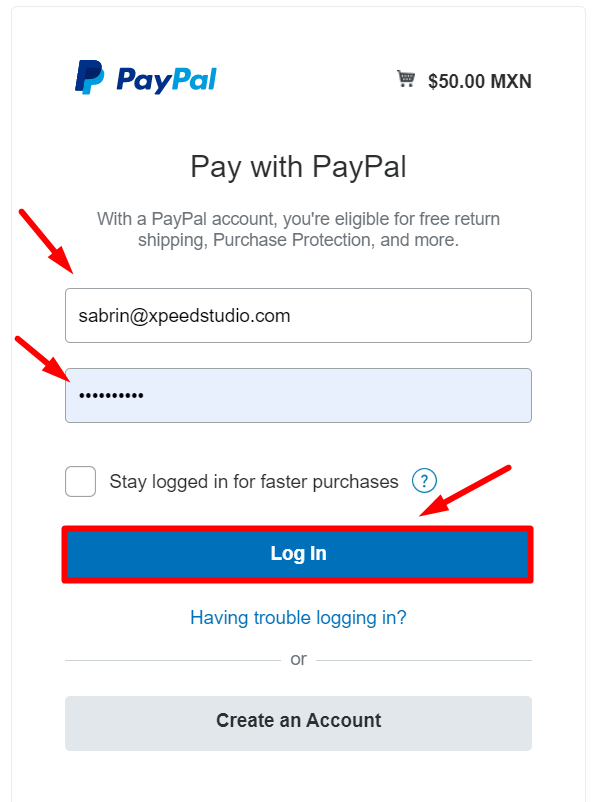
Step=>2: Put your Paypal Email and Password and login to your account
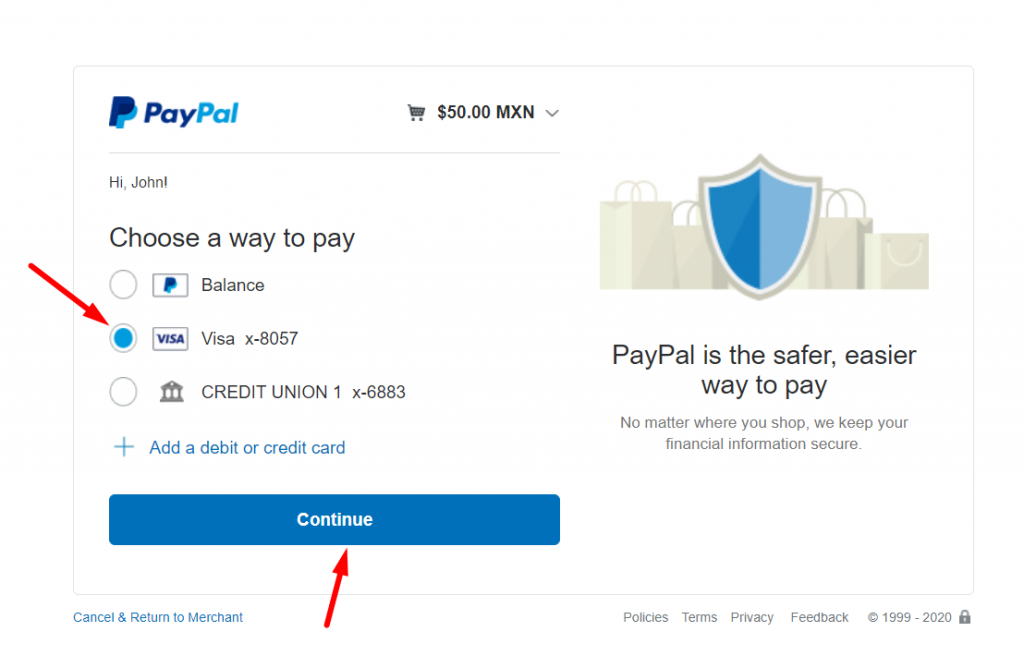
Step=>2: Choose your credit card from the list and click Continue button
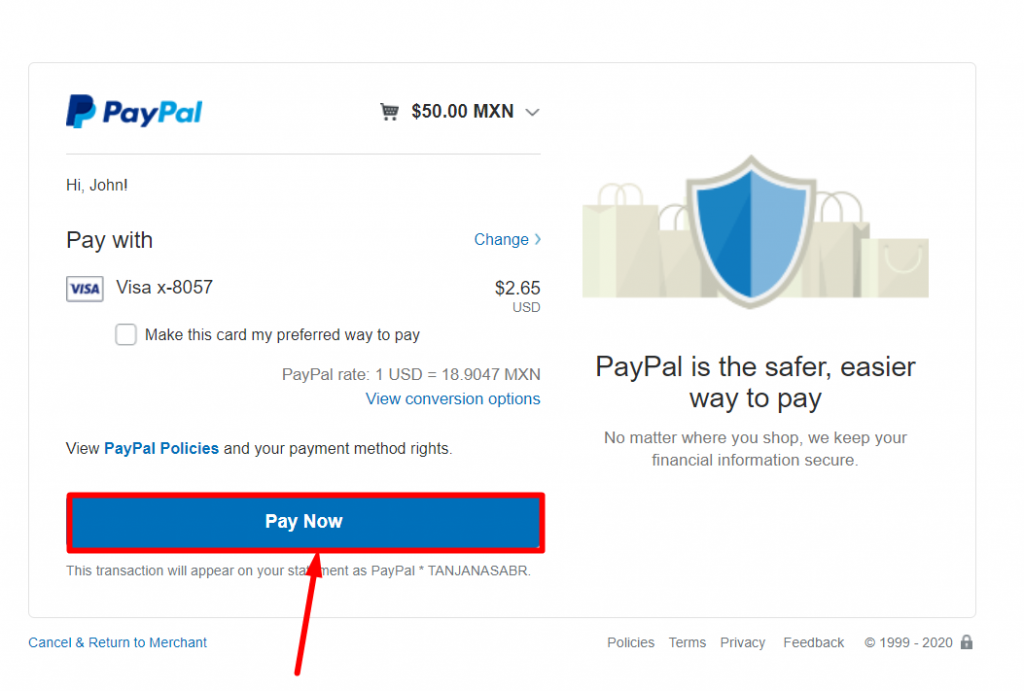
Step=>3: Pay the donation with Pay Now button
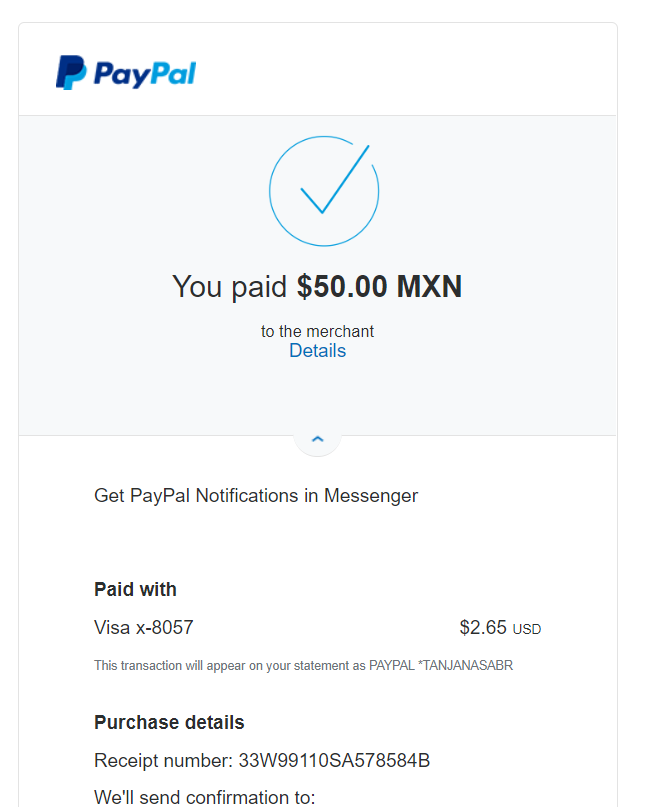
Step=>4: The donation gets Paid
Step=>5: Click On Return to Merchant
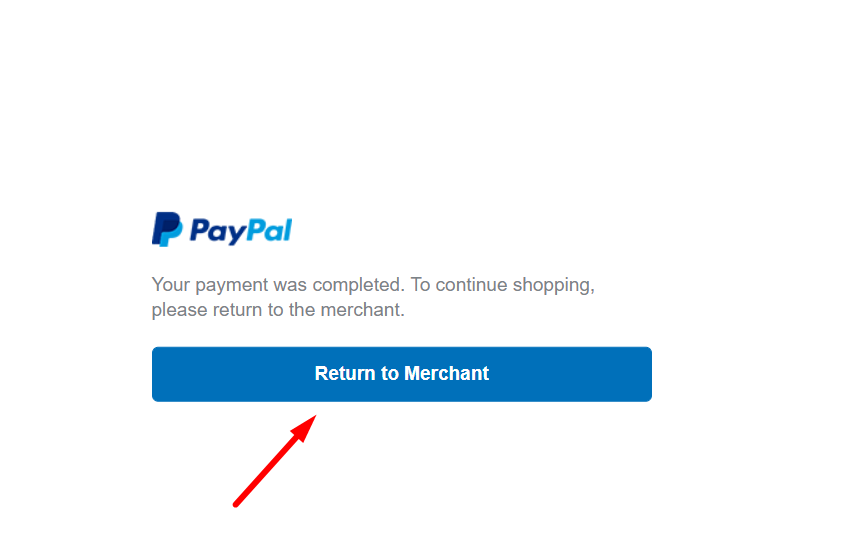
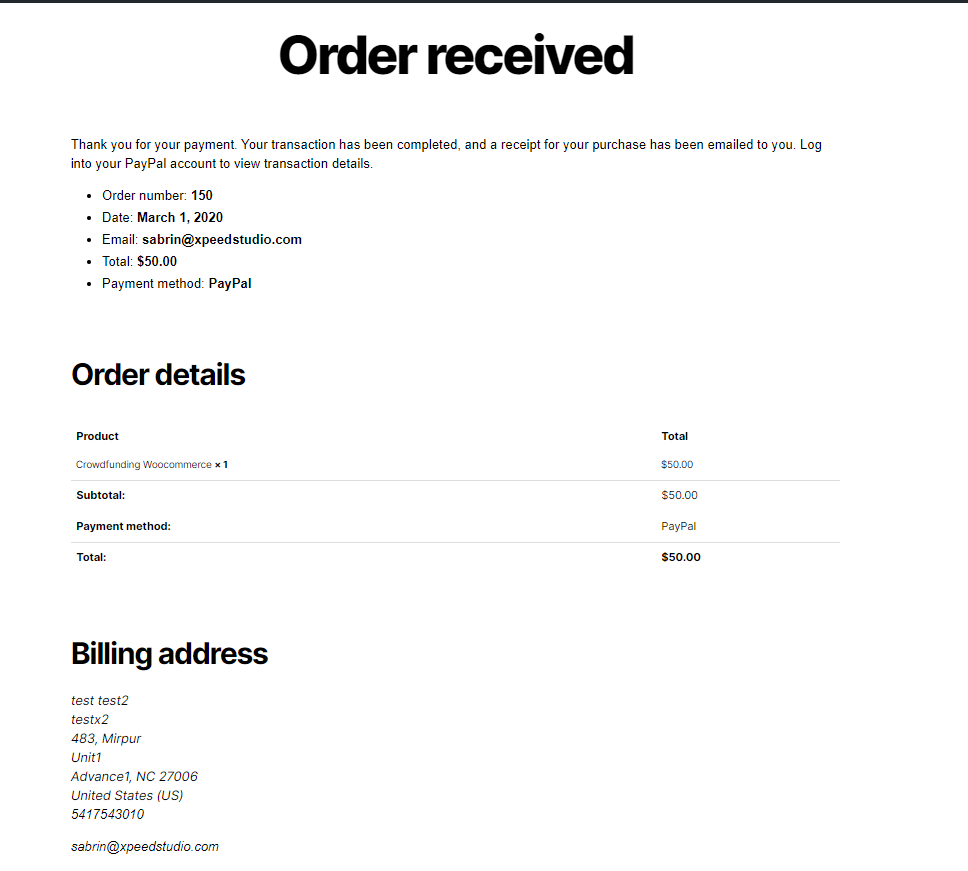
- It Will redirect to the page and show the details
Step=>6: Now go to Wp FundEngine=> Go at bottom of the created Campaign=> Recent Donation List=>In Process=> Action=>Make Pending to Success=> Update
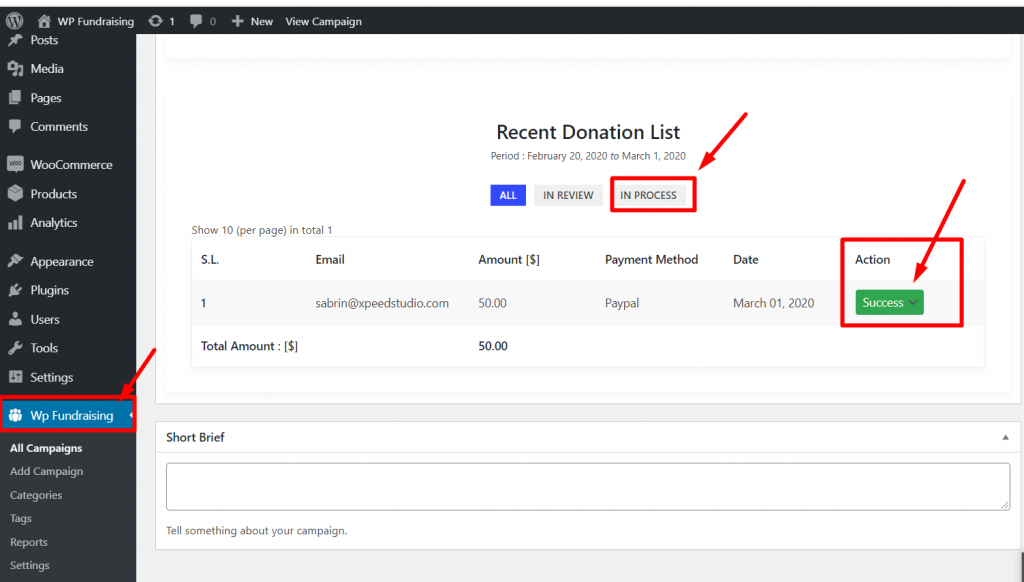
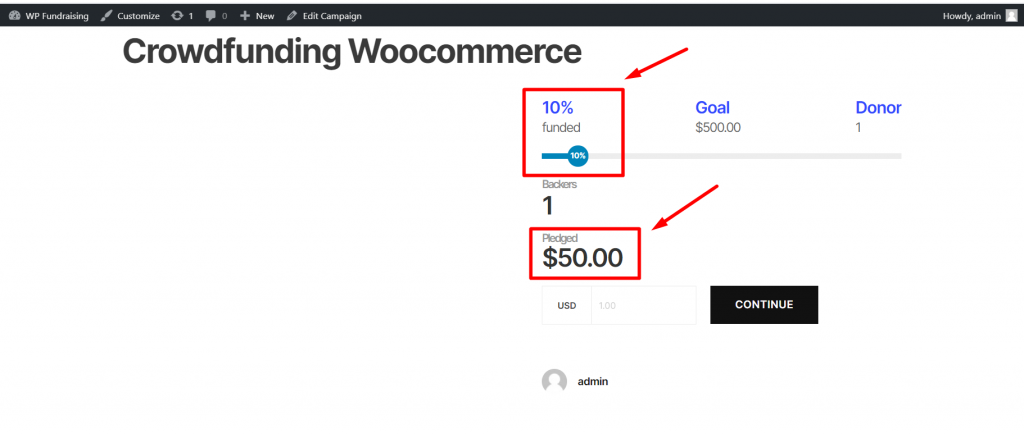
- Go to the web page
- You can see the Percentage of Funded Amount and Pledge Amount
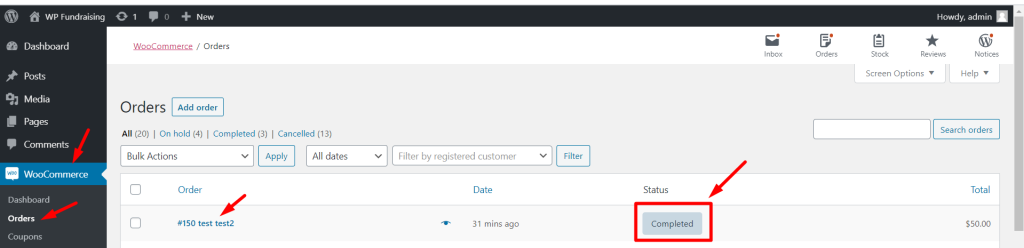
You can check your campaign donation in the back-end.
- Step=1> Woocommerce=> Orders
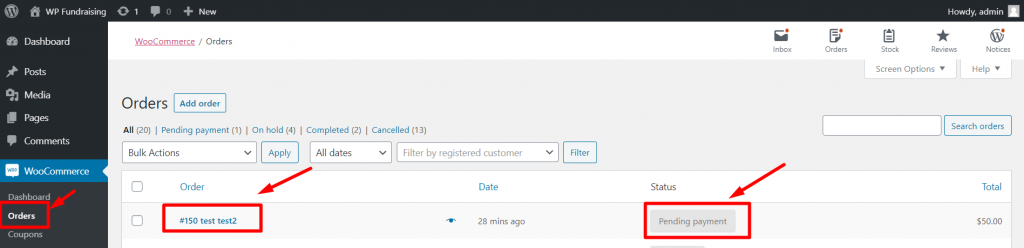
- Step=>2: Click On the Order=> Make the status pending to Completed=> Update
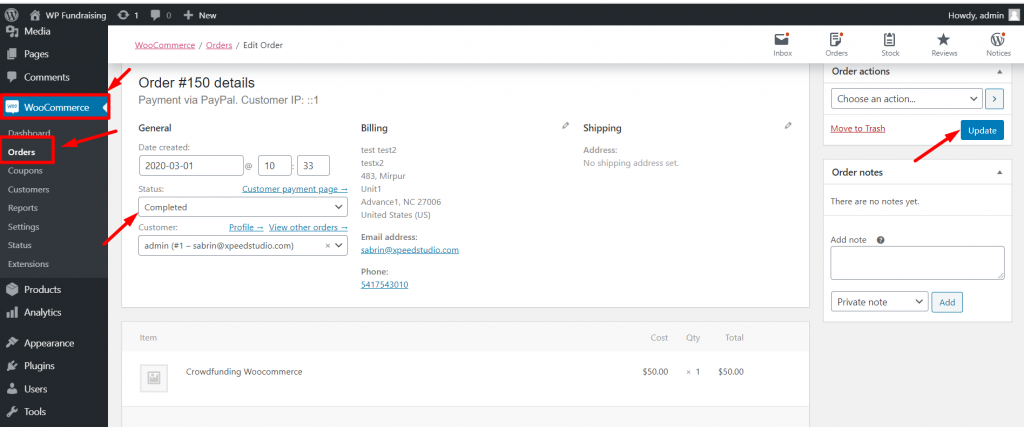
- You can see your order is Completed
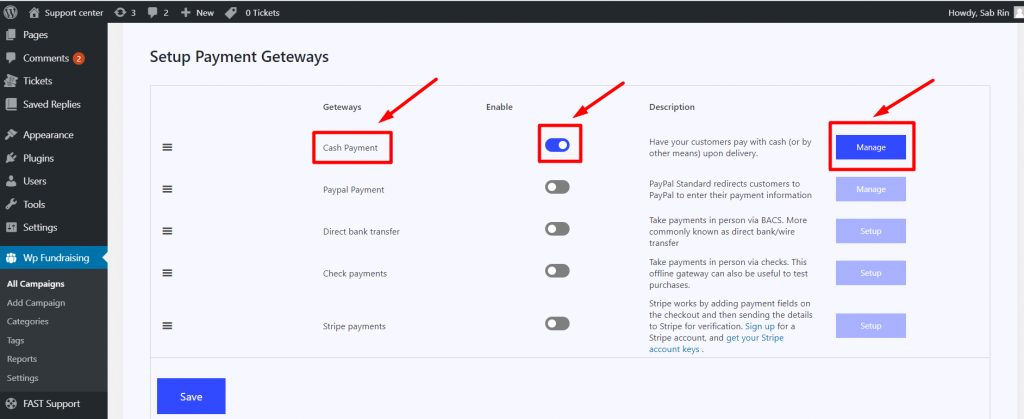
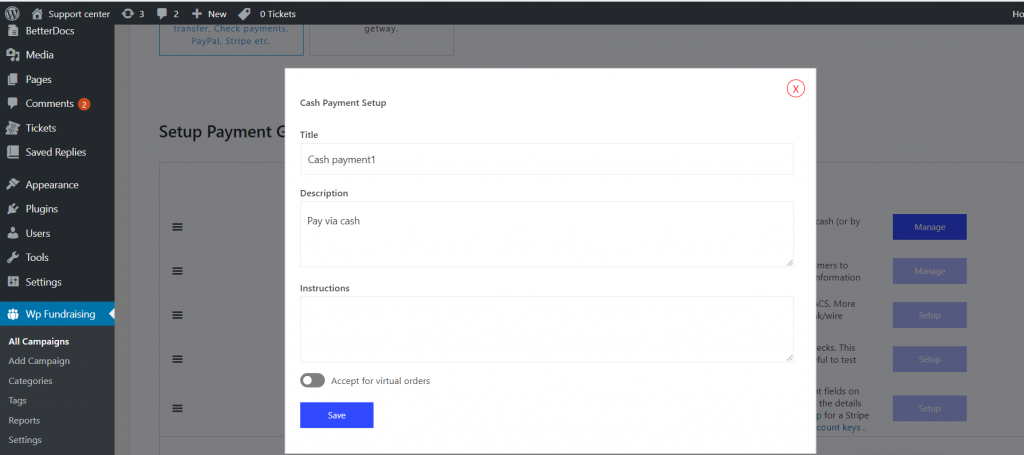
Cash Payment #
- Enable Cash payment to pay via cash=> Click on Manage
- Provide You Details
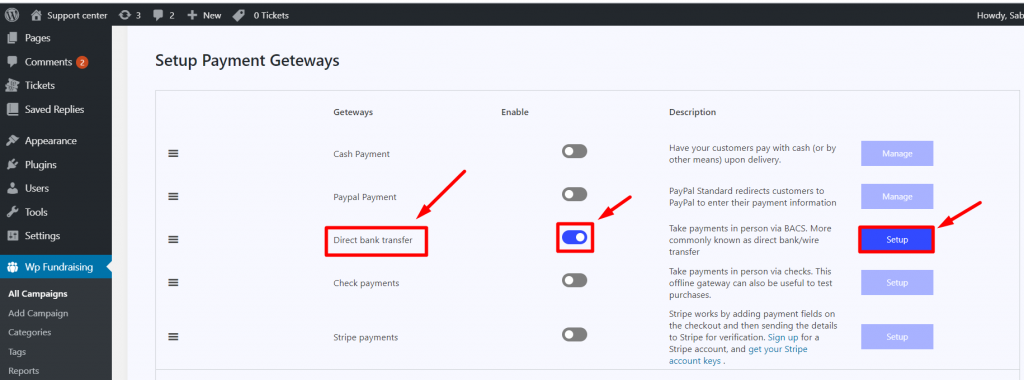
Direct Bank Transfer #
- Enable Direct bank transfer to pay via direct Bank/Wire=> Setup
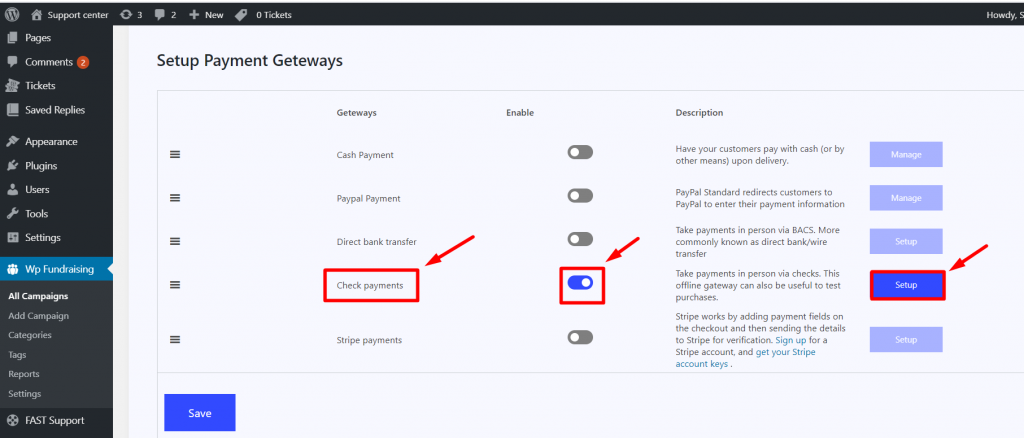
Check Payments #
- Enable Check Payments to pay via cash=> Setup