ElementsKit, the all-in-one Elementor addon gives you the ultimate ability to build websites with WordPress. With 85+ highly customizable widgets and extensions, you have all the page builder’s features in one plugin. Eliminates the need for individual plugins, and reduces the loading time of your WordPress site.
The Timeline widget from ElementsKit is designed to show your content in a chronological timeframe. You can create a stylish timeline to display your post, achievements, and other content with the Elementor Timeline for WordPress. Read this documentation to learn how to add Elementor timeline in WordPress using ElementsKit.
Step-1: Configure the Elementor Timeline #
First, open the Elementor editor and drag the Elementor Timeline widget into your design. Then configure the timeline content and settings to add Elementor Timeline in WordPress.
1.1 Add Content and Choose Layout #
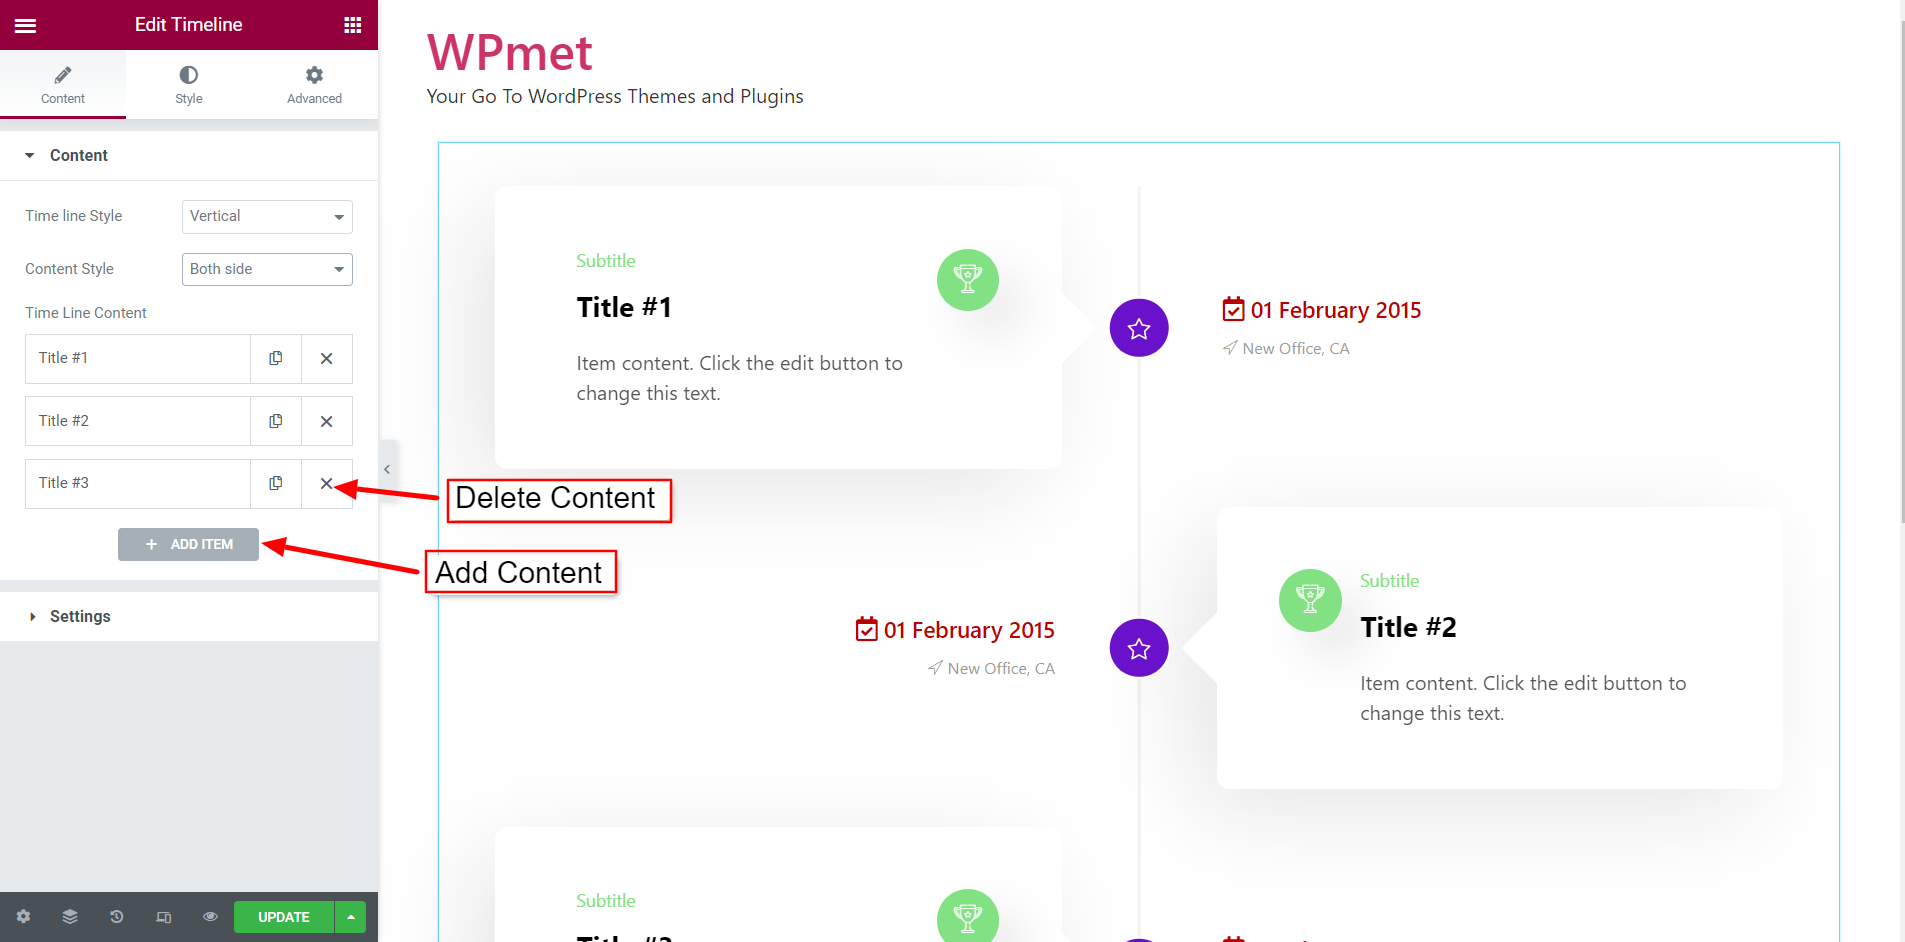
- Choose the Timeline Style to be Horizontal or Vertical. For the Vertical timeline style, you get to select the Content Style between the Same Side or Both Sides.
- You can include Timeline Content with the ADD ITEM button. Also can delete any content when you want.
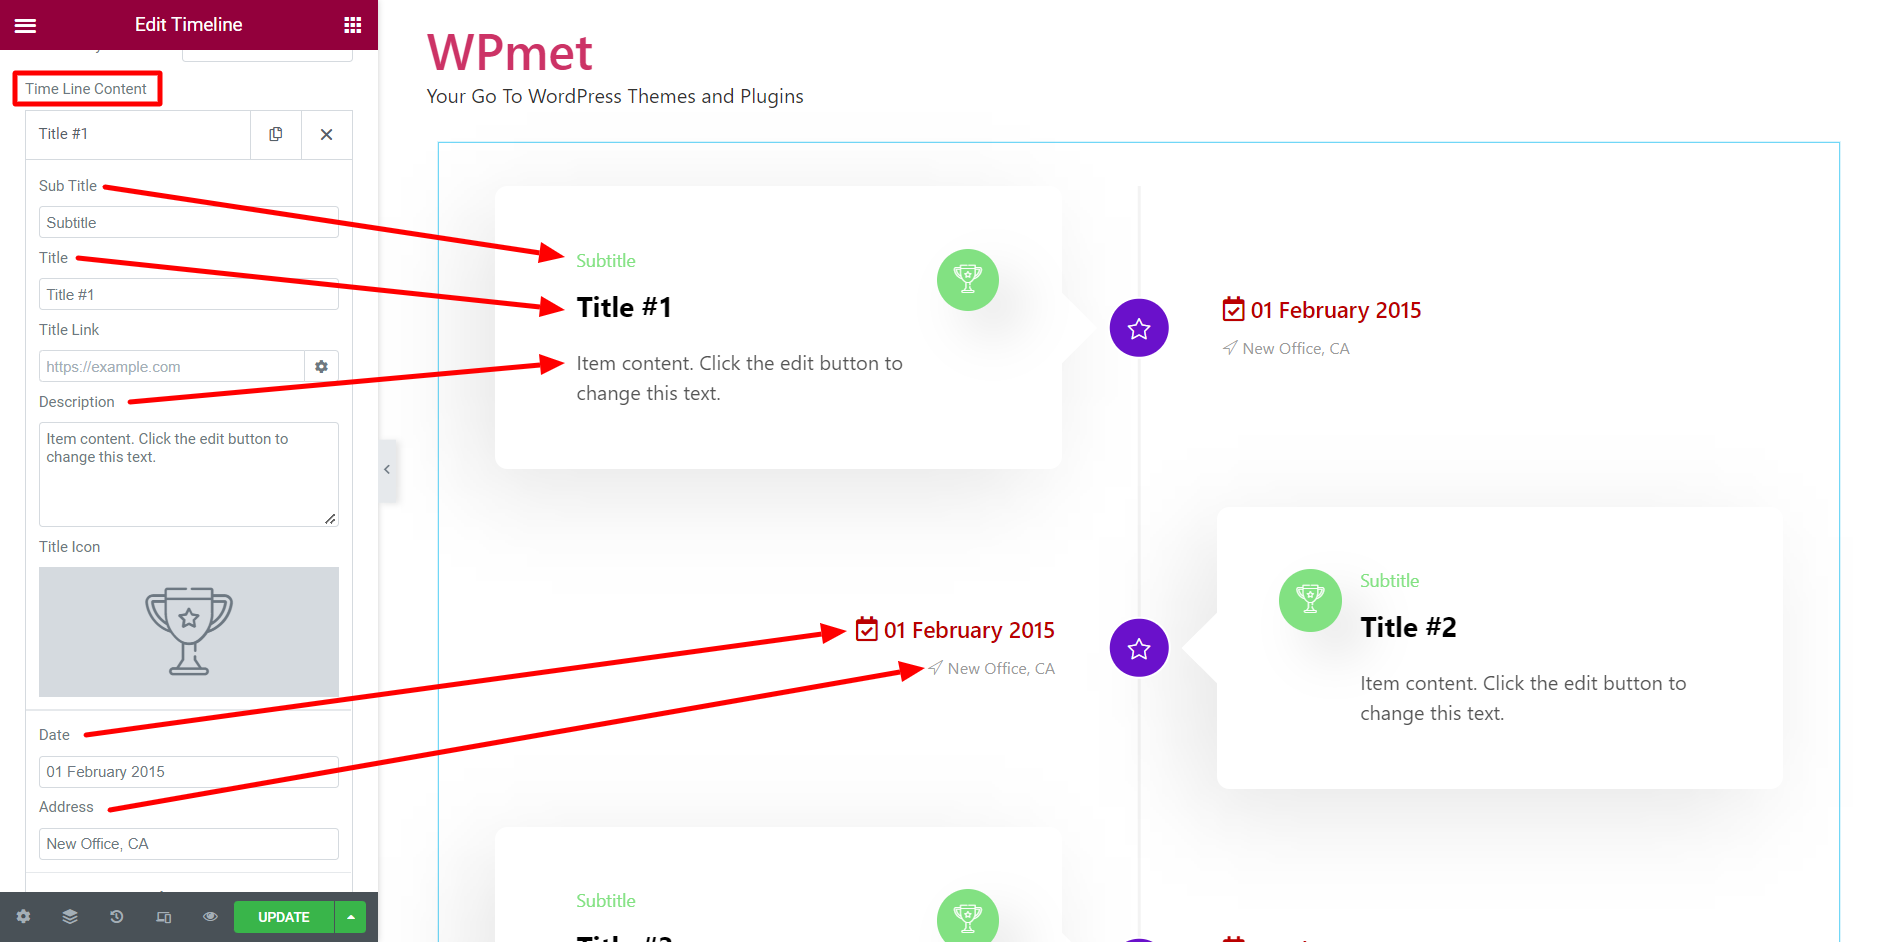
- For each Time Line Content, you can set the Title, Sub Title, Title Link, Description, Title Icon, timeline Date, and Address.
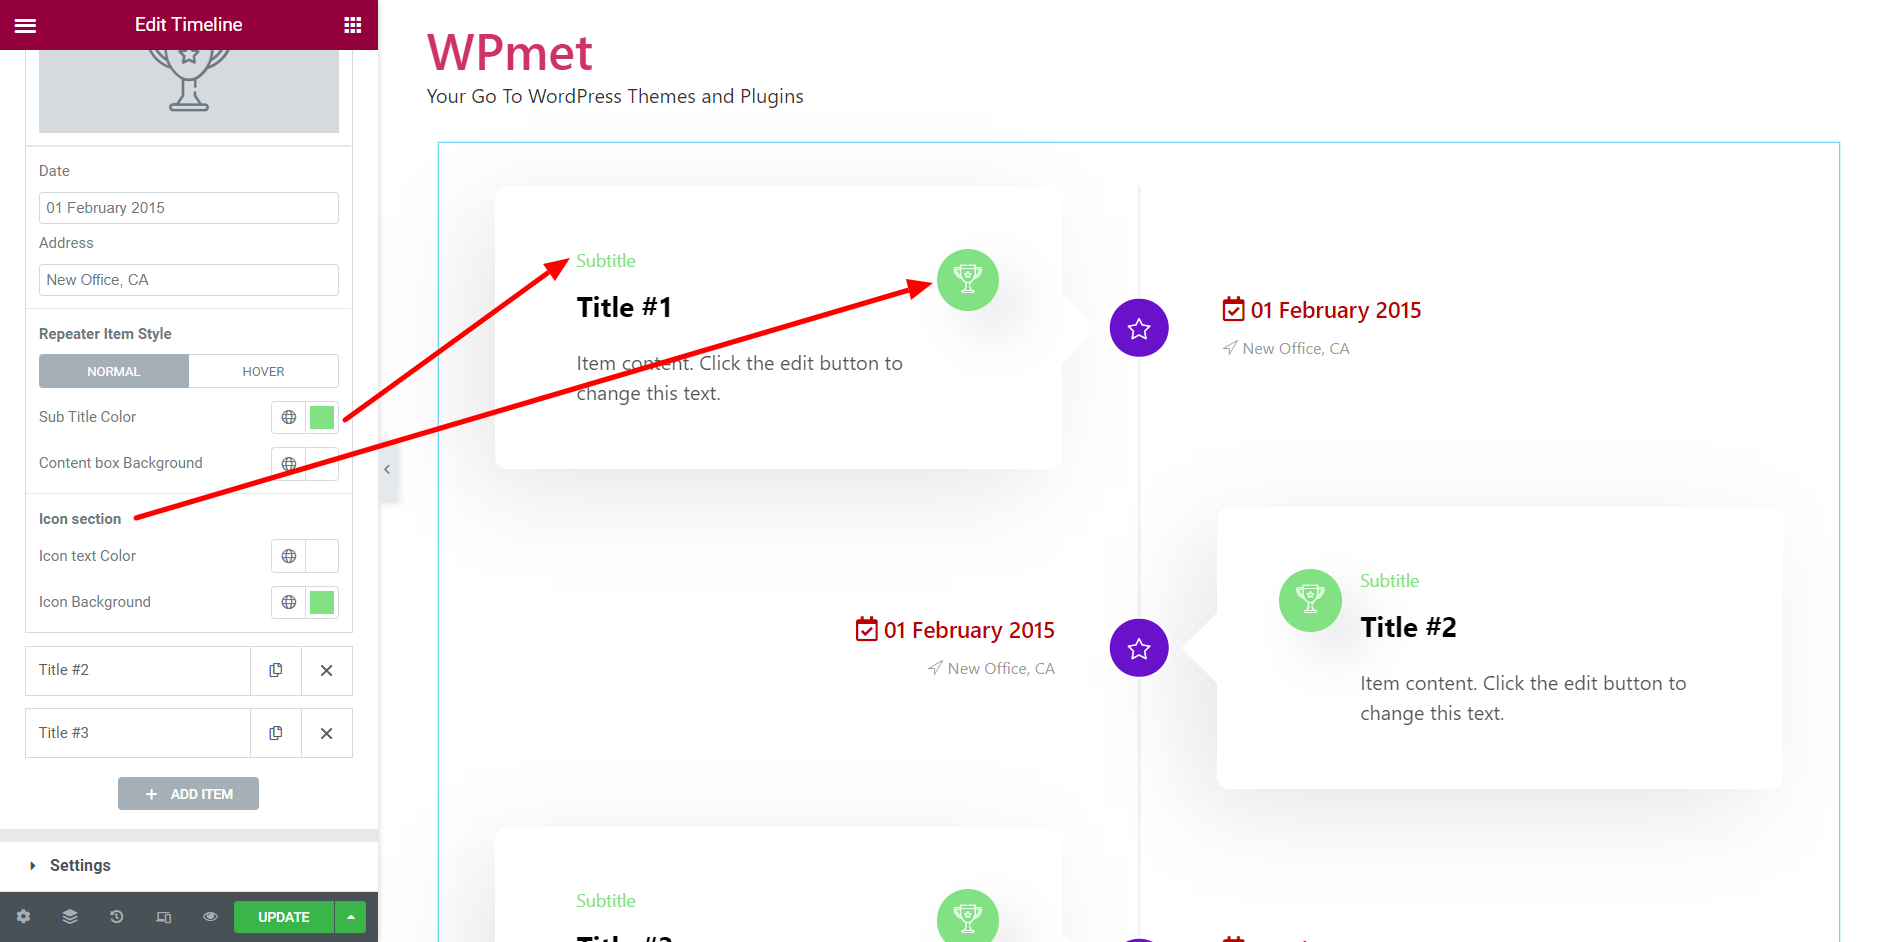
- To customize timeline content, edit the Repeater Item Style. Choose Icon Text Color, Icon Background Color, Sub Title Color, and Content box Background color for Normal and Hover states.
1.2 Settings for Elementor Timeline #
To configure the settings for Elementor Timeline:
- Choose the Date Icon for the timeline.
- Choose the Address Icon for the timeline.
- Select Content Box Entrance Animation from the available list.
- Select Address, Date Entrance Animation from the available list.
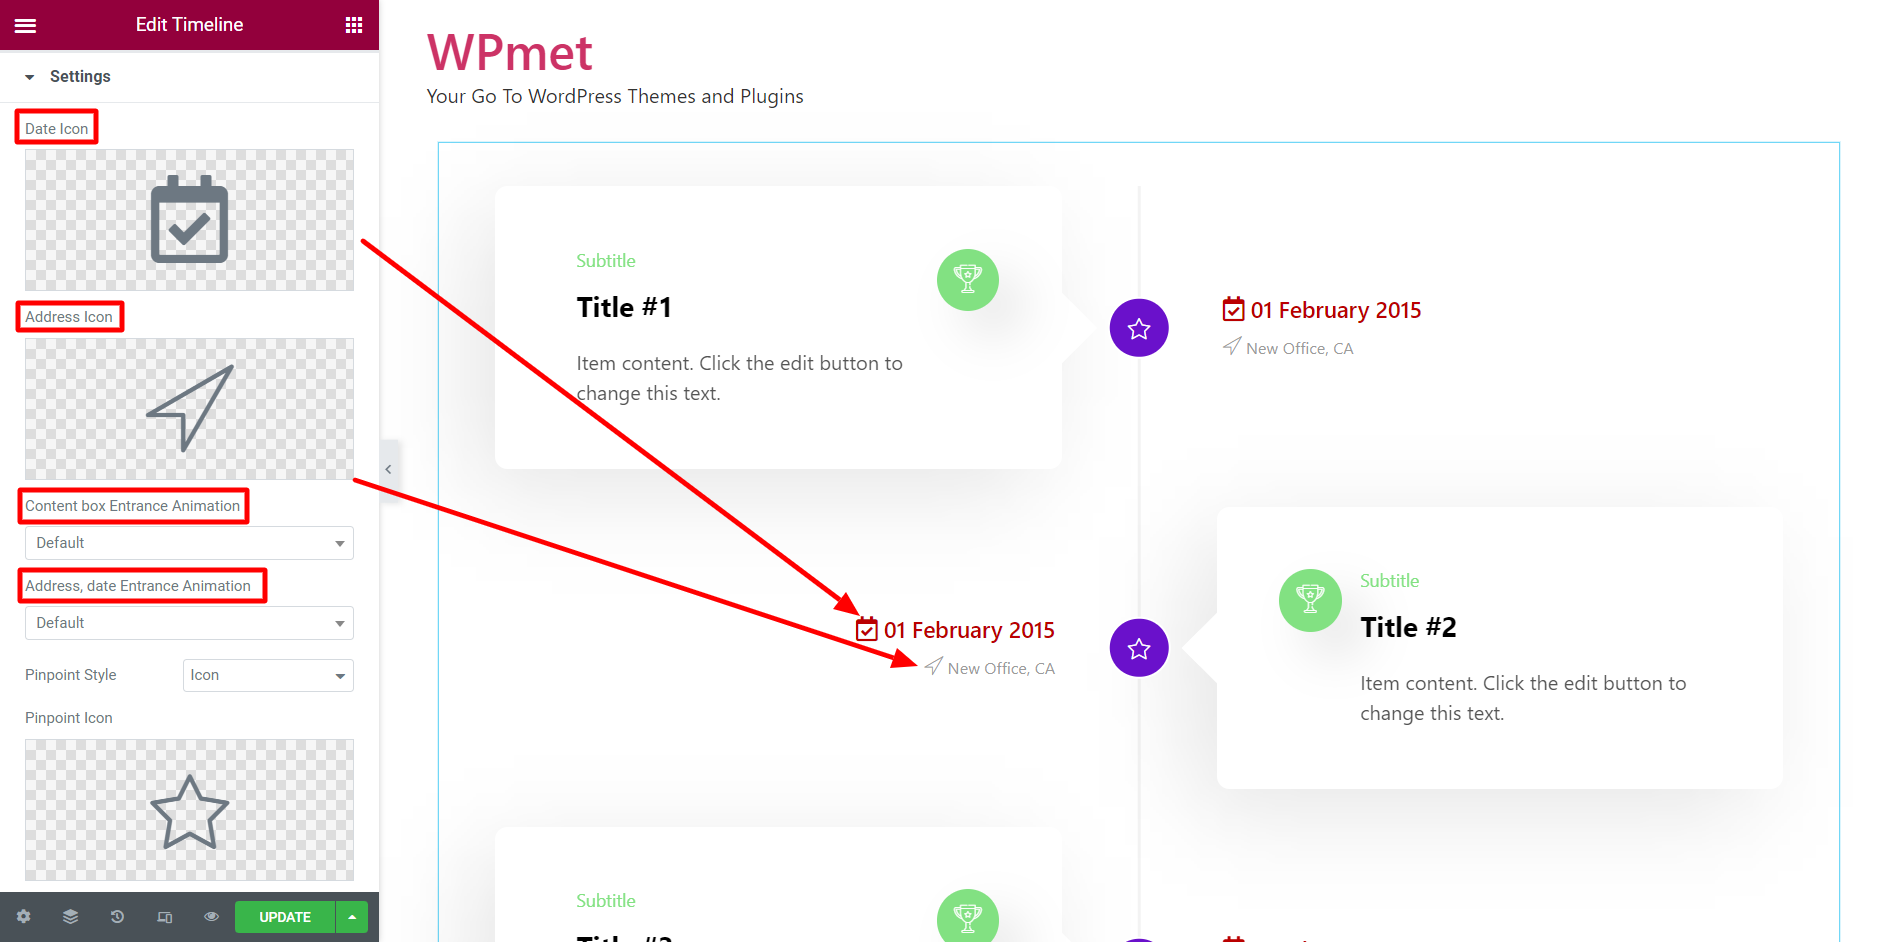
- Set the Pinpoint Style to Default or Icon. For Icon Pinpoint Style, choose the Pinpoint Icon.
Step-2: Customize Elementor Timeline Widget #
You can customize Content, Line, and Container design under the Style tab.
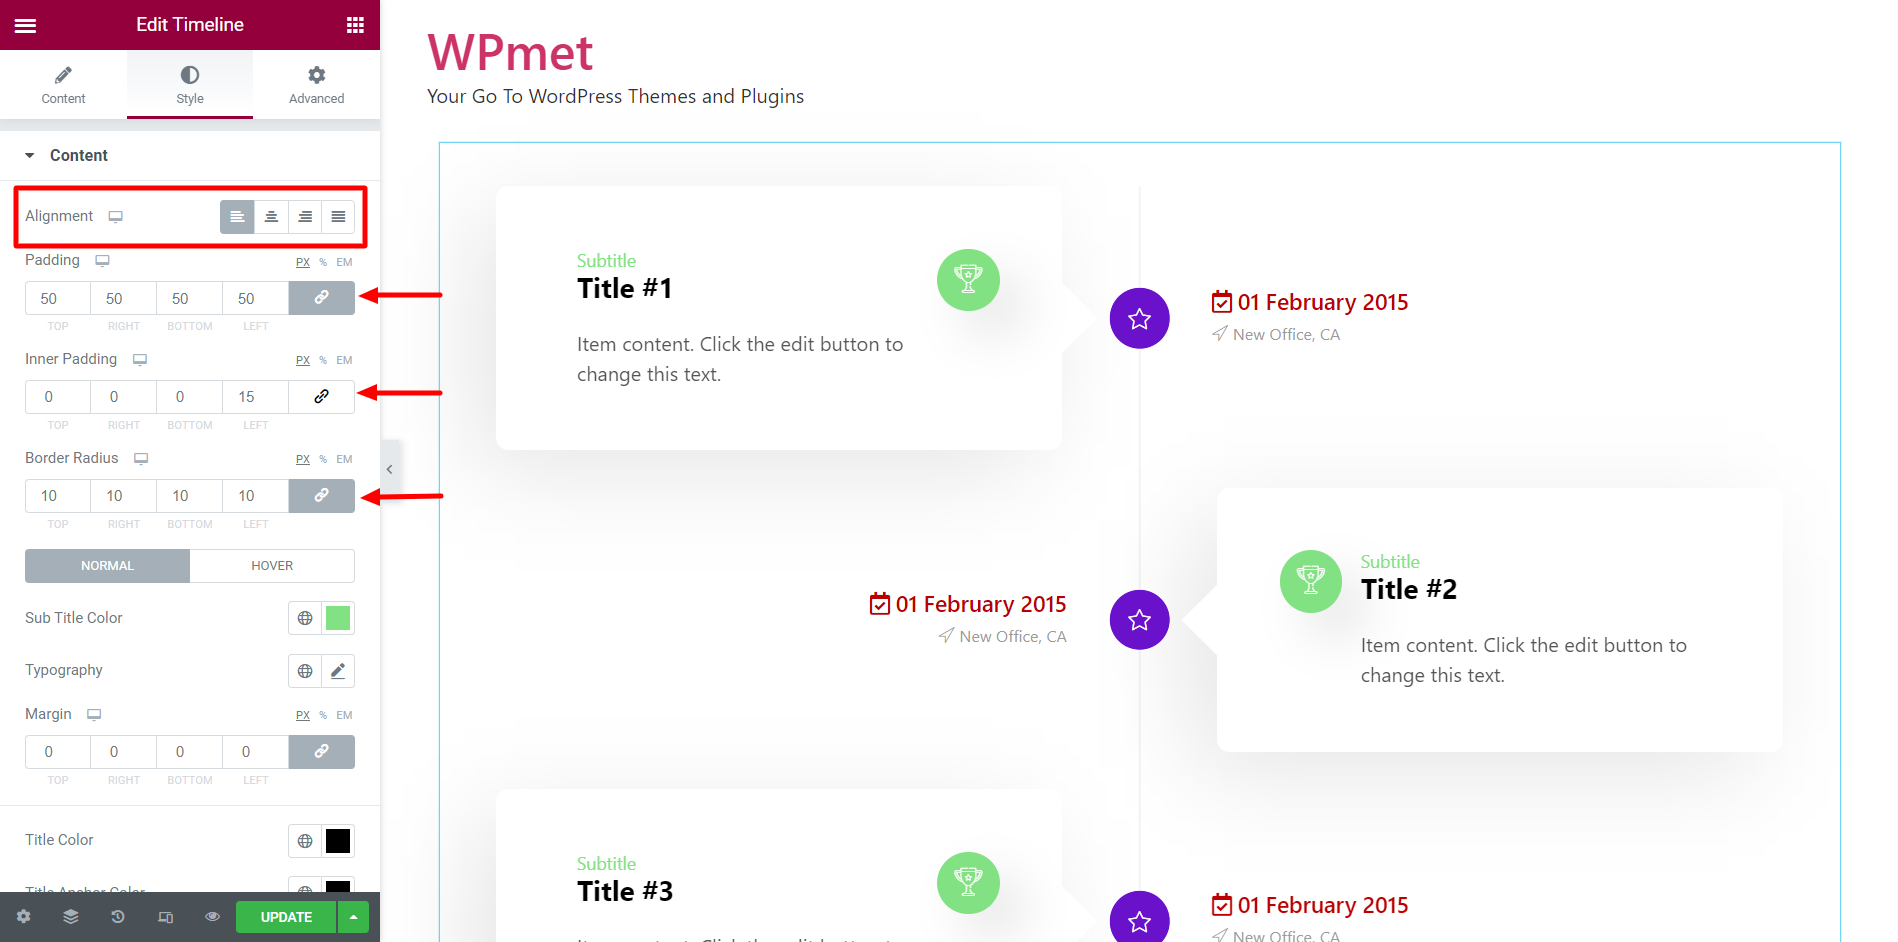
2.1 Content #
To customize the Content style:
- Set Alignment for the content inside the box.
- Adjust the Padding, Inner Padding, and Border Radius.
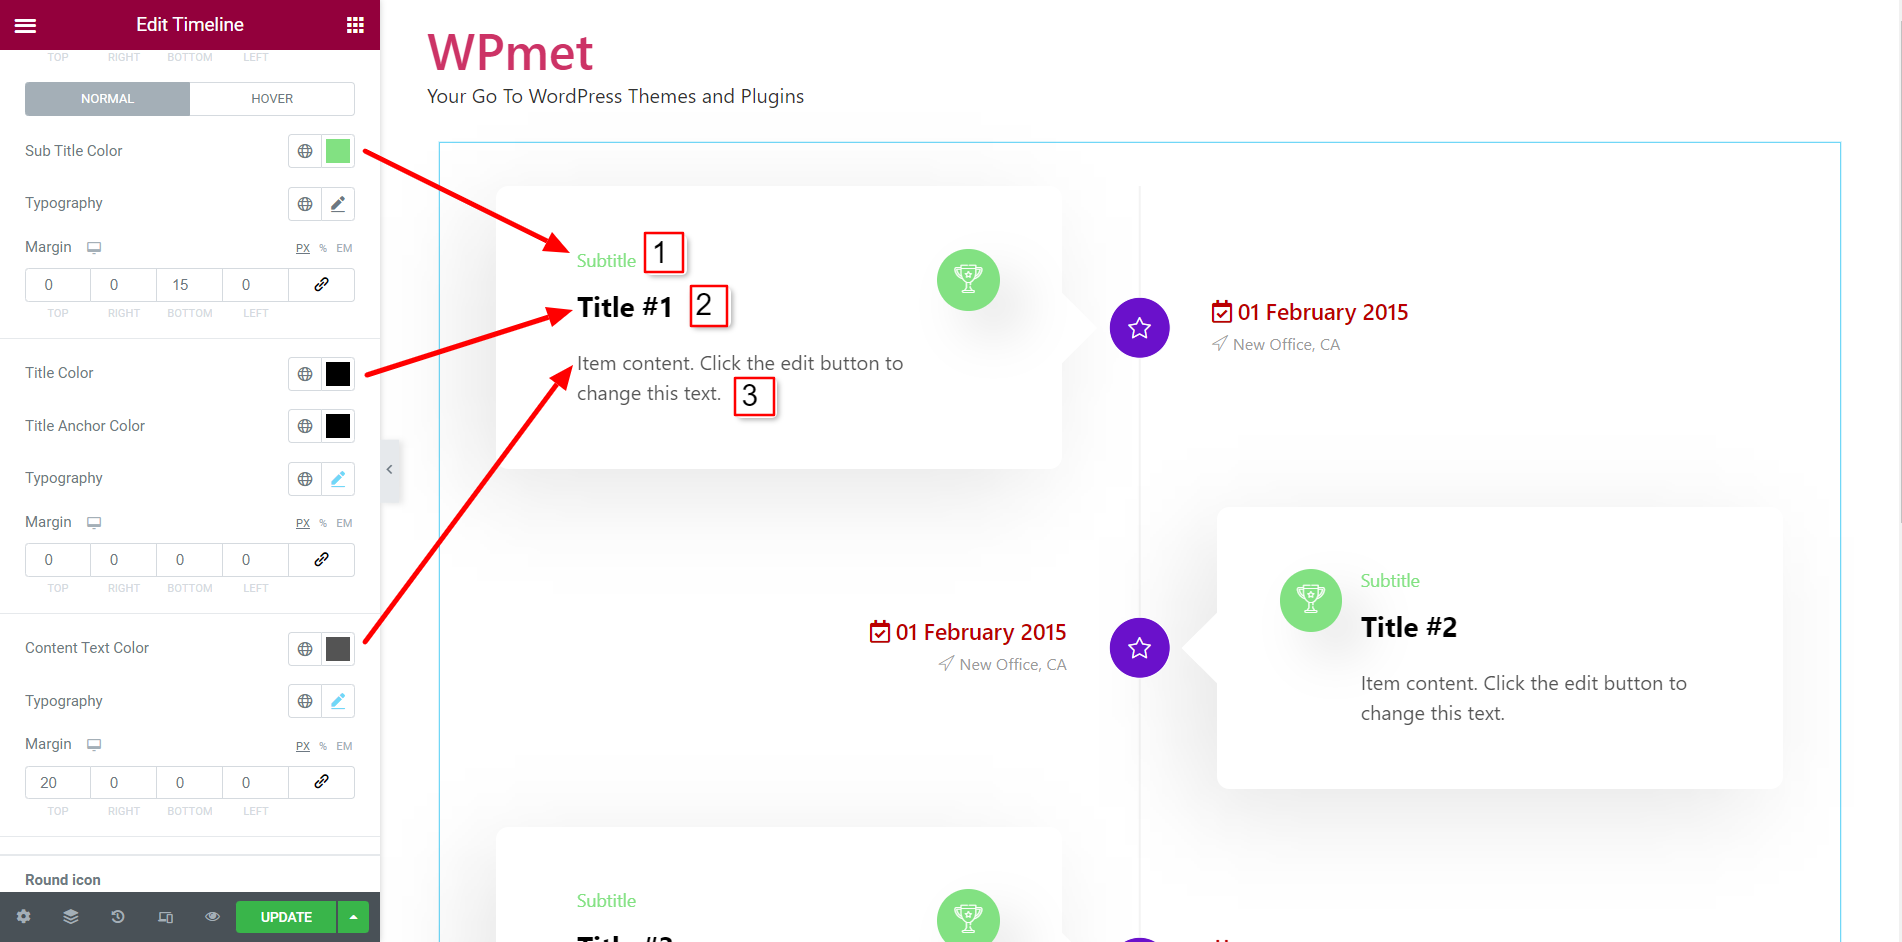
- Choose the color, typography, and margin for Sub Title.
- Choose Color, Anchor Color, Typography, and Margin for content Title.
- Select the Color, Typography, and margin for Content Text.
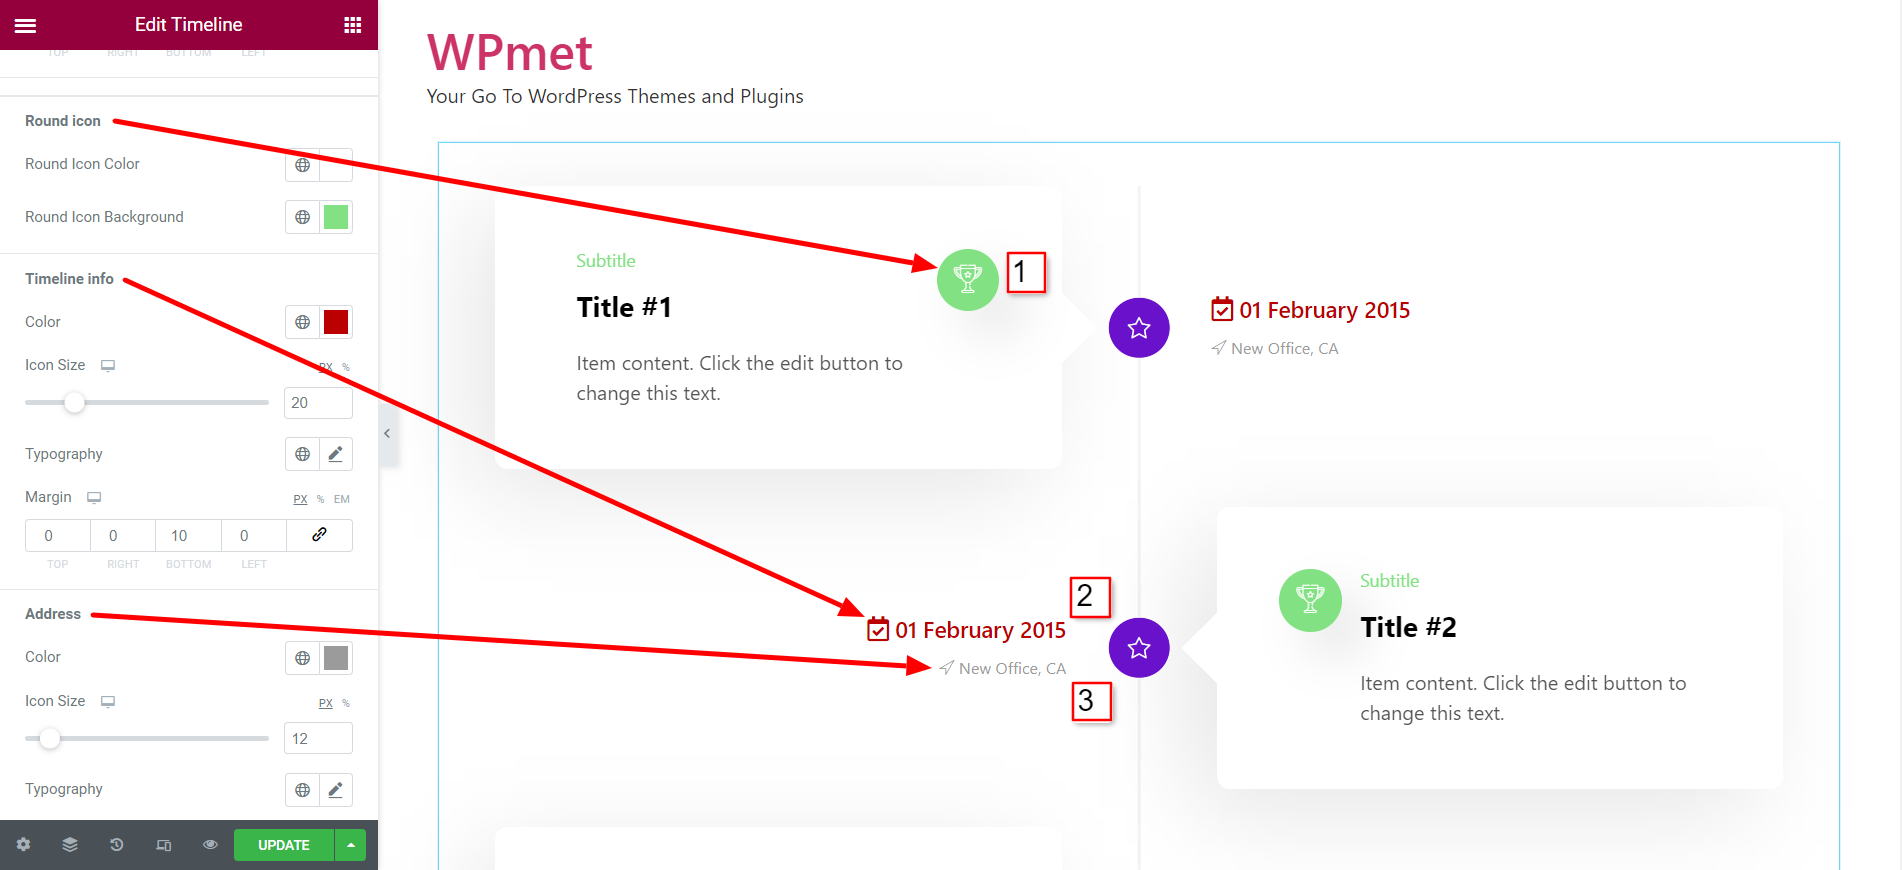
- For Round Icon, set the Icon Color and Icon Background color.
- For Timeline Info, set its Color, Typography, and Margin, and adjust the Icon Size.
- For Address, set its Color, Typography, and Margin, and adjust the Icon Size.
- Set On Hover color for Sub Title, Title, Title Anchor, Content Text, Round Icon, Round Icon Background, and Timeline Info.

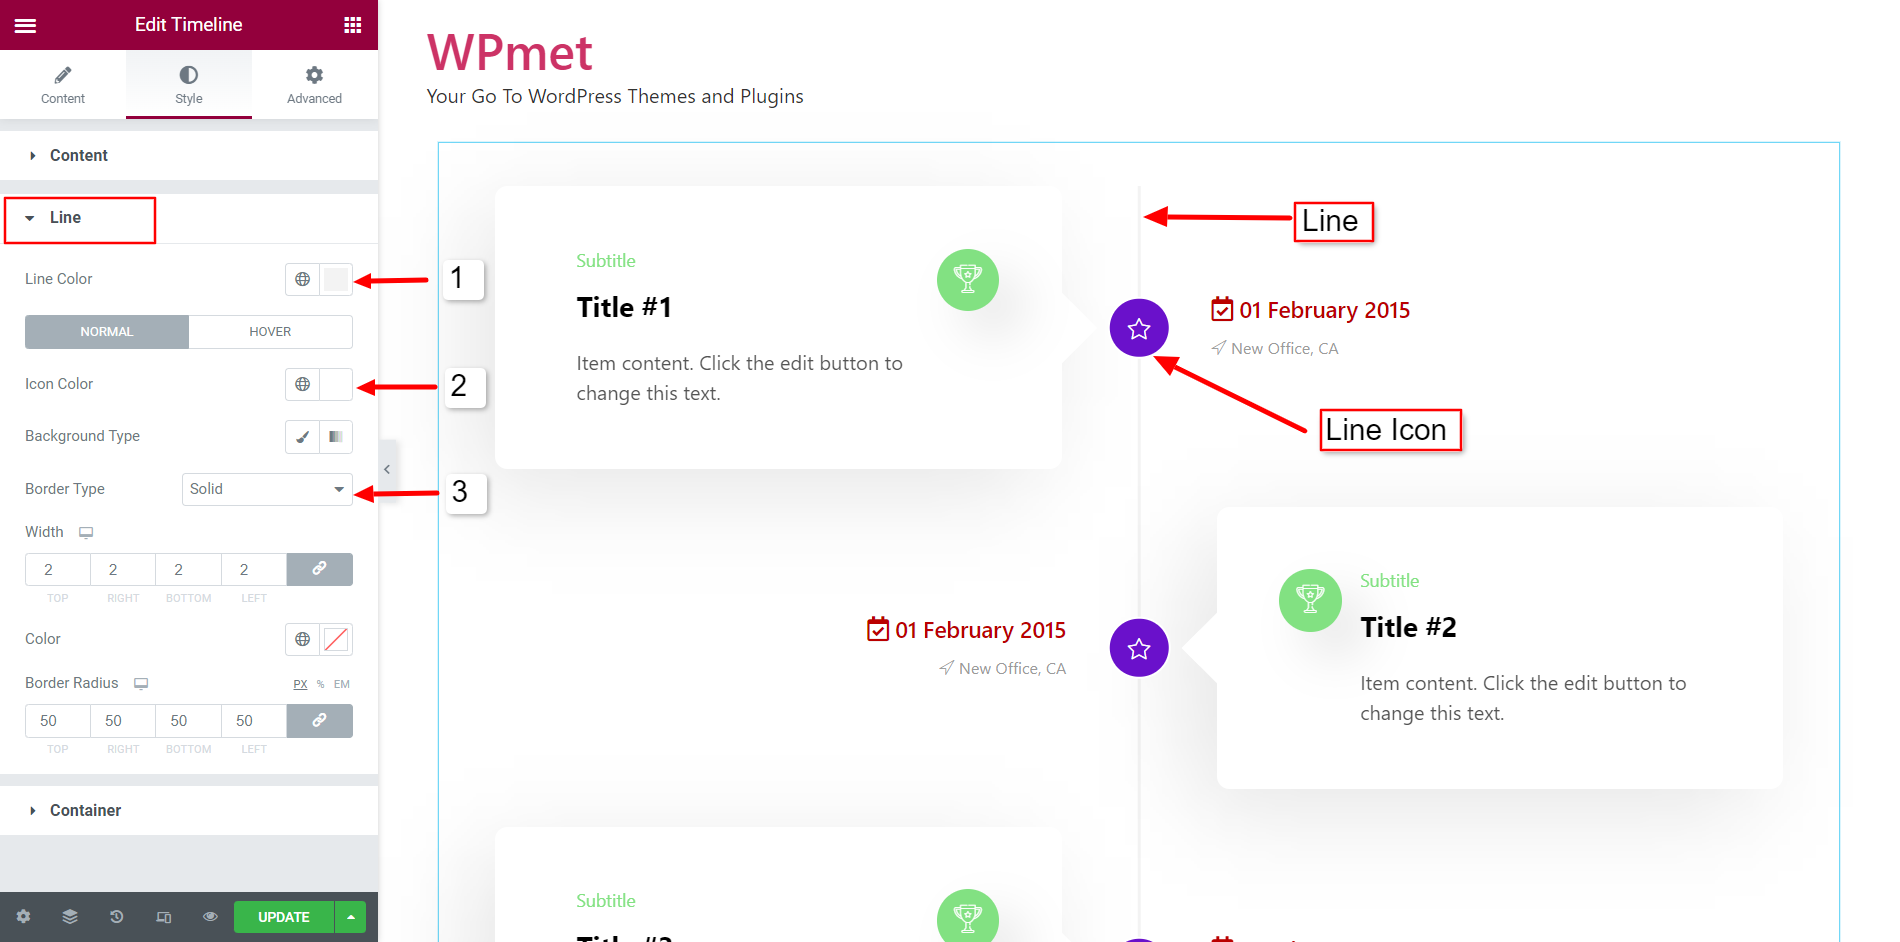
2.2 Line #
To customize the Line and Line Icon styles:
- Choose the Line Color.
- Set the line Icon Color. then Background color type, Border Type, width, color, and Border Radius for the line Icon.
- You can also set the On Hover colors for those elements.
2.3 Container #
To Customize the Container,
- Adjust the gap between Info (address and date) and Icon.
- Adjust the Item Bottom Spacing for container items.
Finally, you can now add Elementor Timeline in WordPress using the ElementsKit Timeline widget and display your content in a stylish way.


