Thank You Page #
After submitting the form with Payment whether it is Succeeded or Failed, Metform will redirect to the “Thank You Page” where User can see the payment details/status.
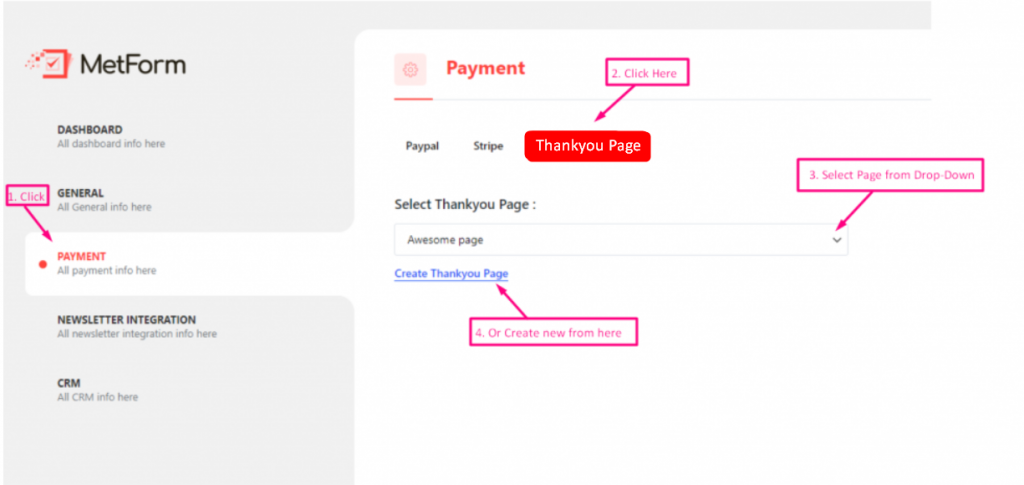
Get Started #
Go to Metform=> Settings=> Payment=>Thank You Page=> Select your page From the Drop-Down/ OR Click on Create Thank You Page to create new
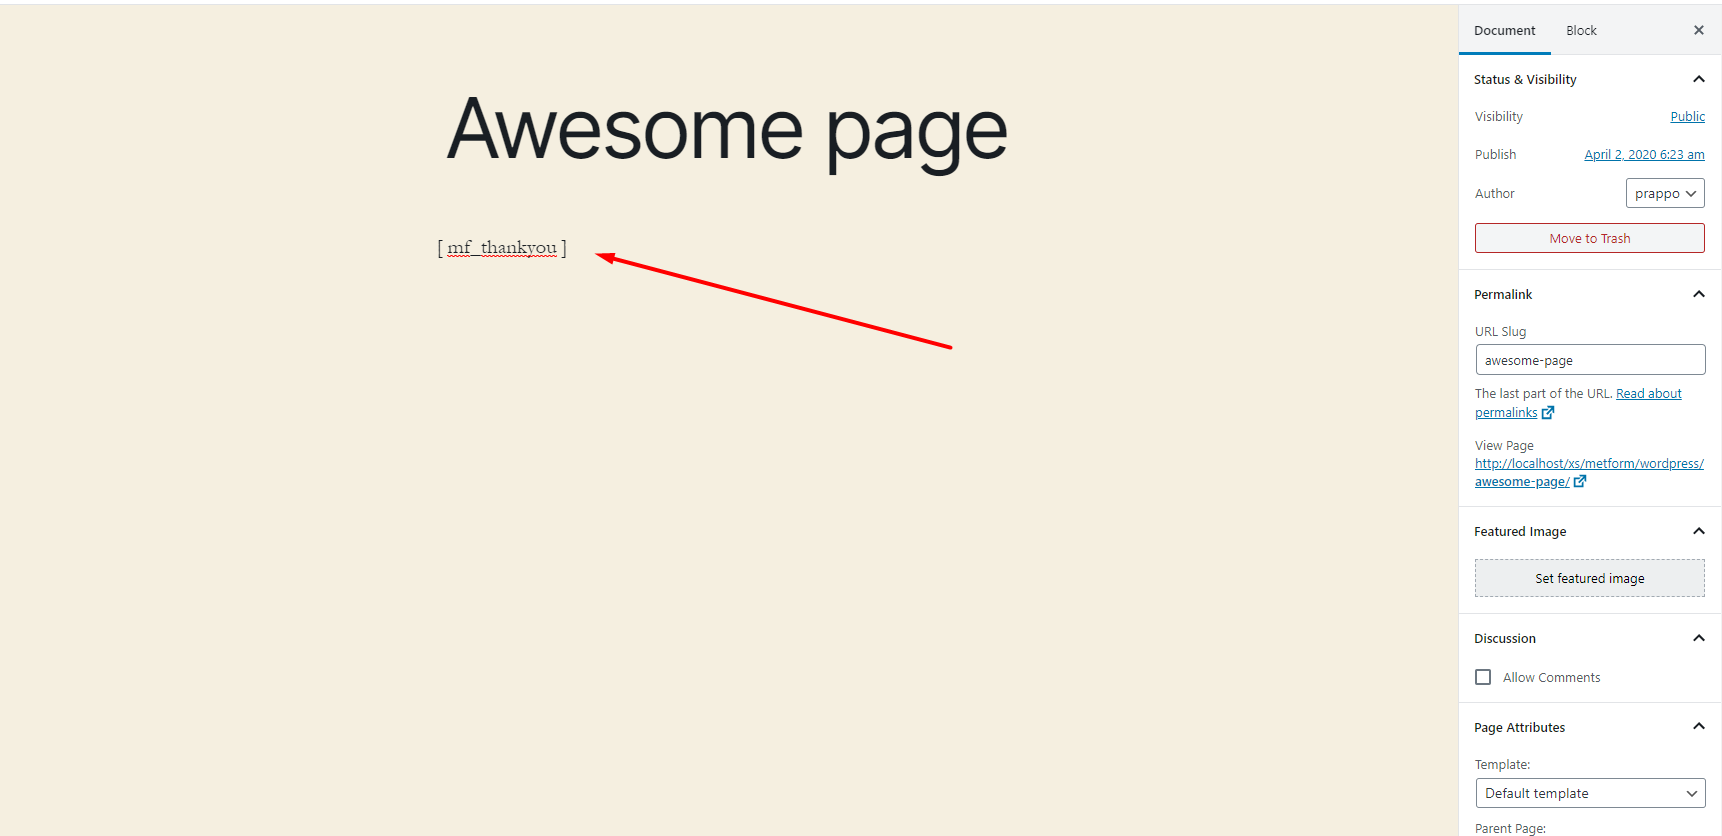
Add Short Code #
Add Short Code to the page, you have selected for WordPress Thank You page
Result #
You can see the WordPress Thank You Page After any Transaction

Advance #
- You can add more functionality to your WooCommerce thank you page. Here are some Short Codes that will make a awesome WooCommerce thank you page.
Default Thank You Message #
If you want to show name along with the Default Thank You Message then pass the fname with the field name to create a custom thank you page for WooCommerce
Example #
[mf_thankyou fname='fname_field']**Note: fname_field is the field name comes form Metform
Payment Status #
If you want to show the Payment Status then you can use the this shortcode
Example #
[mf_payment_status]Transaction Id #
If you want to show a transaction ID then you can use this shortcode.
Example #
[mf_transaction_id]Show Field Data / Value #
If you want to show any field data / value from the form then follow this shortcode
Example #
[mf field='fname']fnameis the field name of the form
.png?alt=media&token=d9a72de8-bf58-455b-b93f-6e018b36215e)


