With Metform, you can create a calculated form in WordPress for your Elementor page. MetForm’s input fields can be converted into WordPress calculated fields form.
Get Started #
Perform calculations on Form Fields to display automatic calculated value with MetForm. You can perform any kind of calculation on form field with MetForm.
Watch out the video guide
Or, follow the step by step process below to create a calculated form in WordPress:
How to create a calculated form in WordPress using MetForm #
Let’s have a look how you can use MetForm as your Elementor form calculator. You can turn MetForm’s input fileds to WordPress calculated fields form using the steps below:
Step 1: Create a Form using MetForm #
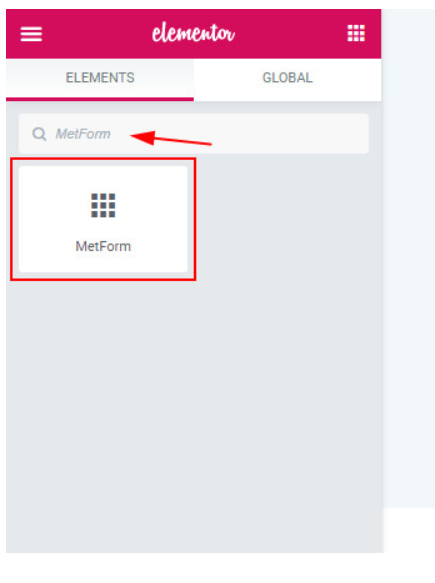
Take a new page or post and start to edit with Elementor. Then, search the Metform widget and drag it to the widget placement area.
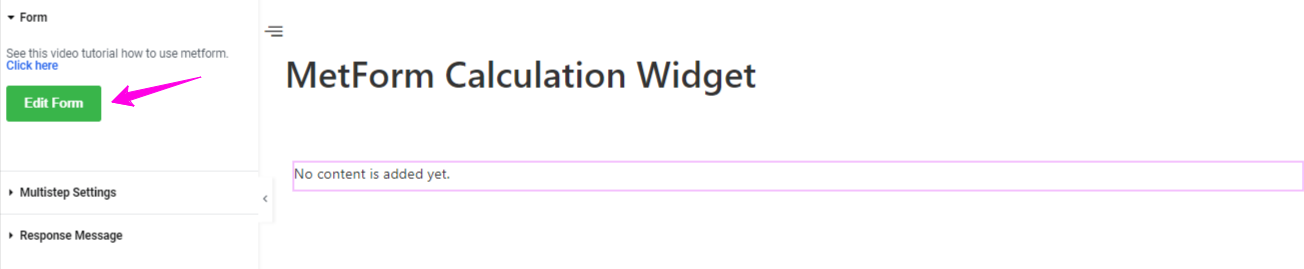
Now come under, the Content Tab of widget settings and follow Forms > Edit Forom.
You will see a popup like the image below, here choose to create a new form. Then enter a name for the form and select the blank form.
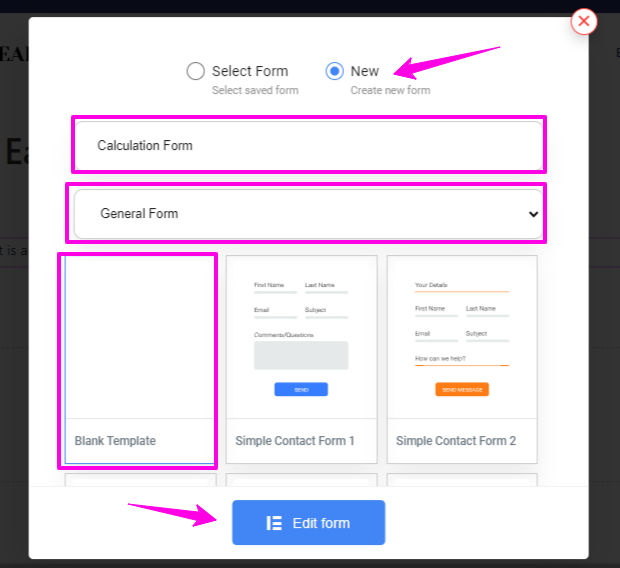
And, hit the Edit Form button. Doing this will open up a form editor screen.
Step 2: Set up WordPress calculated fields form #
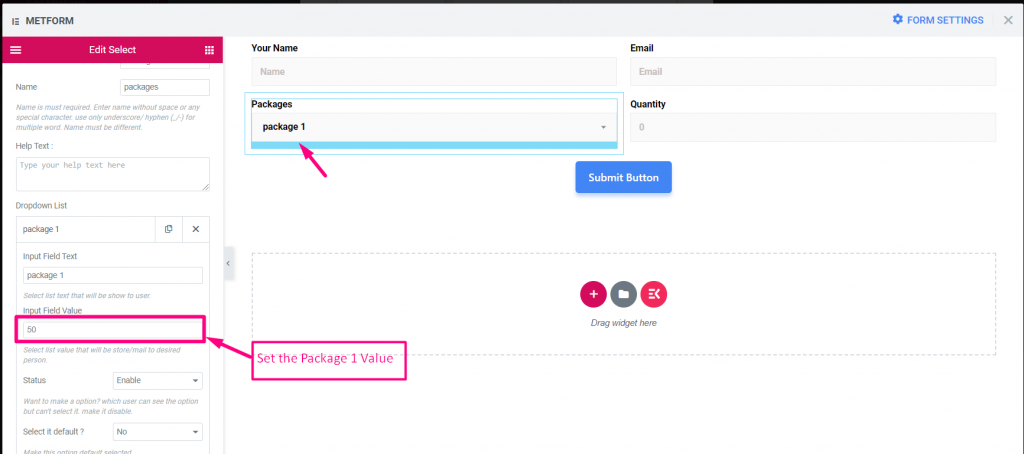
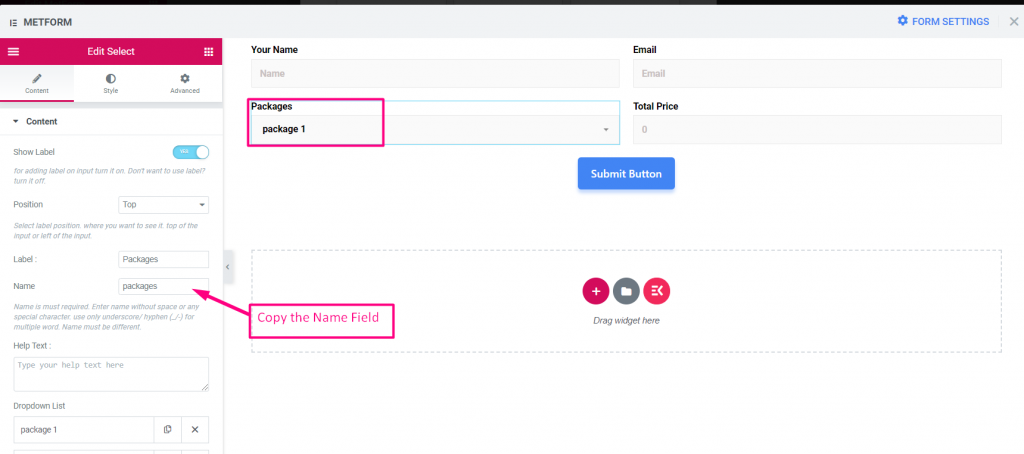
All MetForm widgets help you customize the calculator form in your preferred way. Our example in this tutorial shows the calculation process between packages and quantities. For this workaround, you also need to insert a Select and Number widget.
Set the Package 1 Value: 50
Copy the Packages field Name
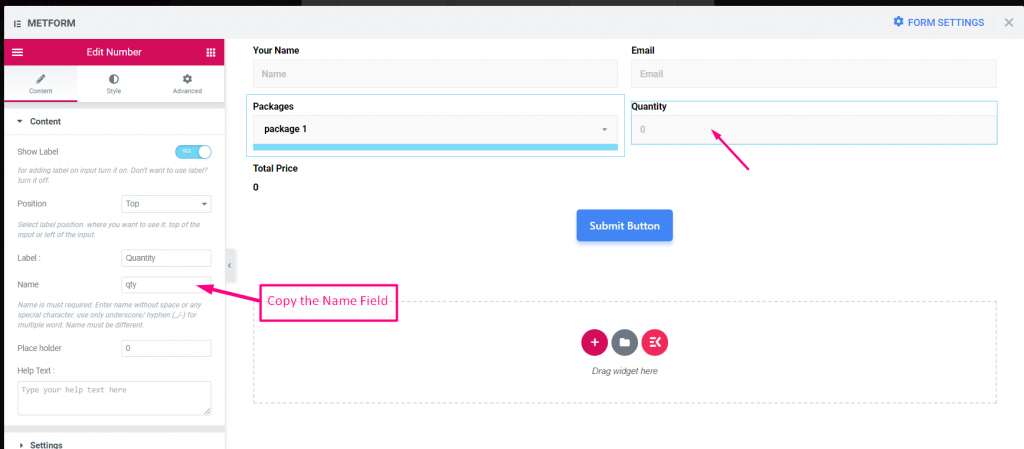
Copy the Quantity field Name
Step 3: Set up Multiplication #
Multiplication is when you take one number and add it together a number of times.
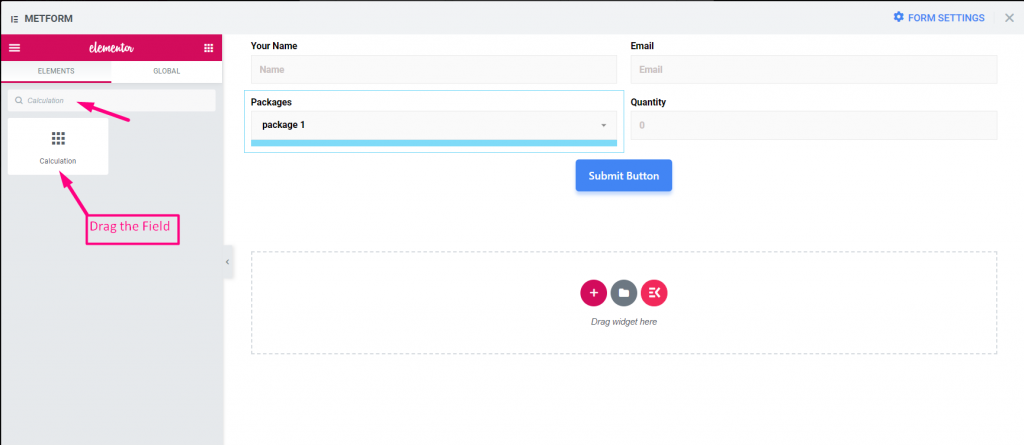
Search for Calculation Field=> Drag and Drop Under the Package Field
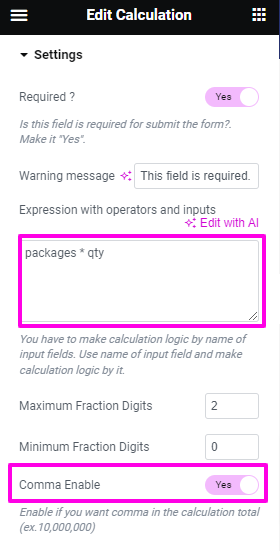
Edit Calculation=> Settings=> Provide the Expression
- Paste the Packages Field Name and Quantity field name with operators: packages * qty
- Also, activate the toggle button next to the “Comma Enable” option if you want to show a comma-separated value.
Site View
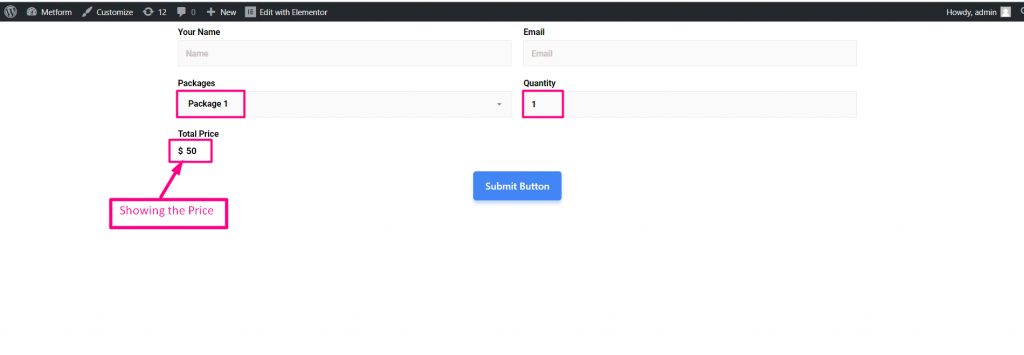
Select Package 1=> Set the Quantity Value: 1
- Showing the price: $50
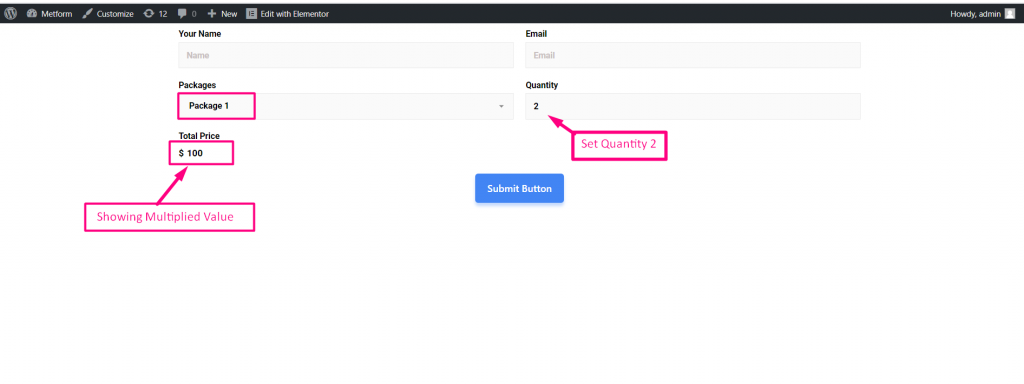
Now set the Quantity Value: 2
- Showing the price: $100
Step 4: Perform Addition #
Addition is a process or action of adding something to something else.
- Edit Calculation=> Settings=> Paste the Packages Field Name and Quantity field name
- Provide Addition expression. For Ex : packages + qty

Site View
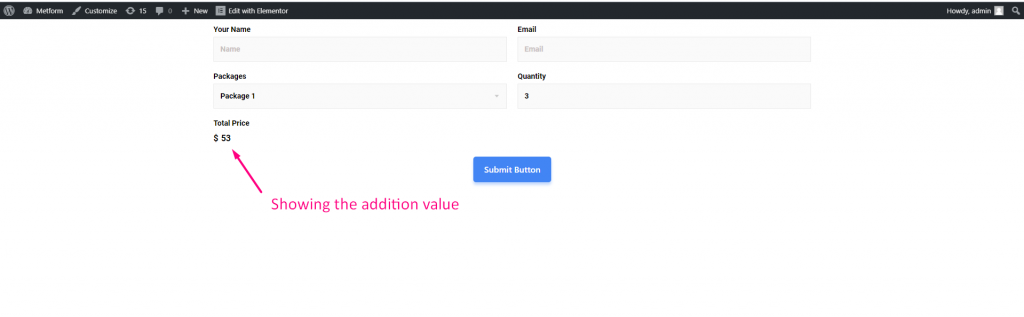
Select Package 1=> Set the Quantity Value: 3
Showing the addition price: $53
Step 5: Add subtraction #
It is the operation of removing objects from a collection signified by the minus sign.
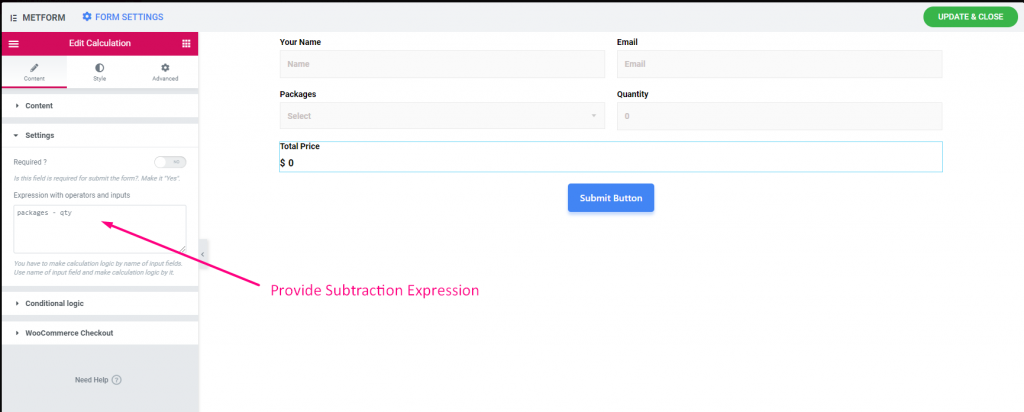
- Edit Calculation=> Settings=> Paste the Packages Field Name and Quantity field name
- Provide Subtraction expression. For Ex : packages – qty
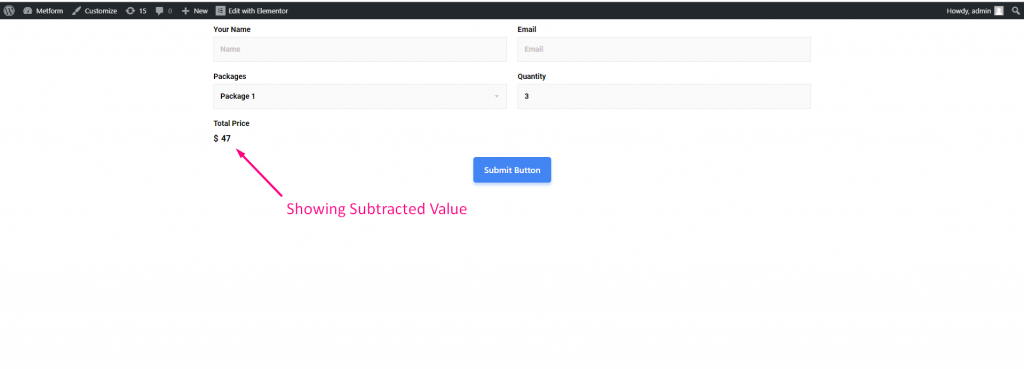
Site View
Select Package 1=> Set the Quantity Value: 3
Showing the Subtracted price: $47
Step 6: Add Division #
Perform Division: A number that divides another number either completely or with a remainder
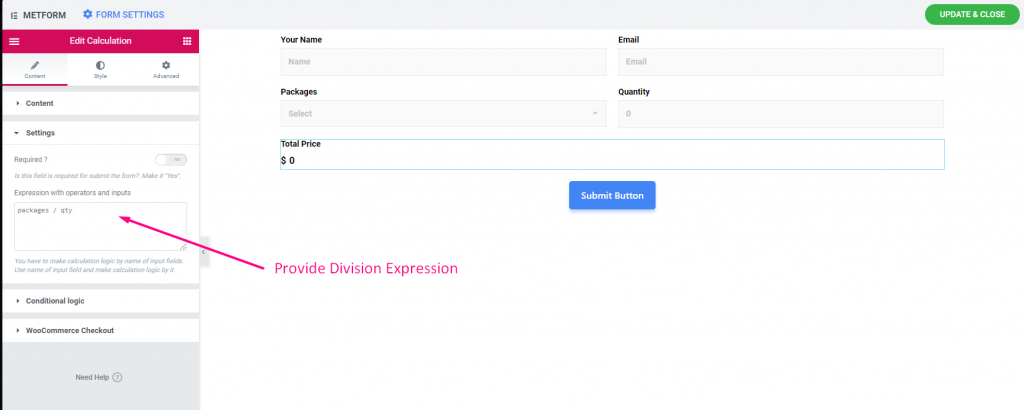
- 1. Edit Calculation=> Settings=> Paste the Packages Field Name and Quantity field name
- 2: Provide Division expression. For Ex : packages / qty
Site View
1: Select Package 1=> Set the Quantity Value: 3
- Showing the Divided price: $16.666666666666668

Step 7: Show float value #
A float is a number, that has a decimal place.
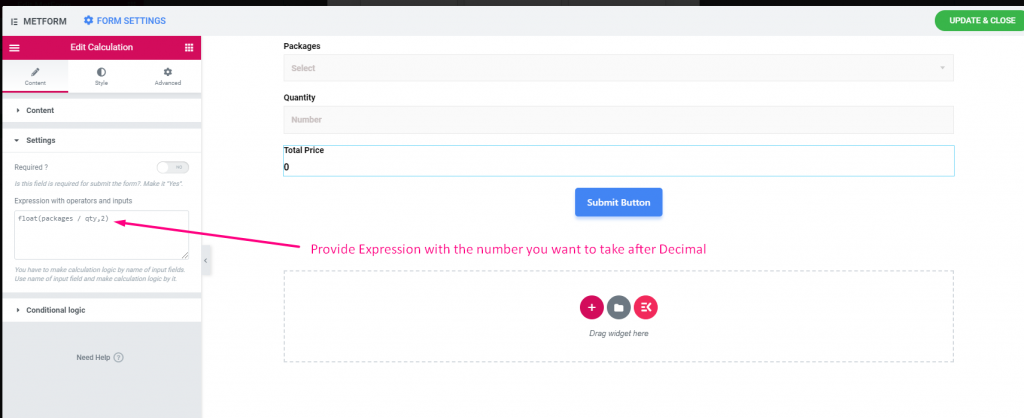
- Edit Calculation=> Settings=>Paste the Packages Field Name and Quantity field name
- Set the number after comma that you want to take after Decimal point.
- Provide the Floating Point Expression. For Ex : float(packages / qty,2). Here you will get 2 decimal places as you have set value 2.
Site View
1: Select Package 1=> Set the Quantity Value: 3
- Showing the floating price with 2 number of input after Decimal point : 16.67

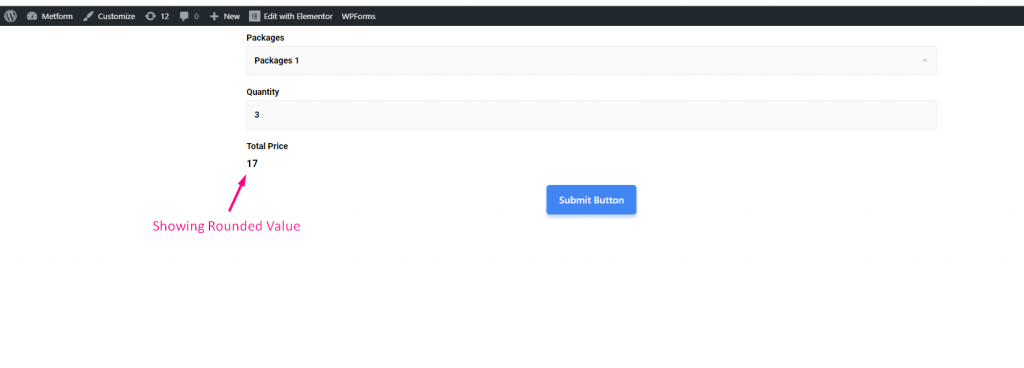
Step 8: Show rounded value #
A number that keeping its value close to what it was.
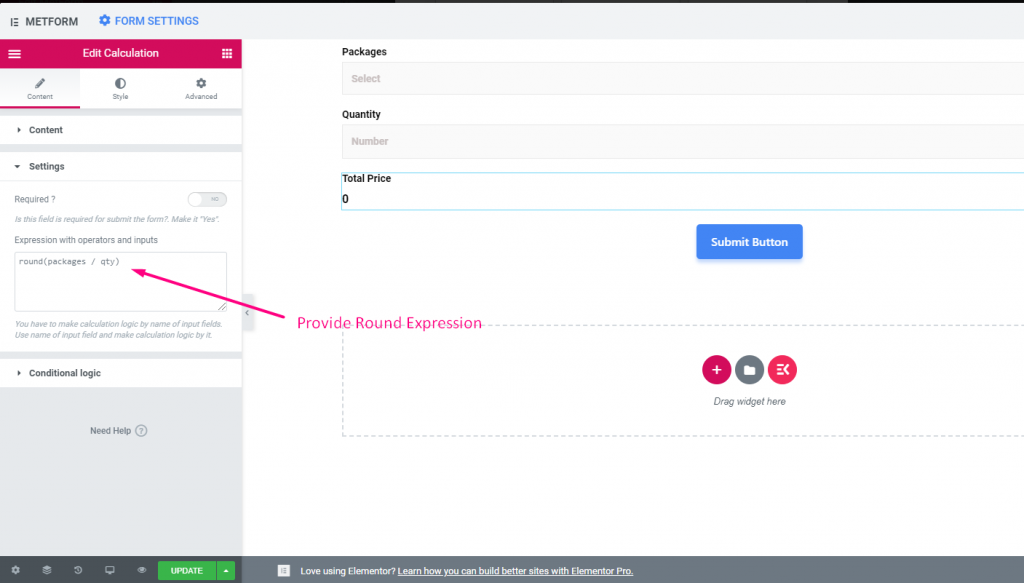
- 1: Edit Calculation=> Settings=> Paste the Packages Field Name and Quantity field name
- 2: Provide round expression. For Ex : round(packages / qty)
Site View
1: Select Package 1=> Set the Quantity Value: 3
- Showing the rounded price: 17
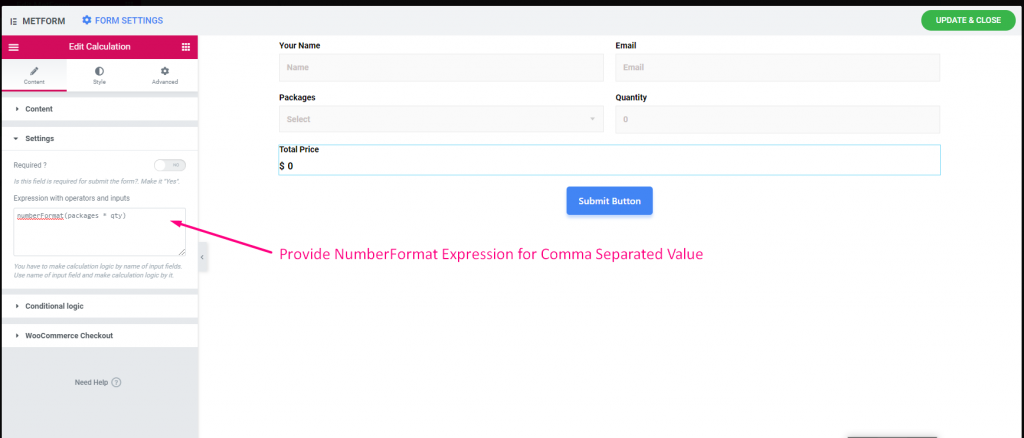
Step 9: Show Number Format Value #
NumberFormat allows you to show comma separated value.
- 1: Edit Calculation=> Settings=> Paste the Packages Field Name and Quantity field name
- 2: Provide NumberFormat Expression. For Ex : numberFormat(packages * qty)
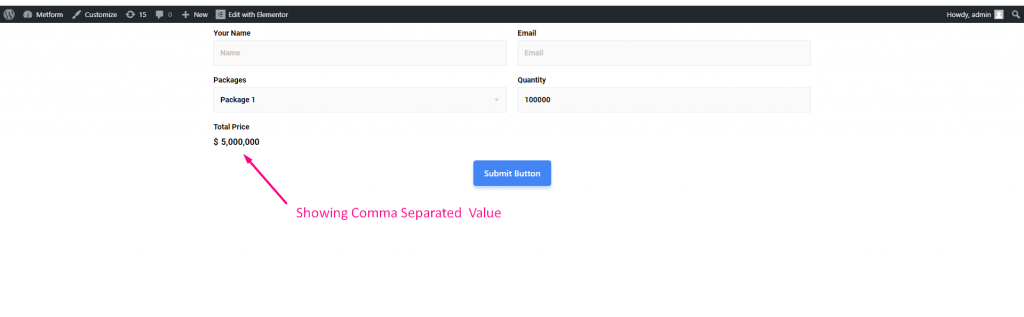
Site View
1: Select Package 1=> Now set the Quantity Value : 100000
- Showing the comma separated values : $5,000,000
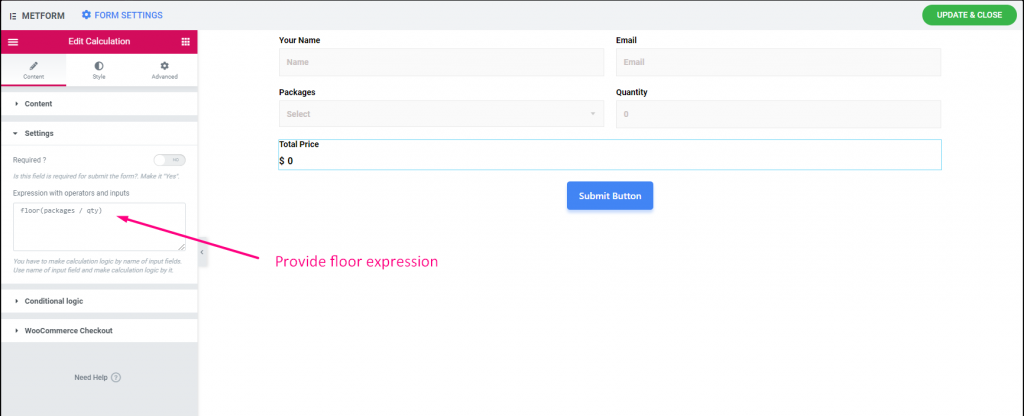
Step 10: Show Floor value #
Floor values allows you to return the closest integer less than or equal to a given number.
- Edit Calculation=> Settings=> Paste the Packages Field Name and Quantity field name
- Provide Floor Expression. For Ex : floor(packages / qty)
Site View
1: Select Package 1=> Set the Quantity Value: 3
- Showing the floor price: 16

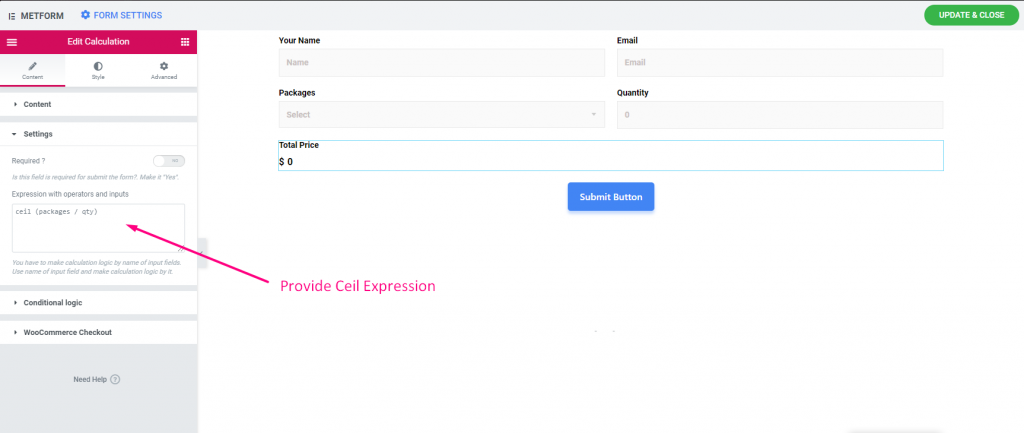
Step 11: Show Ceil Value #
Show Ceil Value: Ceil values allows you to return the closest integer grater than or equal to a given number.
- 1: Edit Calculation=> Settings=> Paste the Packages Field Name and Quantity field name
- 2: Provide Ceil Expression. For Ex : ceil (packages / qty)
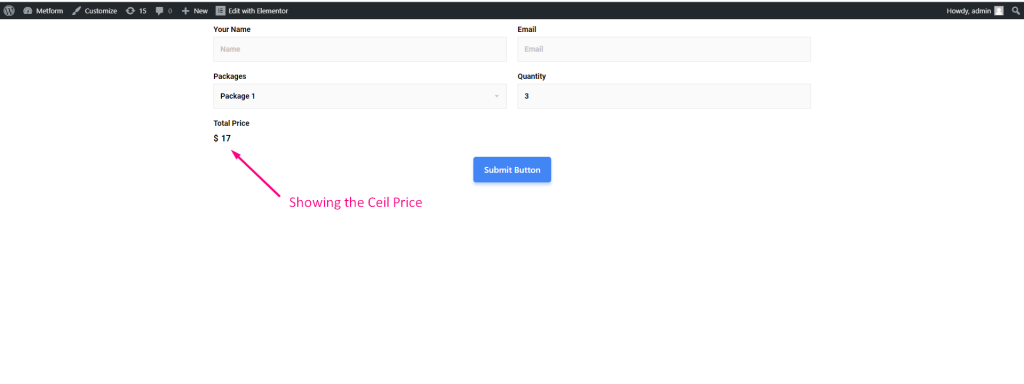
Site View
1: Select Package 1=> Set the Quantity Value: 3
- Showing the Ceil price: 17
- Here is All the Operation with Expression Example
| Operation | Expression |
|---|---|
| Multiplication | packages * qty |
| Addition | packages + qty |
| Subtraction | packages – qty |
| Division | packages / qty |
| Float | float(packages / qty,2) |
| Round | round(packages / qty) |
| NumberFormat | numberFormat(packages * qty) |
| Floor | floor(packages / qty) |
| Ceil | ceil (packages / qty) |
- Options Description
| Options | Description |
|---|---|
| Show Label | Turn on/off Label. |
| Position | Default: Top Select the label position. where you want to see it. top or left of the input. |
| Label | Type the label text. |
| Name | Name is must required. Enter a name without space or any special character. use only underscore/hyphen (_/-) for multiple words. The name must be different. |
| Help Text | Type the text to show below the widget. |
| Prefix | You can also provide operator in the expression before the operands. Example : *+AB-CD (Infix : (A+B) * (C-D) ) |
| Required | Default: No Toggle this option to make it required. Users can’t submit the forms without filling the required fields. |
| Expression with operators and inputs | You have to make calculation logic by name of input fields. Use name of input field and make calculation logic by it. For example mf-number_2 * mf-number_3. It will show calculated value 6 in the calculation field. |
| Maximum/ Minimum Fraction Digits | Define the maximum and minimum number of digits after the decimal separator. |
| Comma EnableComma Enable | Turn on this toggle button to show a comma-separated value. |
| Conditional Logic | Show/Hide this field based on certain criteria. |
| WooCommerce Checkout | Activating it will let you integrate the calculation form with the checkout or cart page. Add the checkout or cart page link in the “Redirect Box” under the form settings. |
This is how you can create calculated form fields with MetForm in Elementor easily without any hassle. So, why delay? Create WordPress calculated fields form in Elementor with MetForm.


