HubSpot integration ensures seamless customer relationship management by efficiently managing the contacts of your customers. Because of MetForm’s HubSpot integration, you don’t need to worry about losing forms that are submitted by your clients or visitors. All contact information of your customers will be stored on your HubSpot account that you can use in the future.
Attention:
We had API based connection before. If you have API based connection with HubSpot, then reconnect your HubSpot account to your site by following the below process using OAuth 2.0.
Get Started #
Submit user data apparently connecting popular CRM services like Hubspot. Here you will get step by step process of how you can connect Hubspot with Metform.
You can easily find the HubSpot MetForm App on the marketplace and click Install App from there or follow the bellow process.
Connect HubSpot with MetForm #
MetForm HubSpot integration is enabled using OAuth 2.0. All you need to do is signup or sign in to HubSpot from the MetForm dashboard. This will automatically integrate your HubSpot account with MetForm. This process is secured and an official MetForm app on HubSpot marketplace uses OAuth 2.0 to integrate.
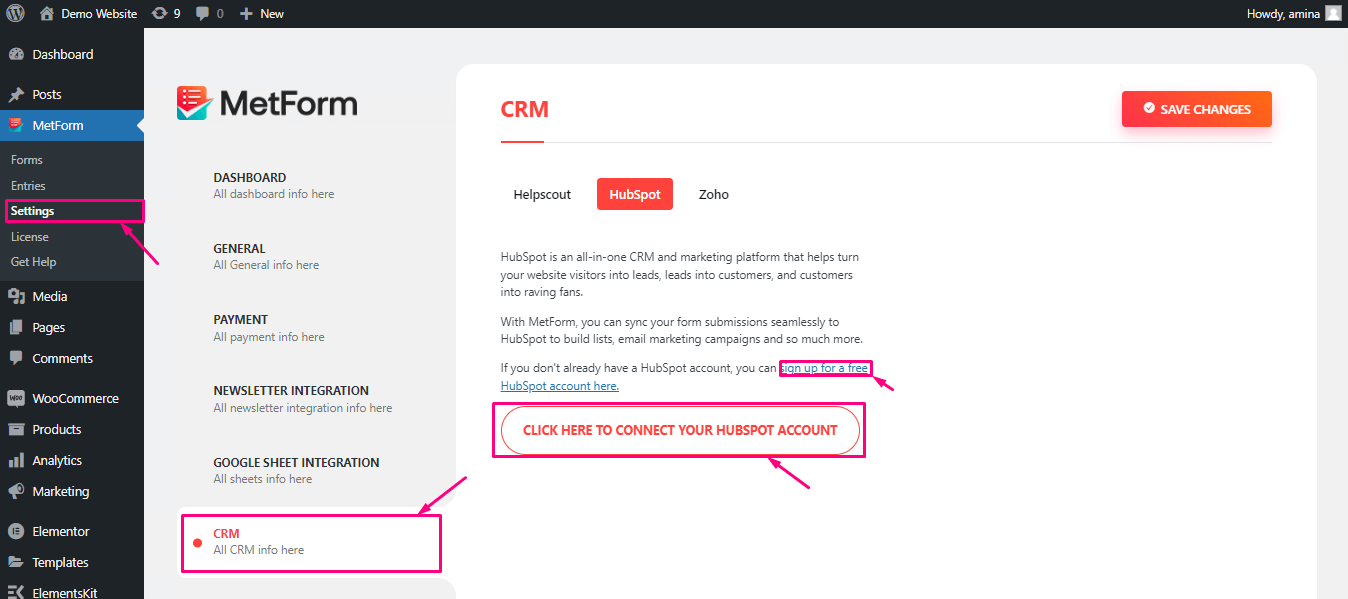
Now to connect with HubSpot, press “Settings” that you will find under MetForm. After that, go to CRM>> HubSpot, then press the “Click Here To Connect Your HubSpot Account” button.
If you don’t have a HubSpot account, you can sign up for a free HubSpot account here.
It will redirect you to the HubSpot sing in page from where you can sign in or also sign up.
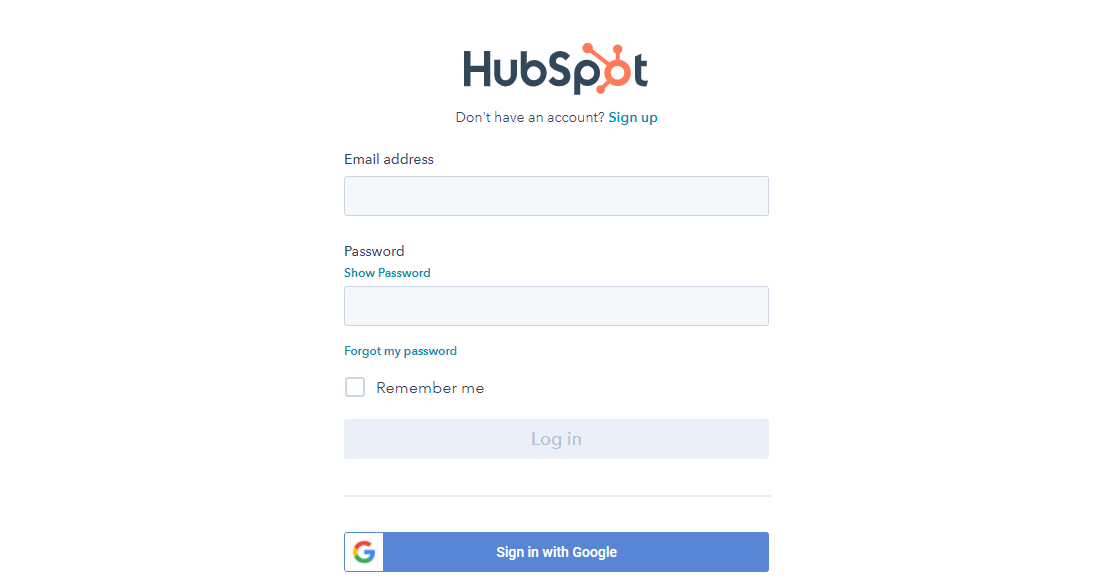
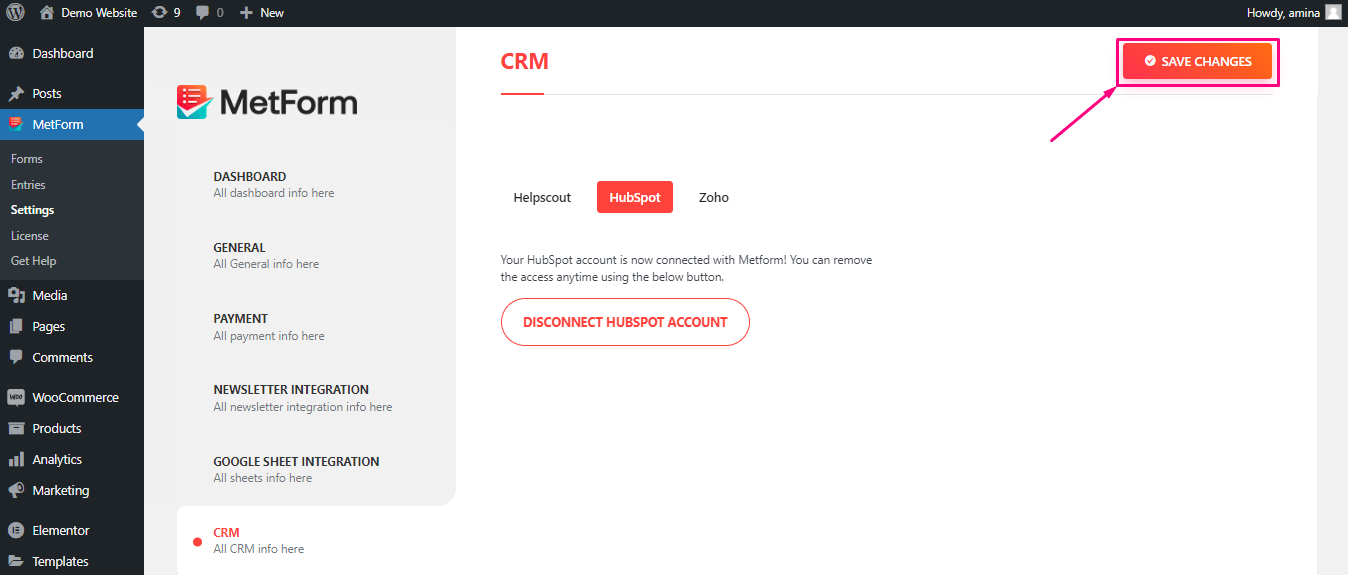
After signing up or signing in, your HubSpot account will automatically get connected to MetForm using OAuth 2.0. Finally, click on the “Save Changes” button.
Attention:
We had API based connection before. If you have API based connection with HubSpot, then reconnect your HubSpot account to your site by following the above process using OAuth 2.0.
Create Hubspot Form #
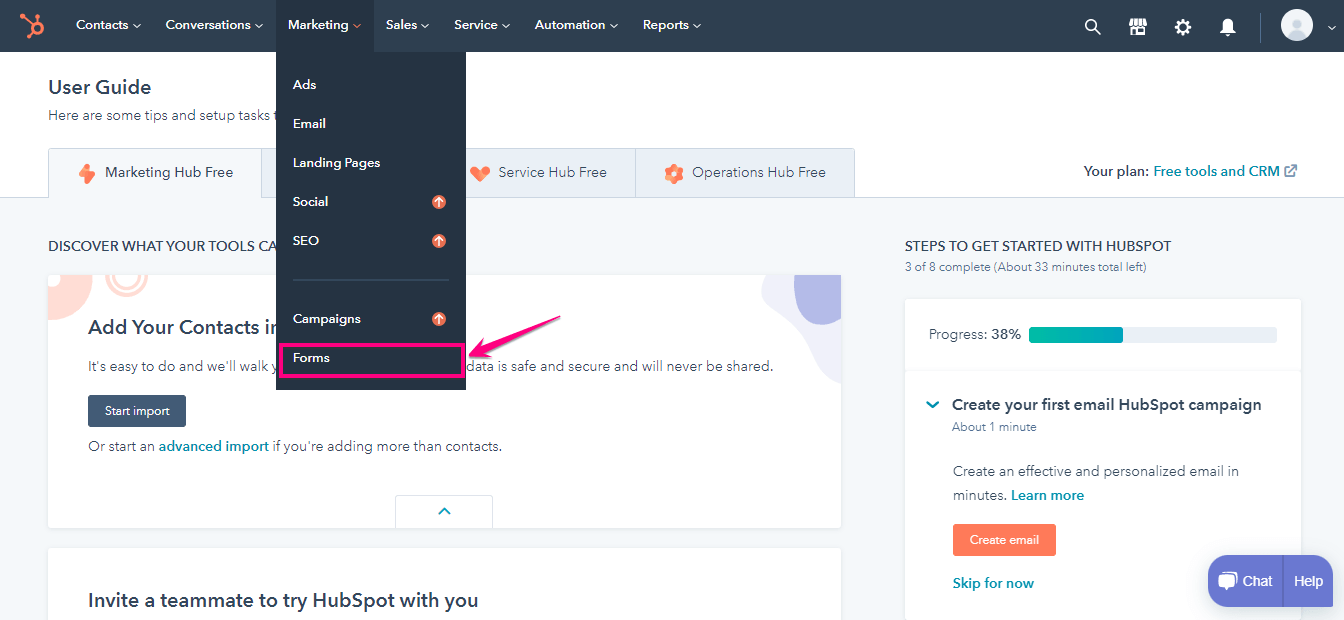
- Go to Hubspot=> Marketing=> Click on Forms
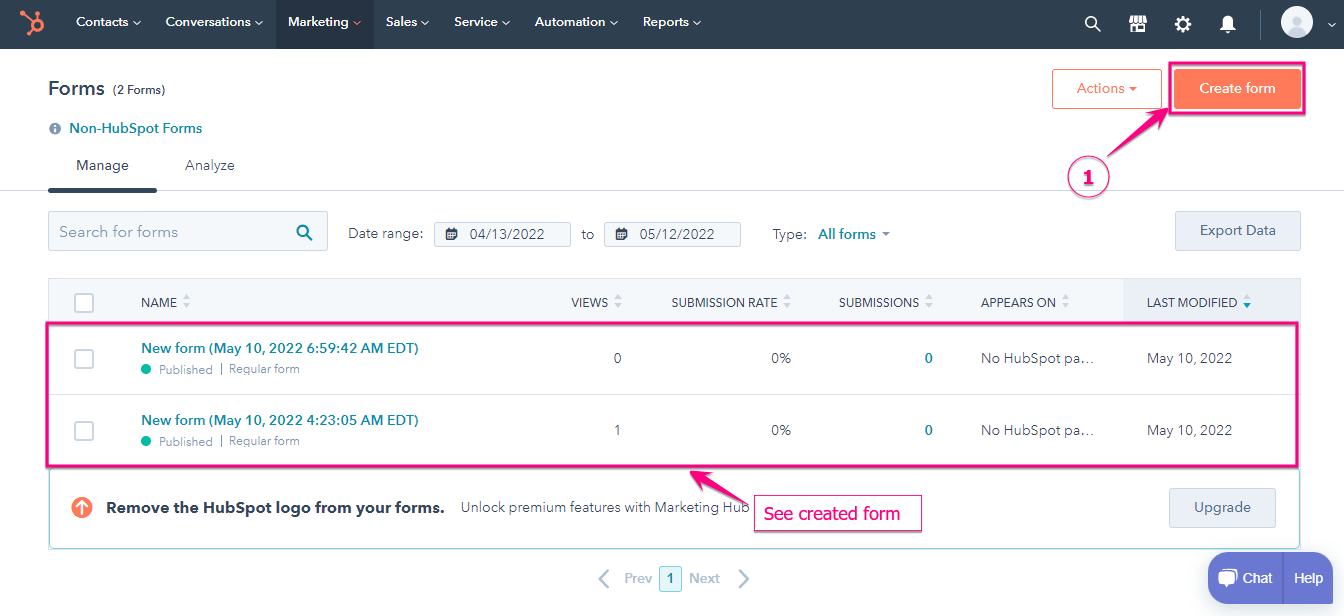
2. Click on Create Form=> Created form Appeared
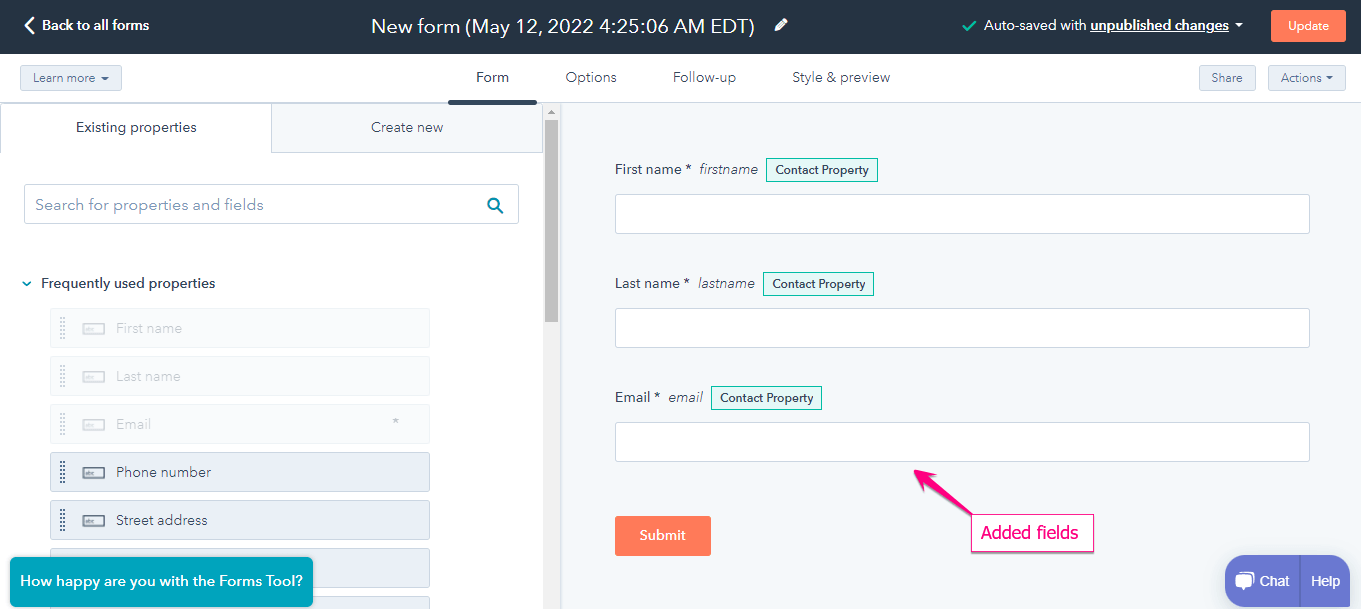
- Showing the Hubspot Created Form Fields: Email, Firstname, Lastname
Create a New Form #
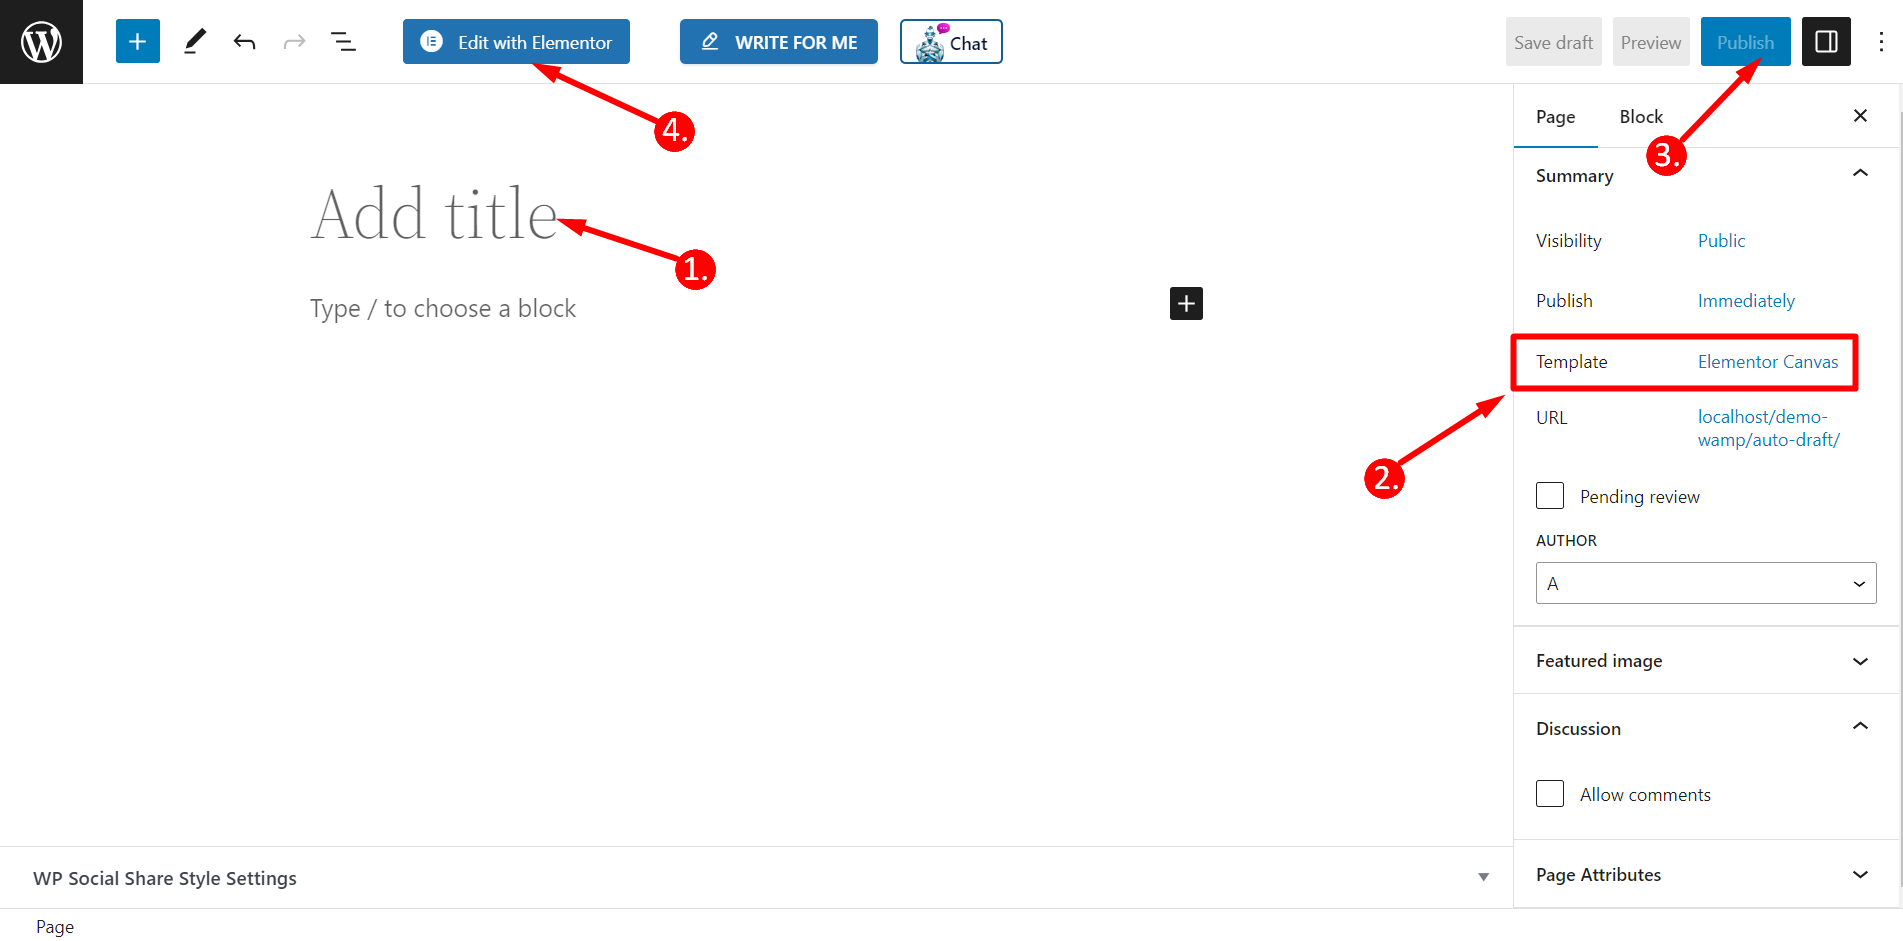
Step=>1: Go to Dashboard=> Pages=> Add new=>
- Add Page Title
- Select Template Elementor Canvas
- Click on Publish
- Edit with Elementor
- Step=>2: Search For Metform and drag and drop MetForm to the plus icon.

- Step=>3: Click the “Edit Form” button.
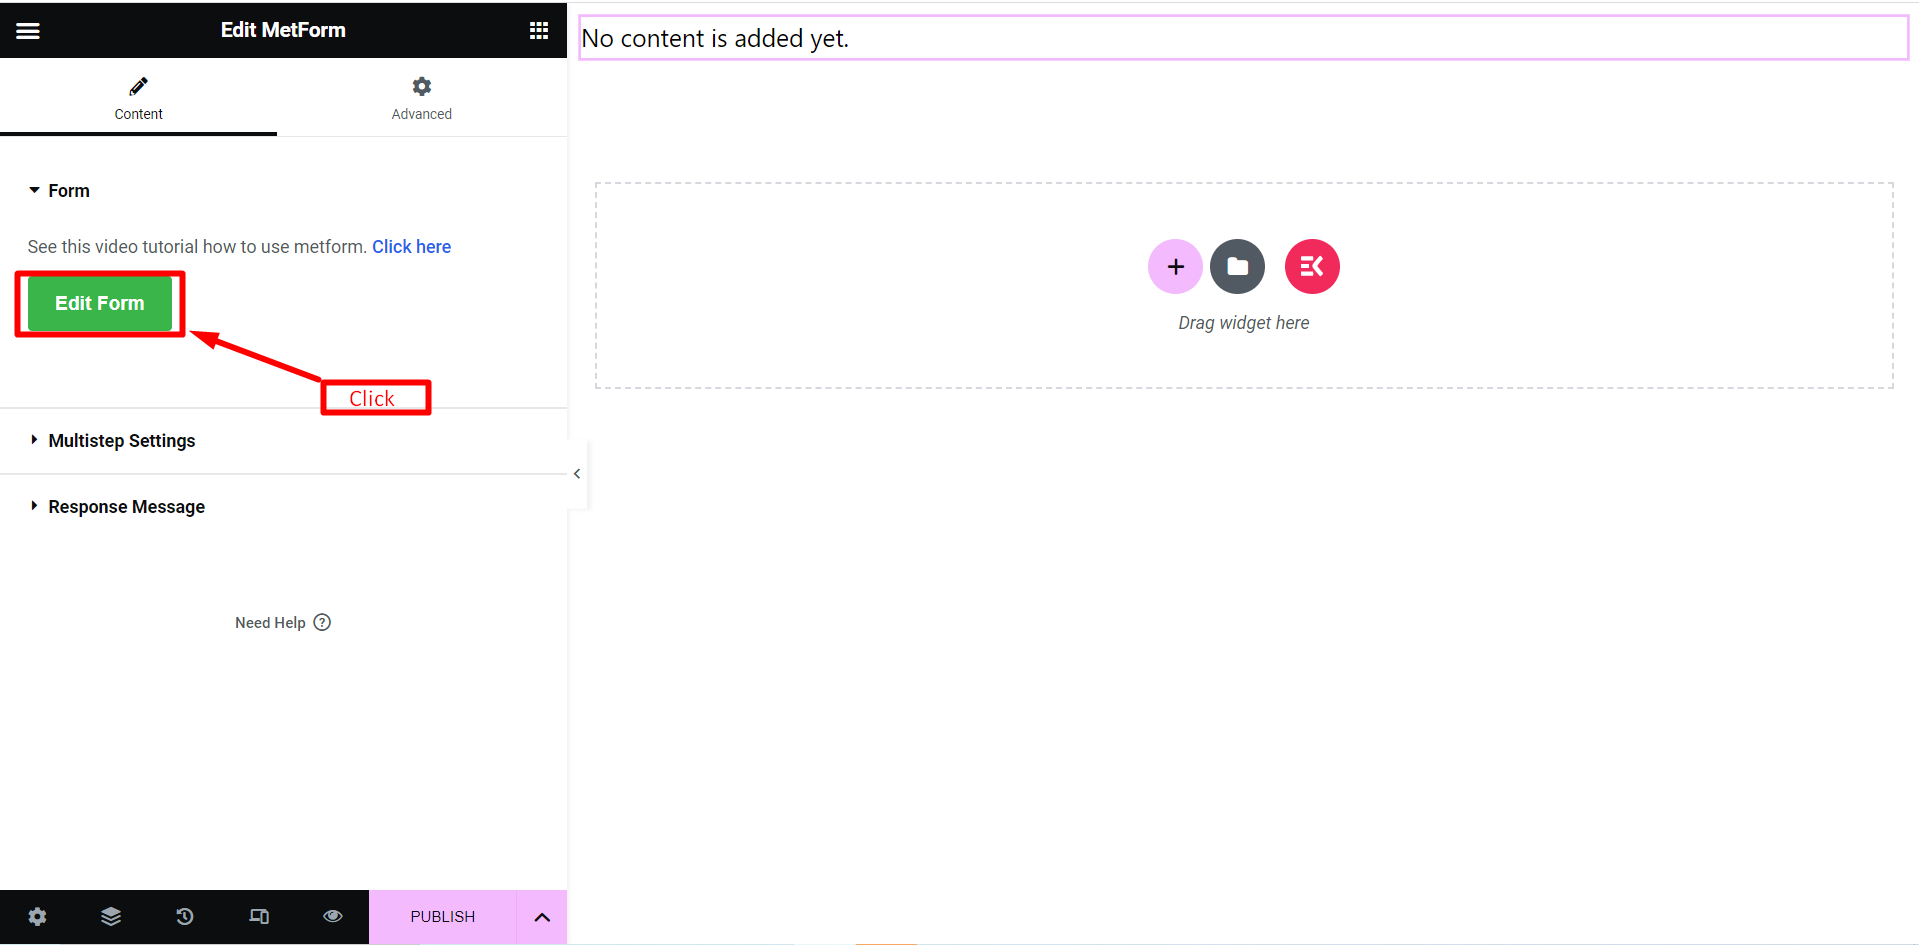
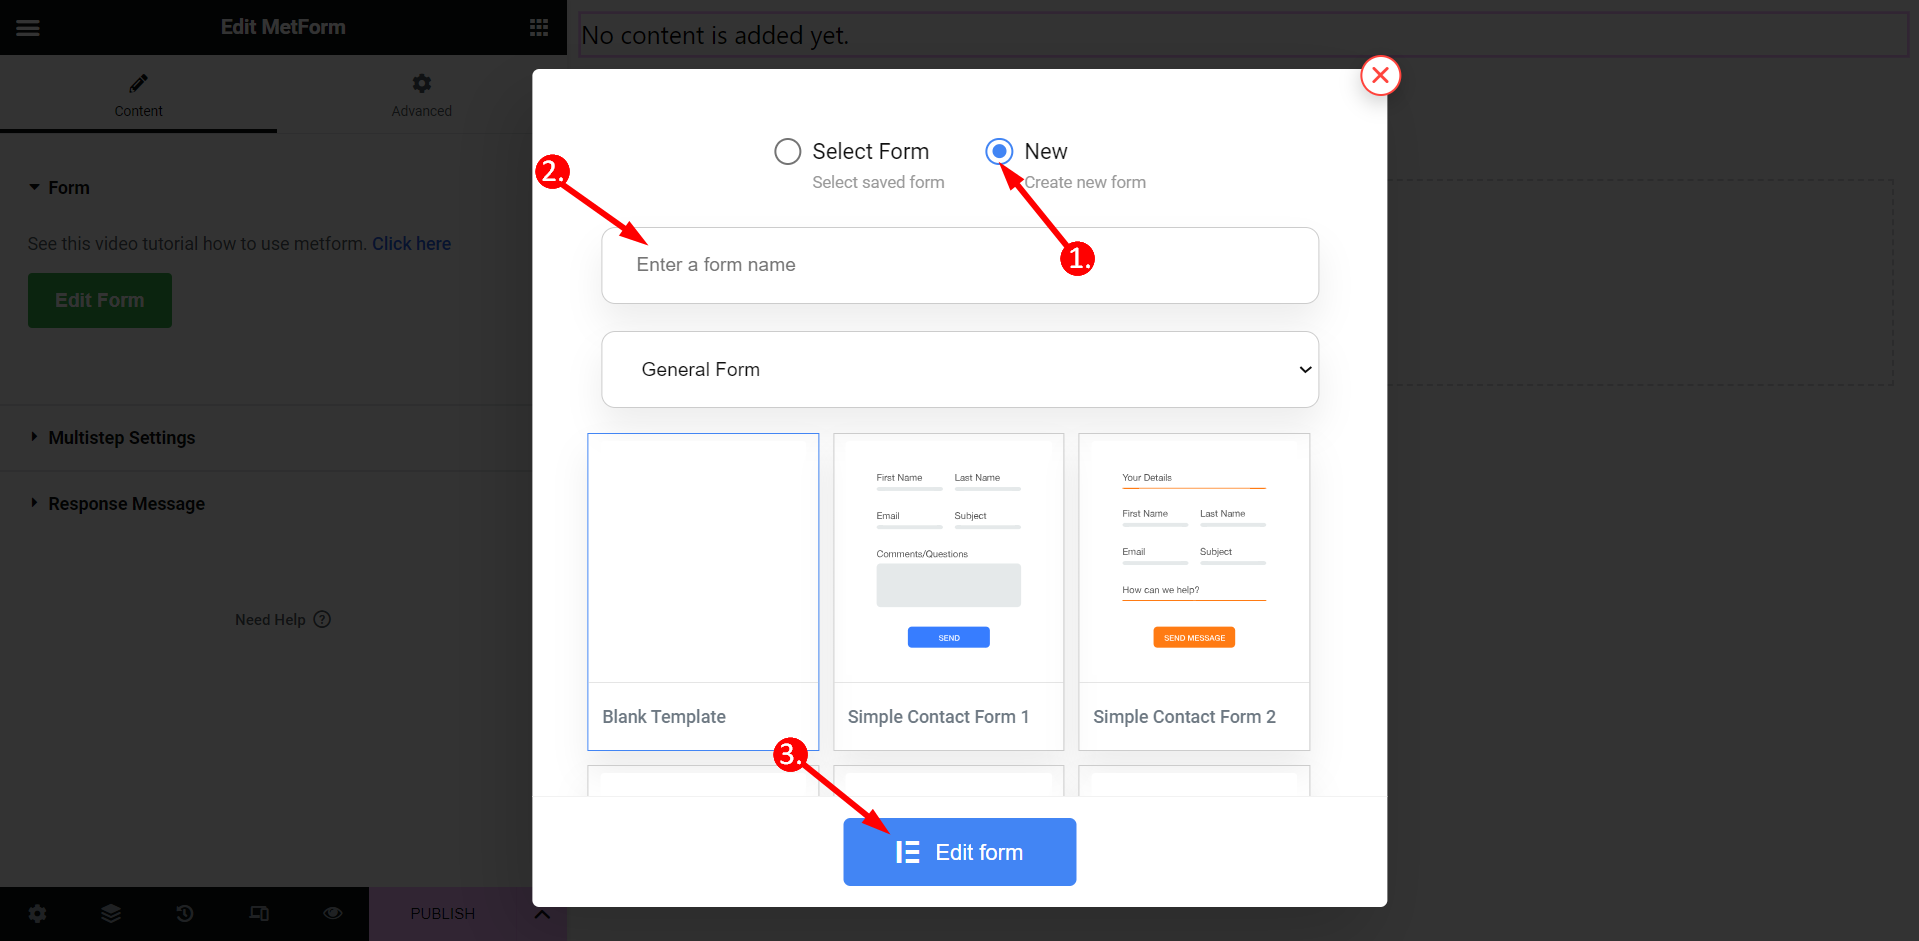
- Step=>4: Select New=> Enter your Form Name=> Click on Edit Form
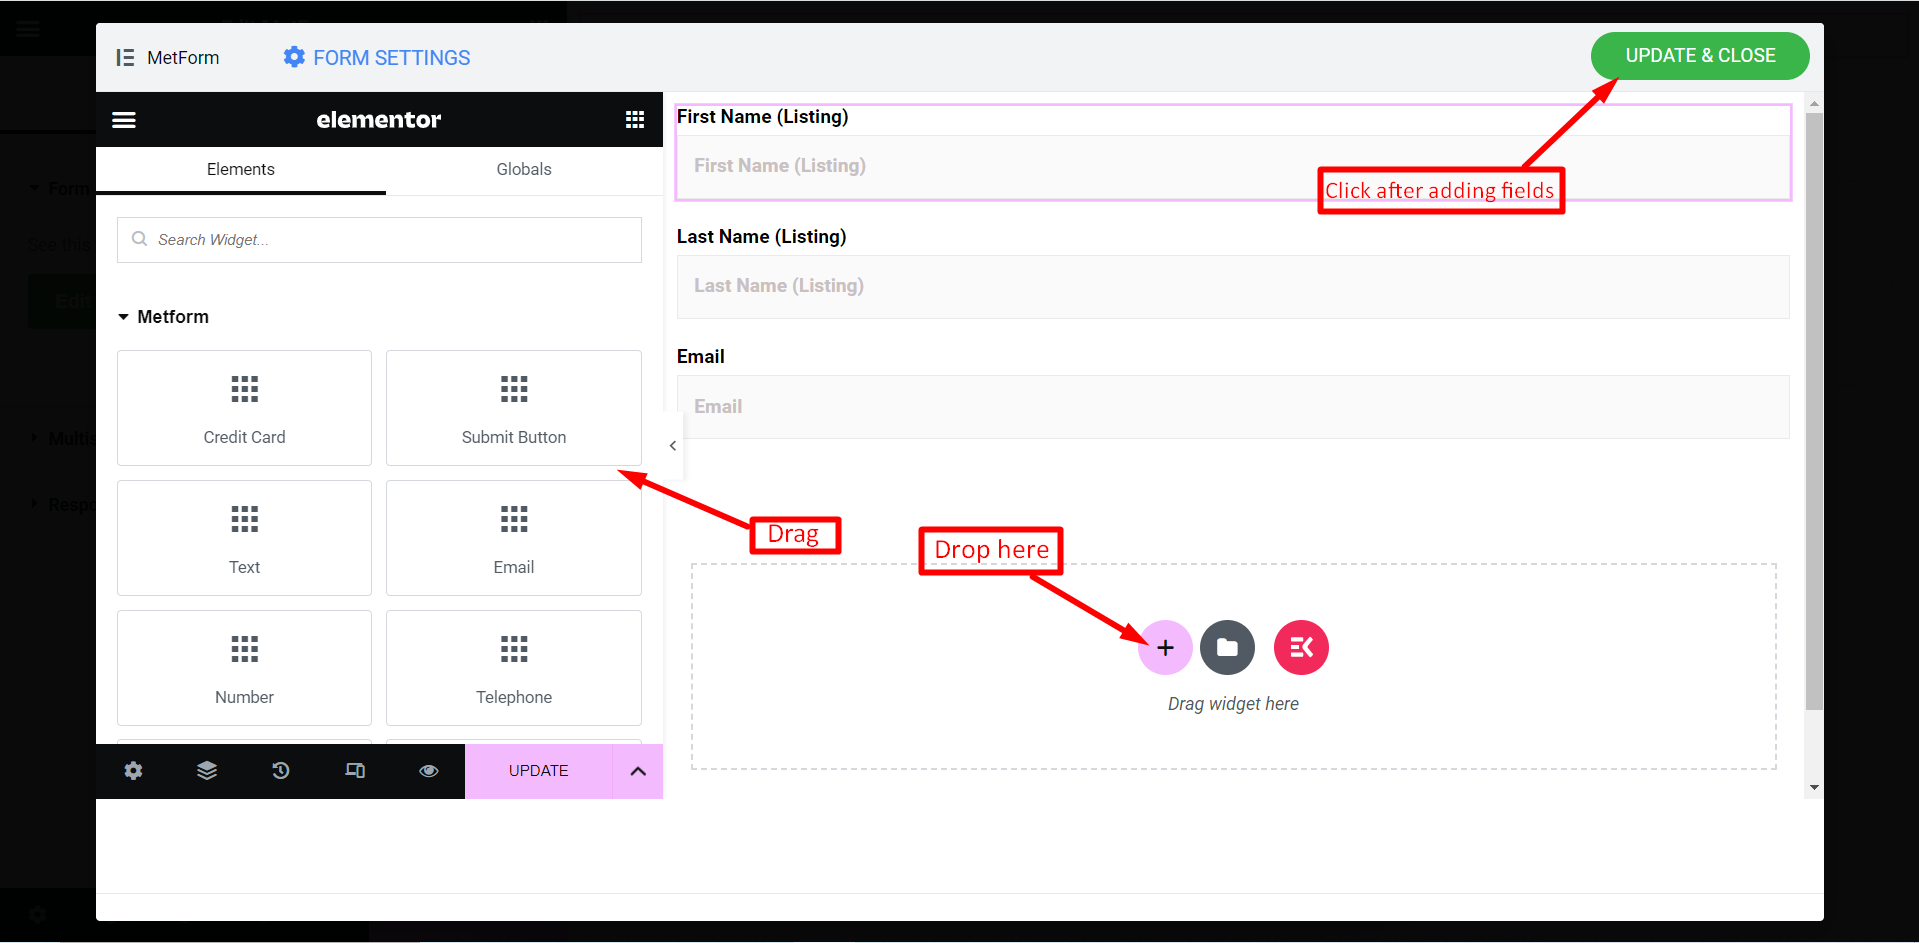
- Just Drag and Drop three Field Named: Email , First Name, Last Name as same as Hubspot Created Form Field
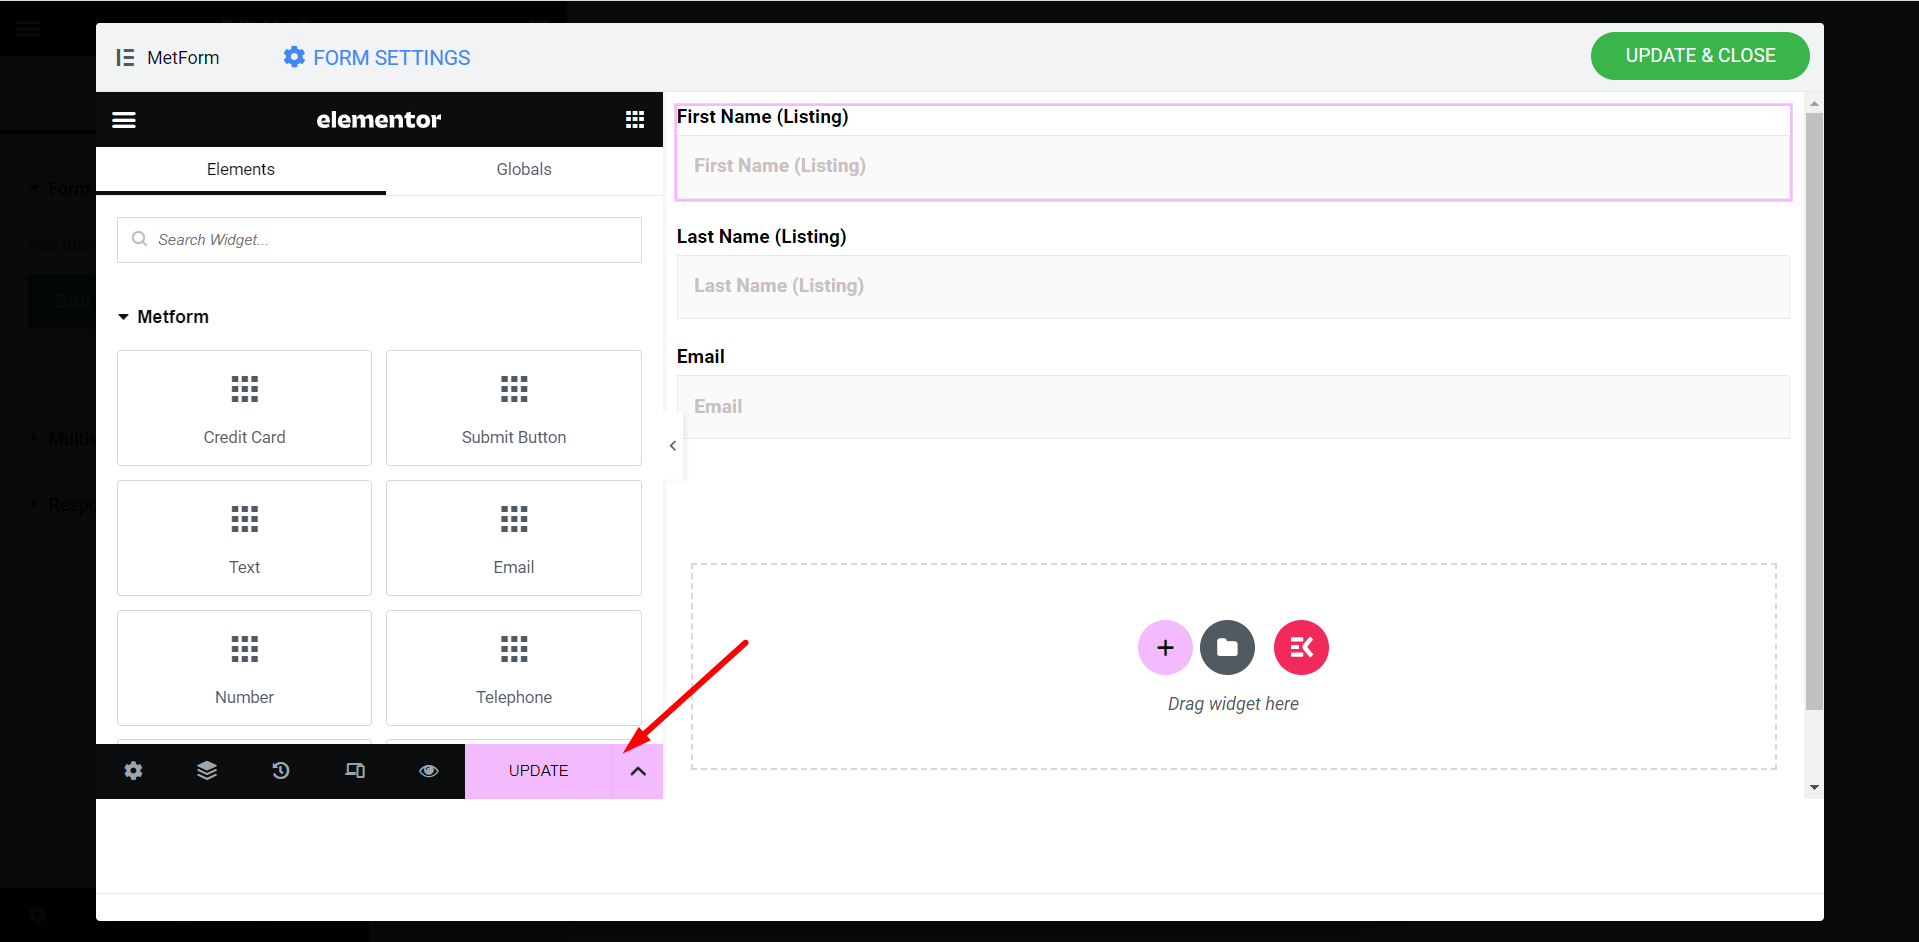
- Click on the update and close button.
Finally, press the “Publish” button.
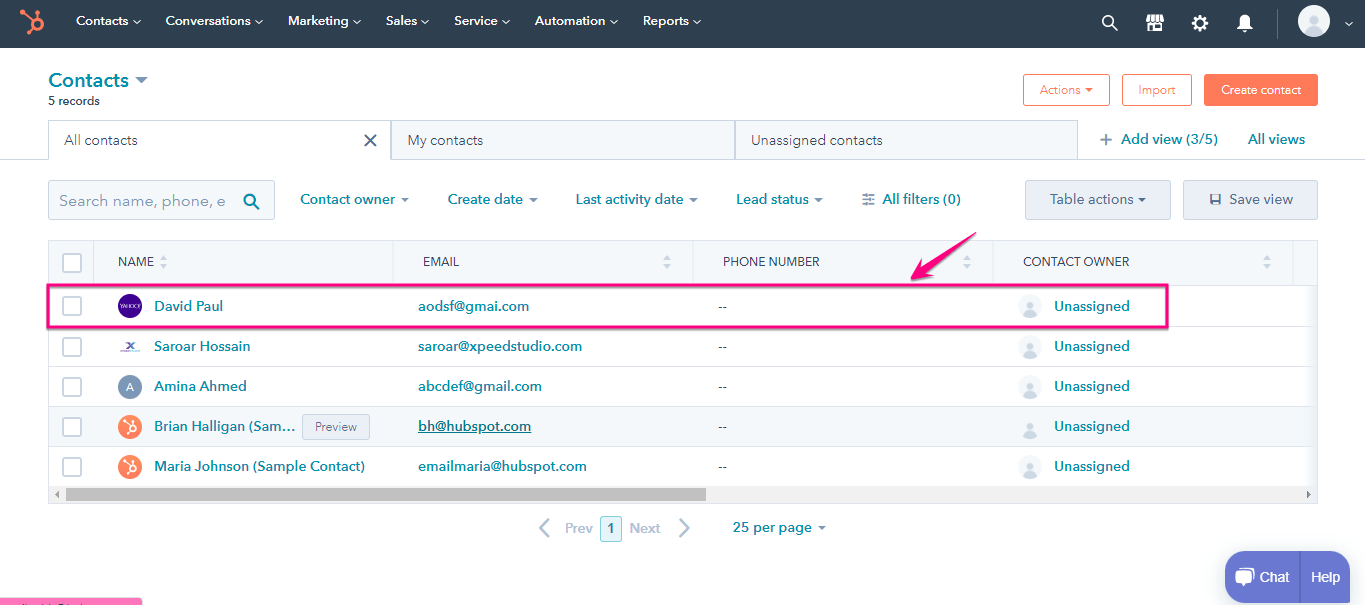
Hubspot Contacts #
- Now you need to perform some form settings. For doing that, go to your admin panel and visit MetForm>> Forms. Then edit the form to which you want to add HubSpot. After that, go to the general tab and enable Store Entries.
Now enable HubSpot Forms and Contacts that you will find under the CRM tab. Then click fetch HubSpot Forms and select the similar form that you have created in HubSpot. Now here comes the main part.
The left side fields are the added fields of your form that you have added to your site’s contact form and the right ones are the field of the HubSpot contact form. You need to choose the exact HubSpot field name in the right side. For example, if the field name of the first name in the HubSpot form is First name (Listing) then you need to choose that like the gif. Like this choose all the fields name of HubSpot Form.

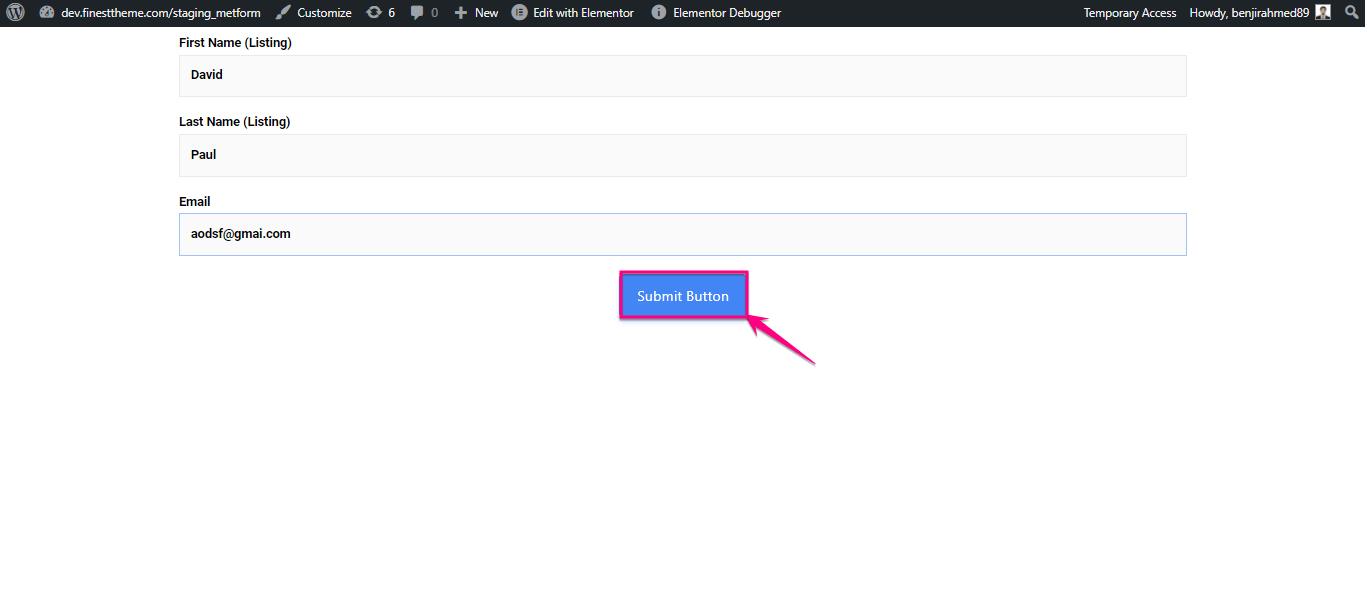
2. Go to the Site=> Fill the Form and Click on Submit Button
3. Go to Hubspot=> Click on Contacts
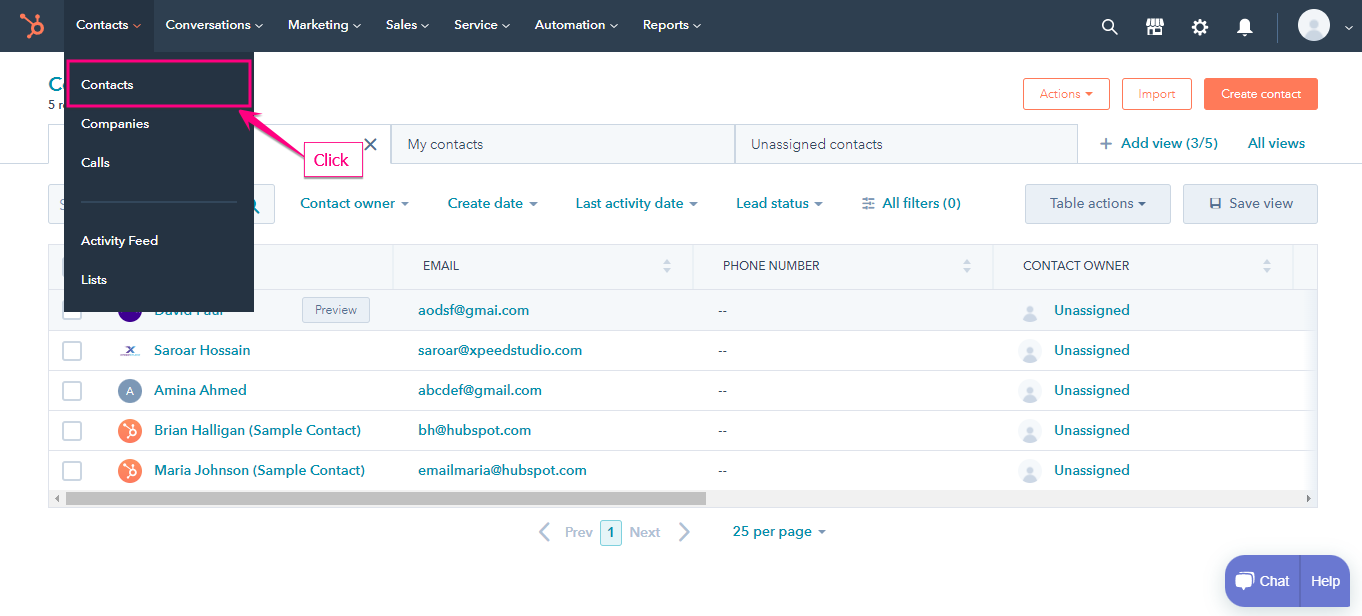
- You can see the submitted contact form Here.