How to Install ShopEngine Elementor WooCommerce Builder #
Before getting started make sure, Elementor plugin is installed & activated on your website.
If you want to use ShopEngine with Gutenberg, follow this documentation instead.
Just follow the step by step process to install ShopEngine Elementor Woocommerce Builder:
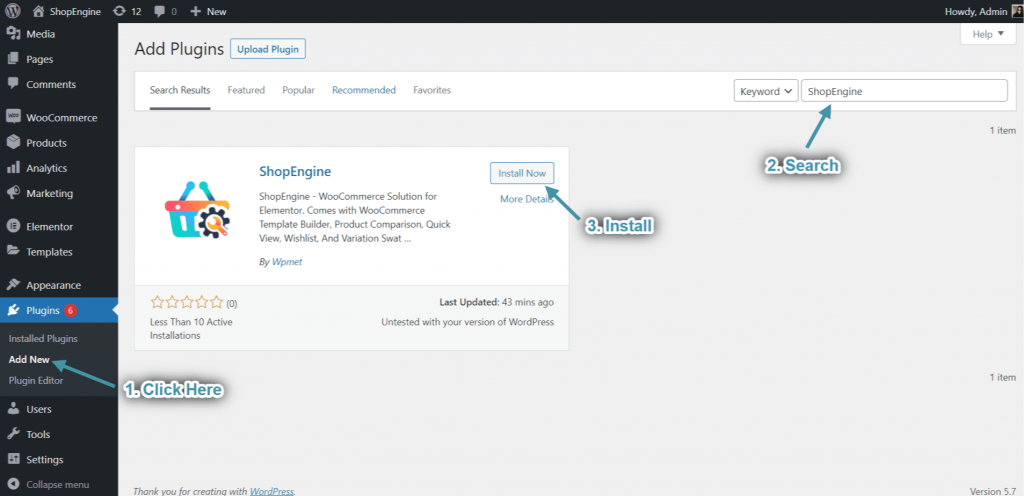
Step #1 #
Go to the WordPress Dashboard➔ Plugins➔ Add New➔ Search for “ShopEngine”➔ Install it.
Step #2 #
After successful installation, just click on the “Activate” button to activate ShopEngine.

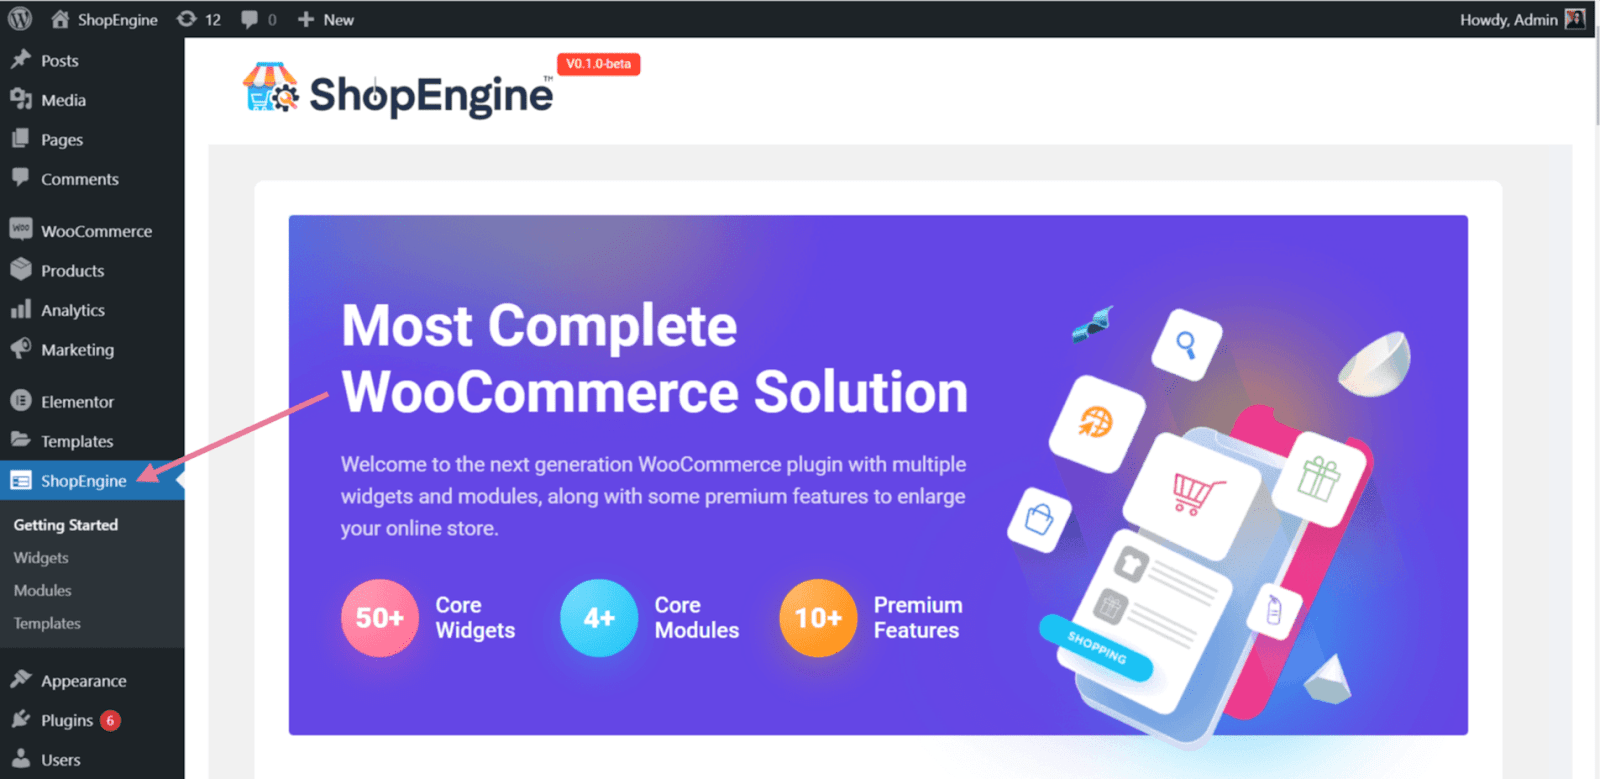
Step #3 #
After activating the plugin, ShopEngine Menu will appear in the WordPress Dashboard.
How to install ShopEngine Pro and activate the license #
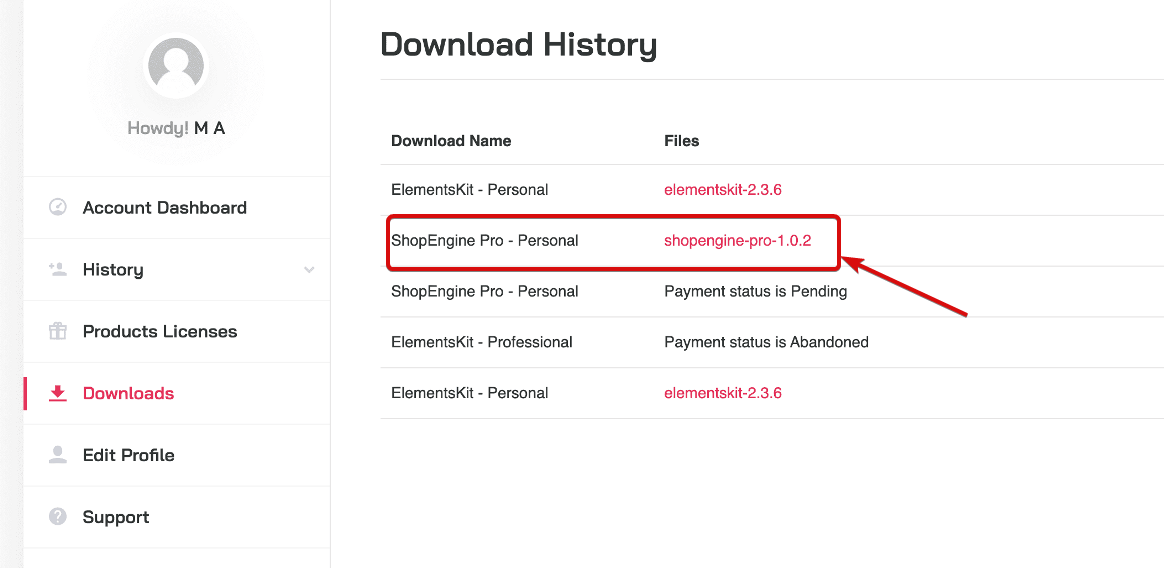
Step #1: #
Go to your Wpmet account dashboard and navigate to Downloads

Step #2 #
To download click on the ShopEngine Pro on the plugin list
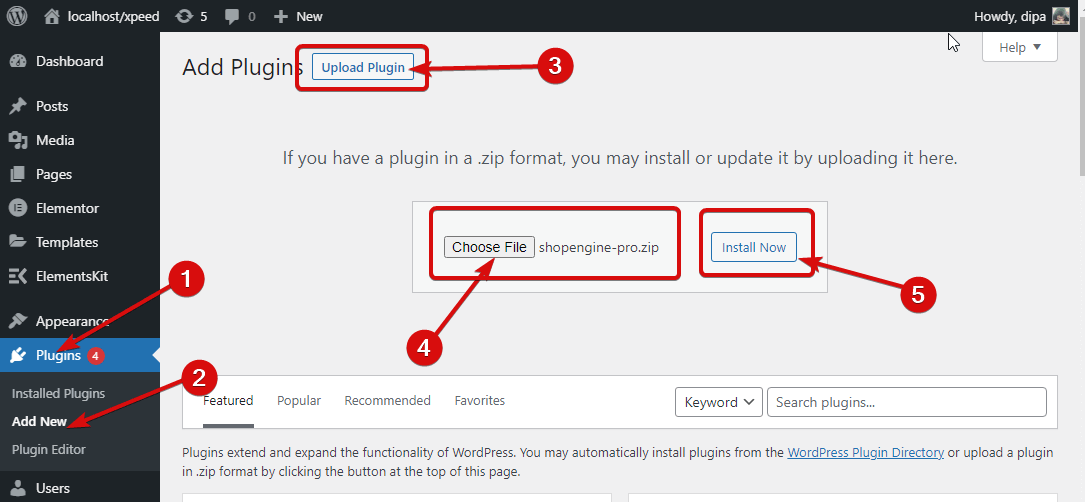
Step #3 #
Now go to Dashboard > Plugins > Add new. Click on the upload plugin and choose the ShopEngine Pro plugin file you downloaded. Click on Install the plugin and activate it.
Step #4 #
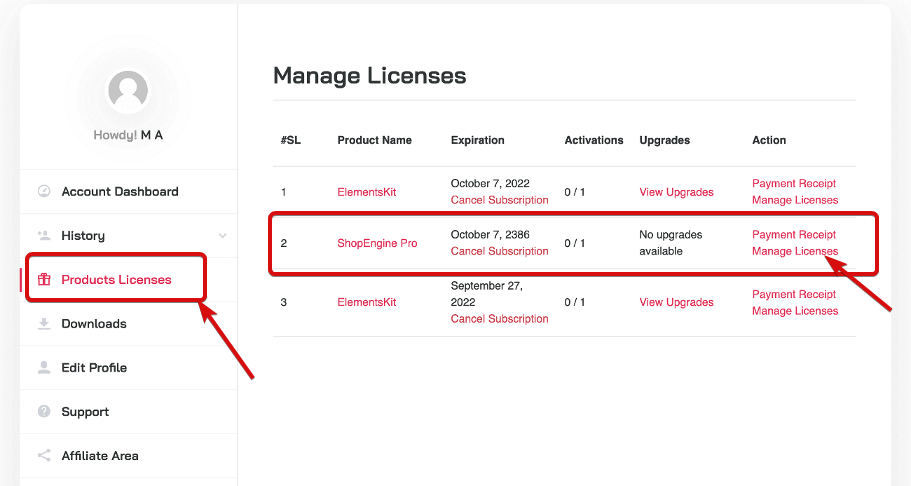
Go to product licenses and click the Manage Licenses option for ShopEngine Pro
Step #5 #
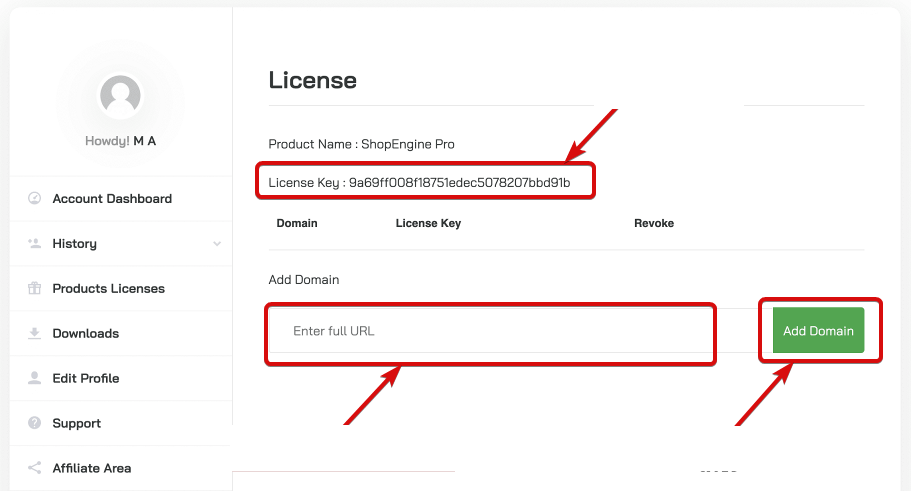
On the license management page add your website in the Add Domain field. Click on the Add Domain button to save. After that copy the license key
Step #6 #
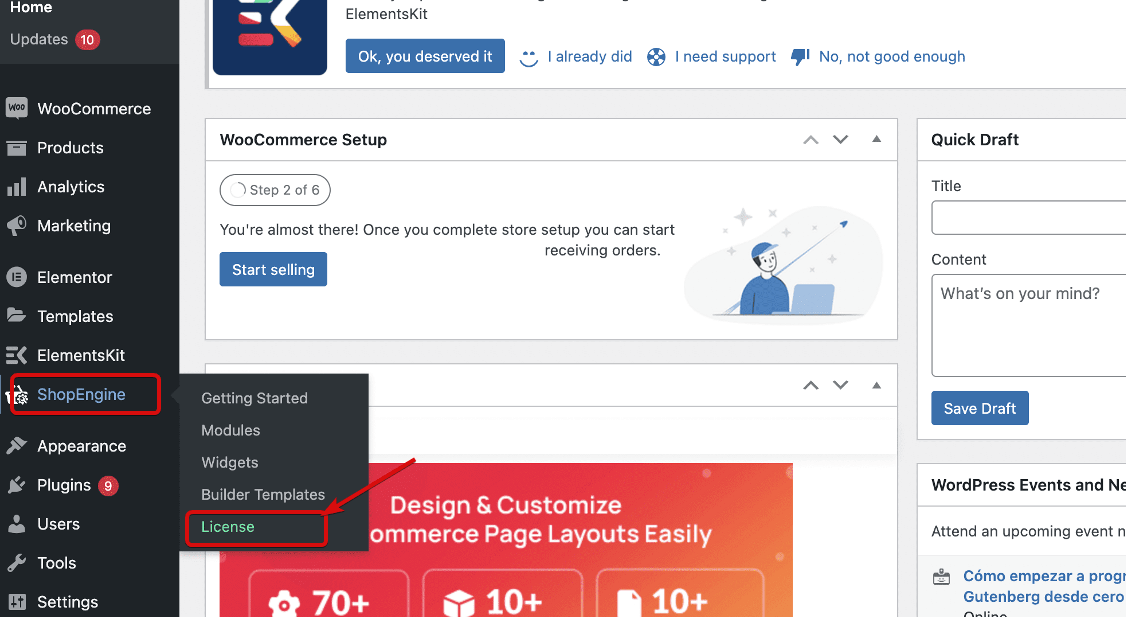
Go to your WordPress Admin Dashboard. Navigate to ShopEngine > License
Step #7 #
Finally, put the license key you copied in the Your License Key field and click Activate Now
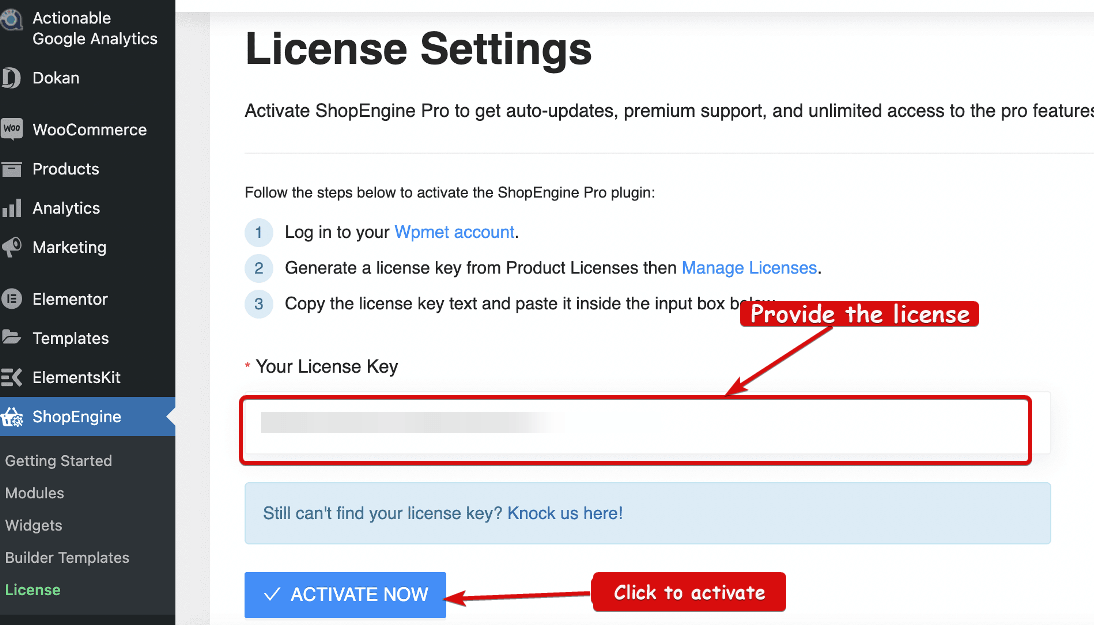
Now you should have all the premium features of ShopEngine.
ShopEngine Dashboard #
We have designed a powerful yet user-friendly dashboard for you. In the dashboard, you will get all the necessary information and resource links. This includes Documentation, Video tutorial links, Official support channel links, Product comparison section, and many more.
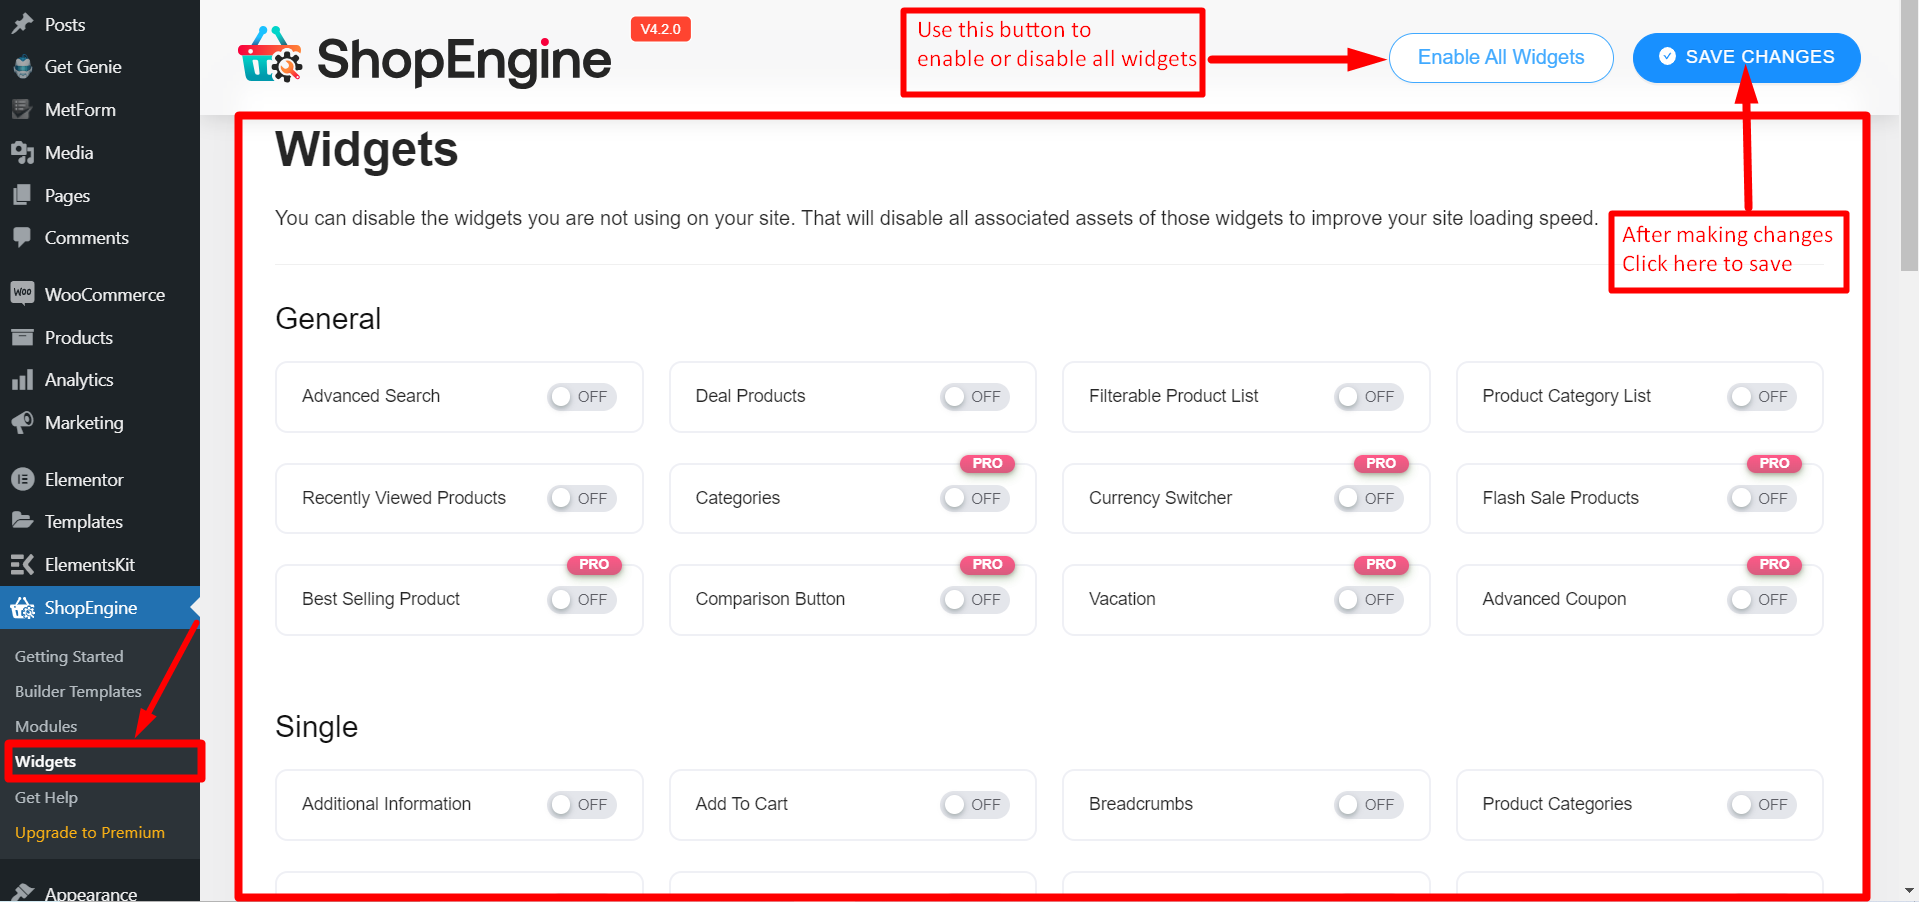
Widgets #
Go to the ‘Widgets’ to check out all the available ShopEngine widgets. Here we have introduced the single widget activation or deactivation along with bulk activate and deactivate functionality. You can enable or disable all the widgets just in one click.
- Please make sure to click the save changes button to save your settings.
Modules #
You can switch to the ‘Modules’ to check out all the available modules. You can use the toggle to enable or disable them as per your requirements. Click on Save Changes after every action.
Templates #
From this ‘Template‘ section, you can visually design WooCommerce templates for different pages such as Single Product page, Shop Page, Archive page, My Account page, Checkout Page, Cart Page, Thank you page without any coding skills. To create your template:
- Go to Templates > Add New.
- Provide name-> Select your page type: For Ex: Shop.
- Enable Default Template Toogle-> Save Changes-> Now Click on Edit with Elementor.

That’s how you can install ShopEngine in your WooCommerce website simply and smoothly. Then, you can proceed to upgrade your WooCommerce website with ShopEngine.
In case you are looking to launch a WooCommerce website but struggling to find a good hosting service, you can reliably choose Kinsta. They have all the key hosting features that you would usually expect from a hosting service provider.


