Add Single Donation Campaign #
By Adding Single Donation Campaign which will encourage anyone to provide donation online with WP fundraising. With this platform you can get donation for your study, product, food and many other purposes.
So for this we need to create a campaign for Single Donation.
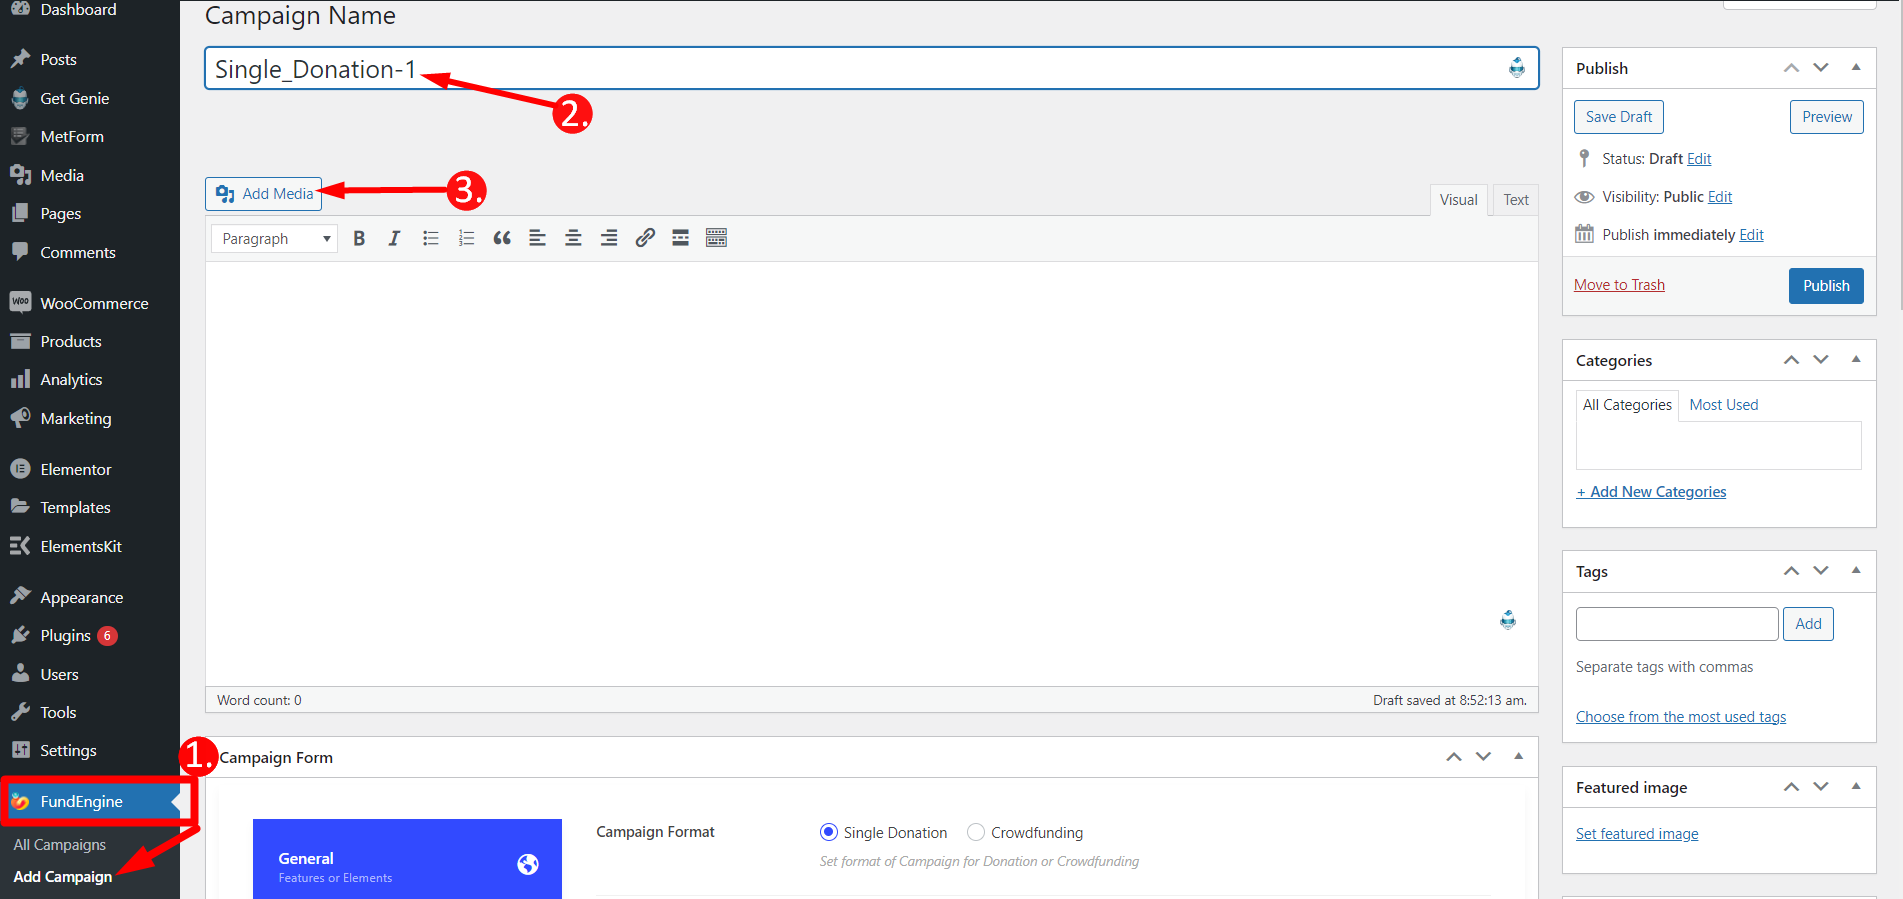
1.Click on Add campaign from WP FundEngine=> 2.Name=> 3. Add Media to show image
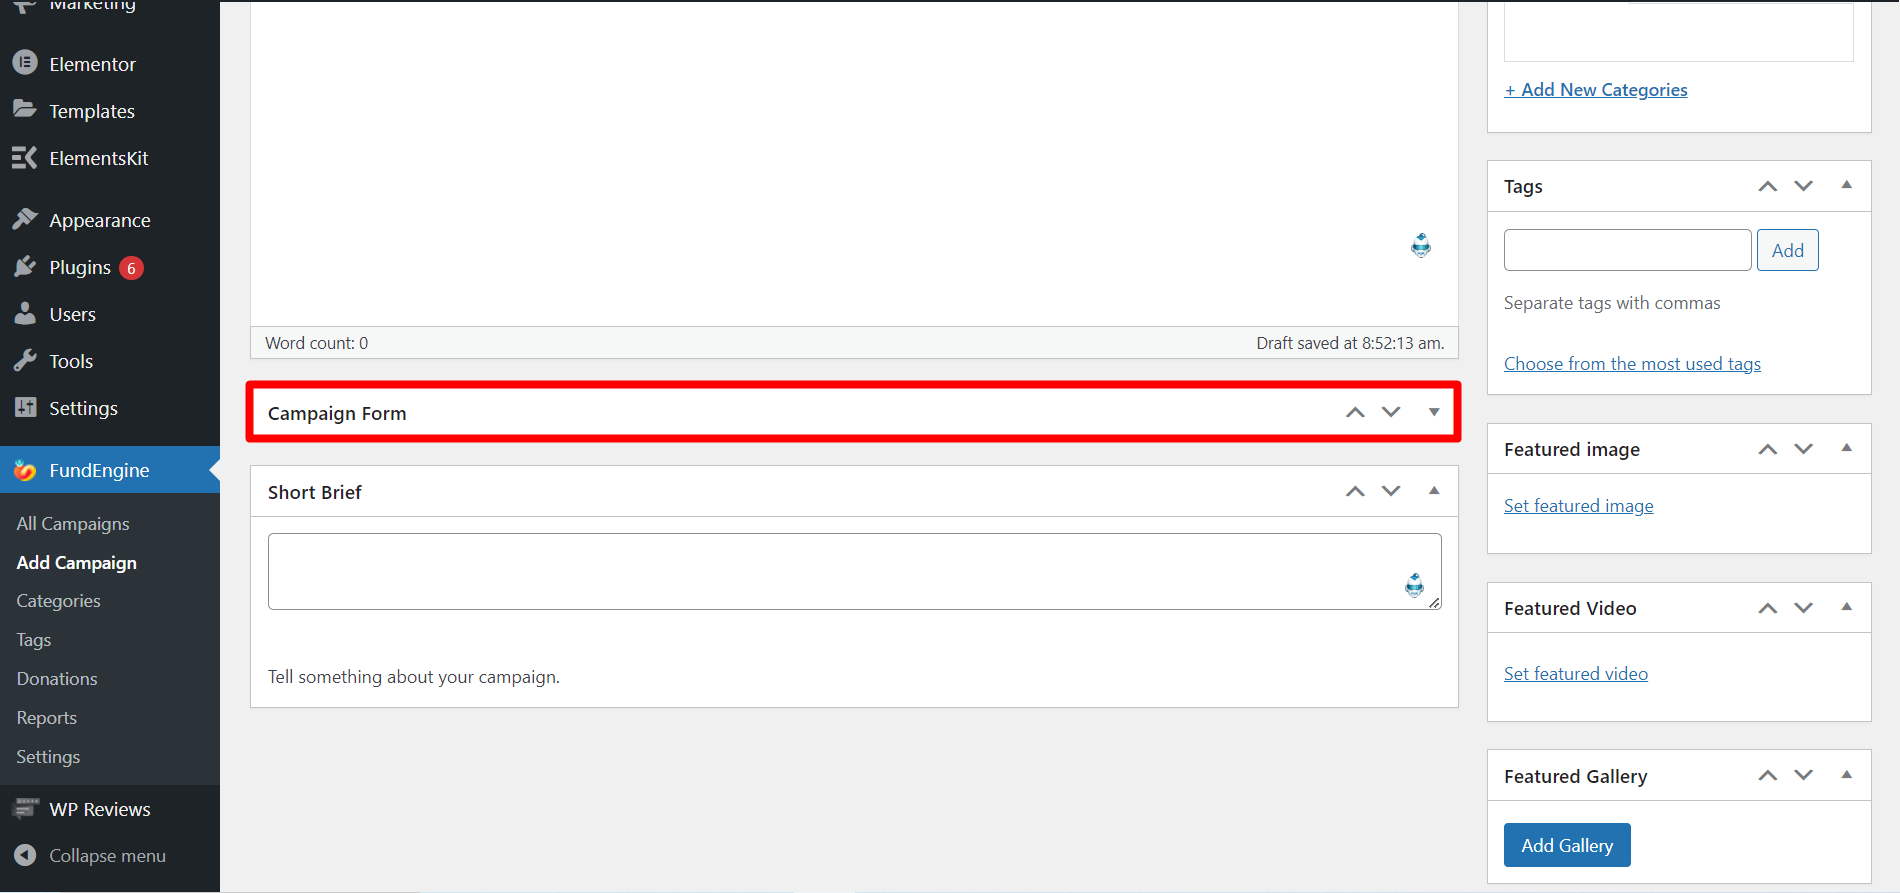
Click on the Campaign Form and it will expand
General #
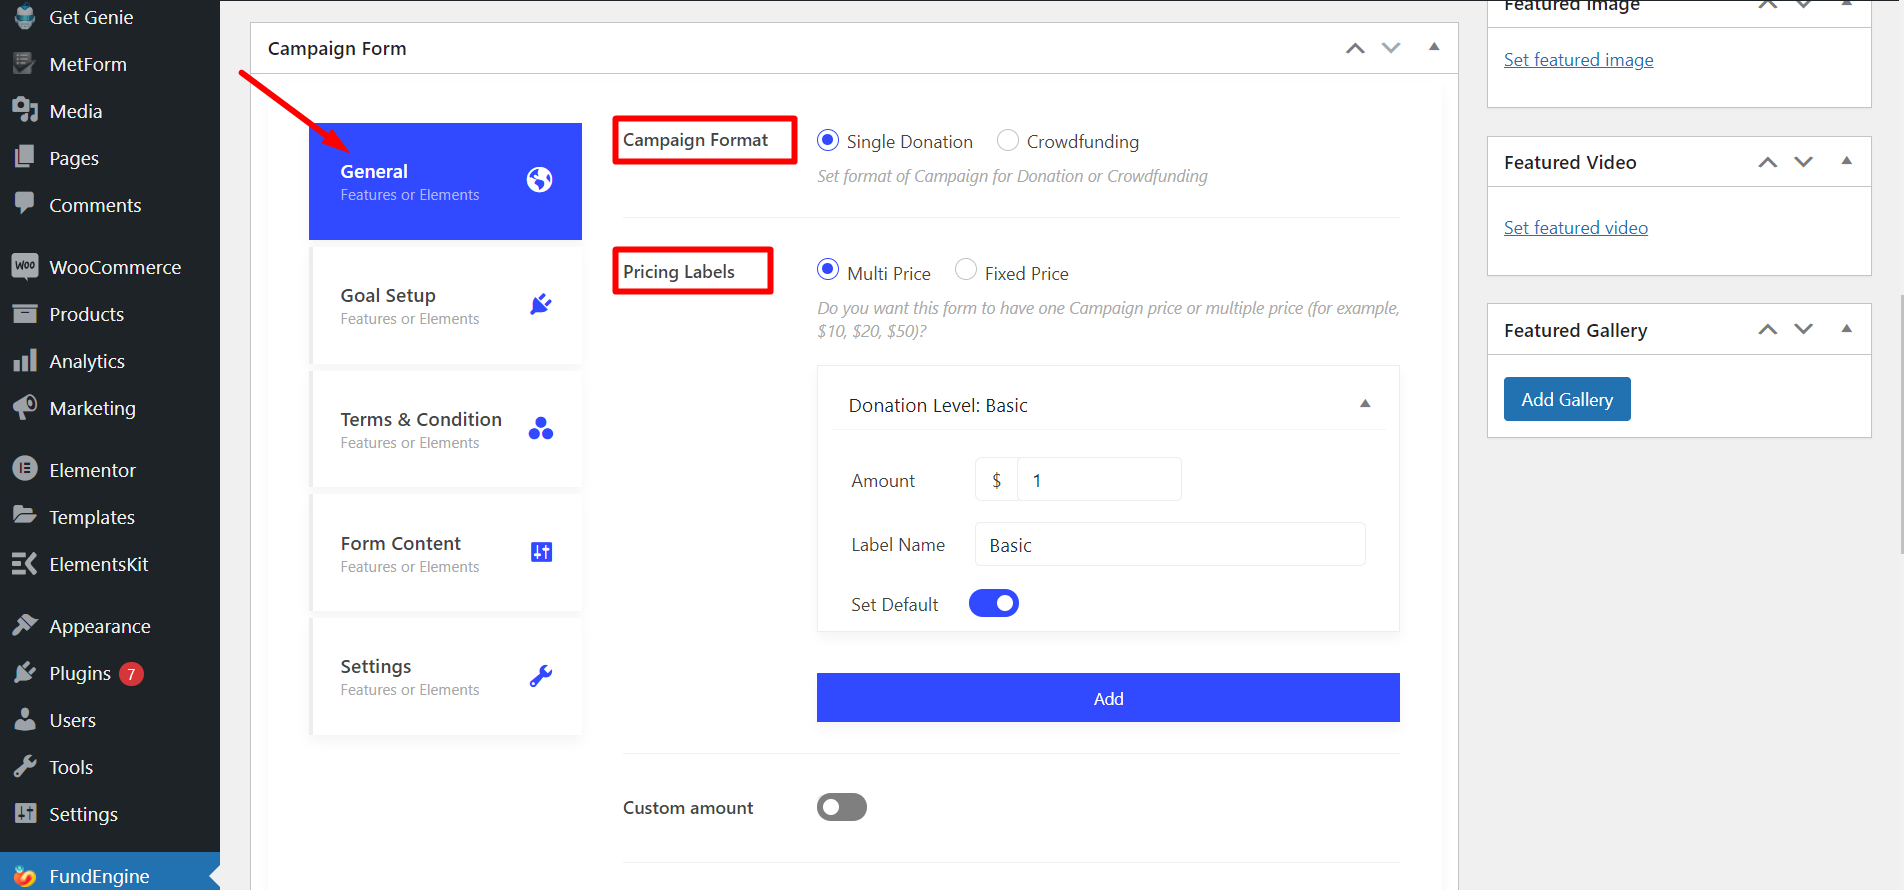
Set up your Campaign Format for Single Donation You can display pricing label at your own choice like how you want to show your pricing label on the form. Moreover, You can set the multi price or fixed amount that user want to give. User can select price from multiple choice and you can give fixed amount as you need. Moreover, you can set up maximum and minimum amount.
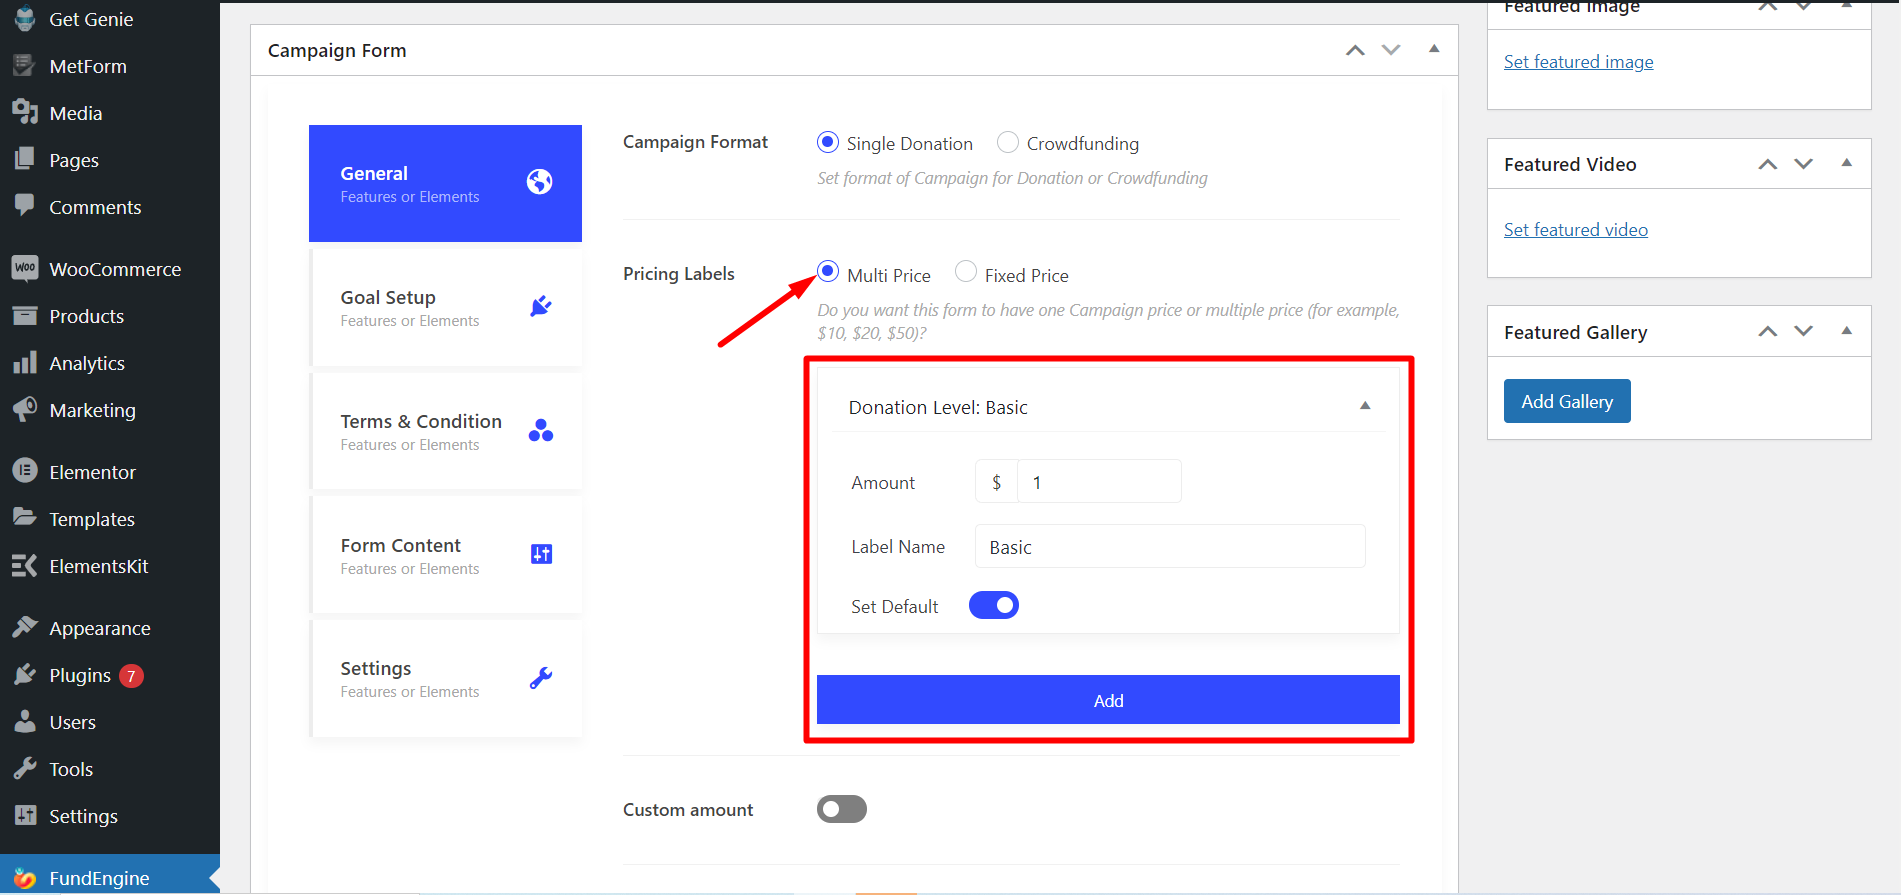
Click on General=>
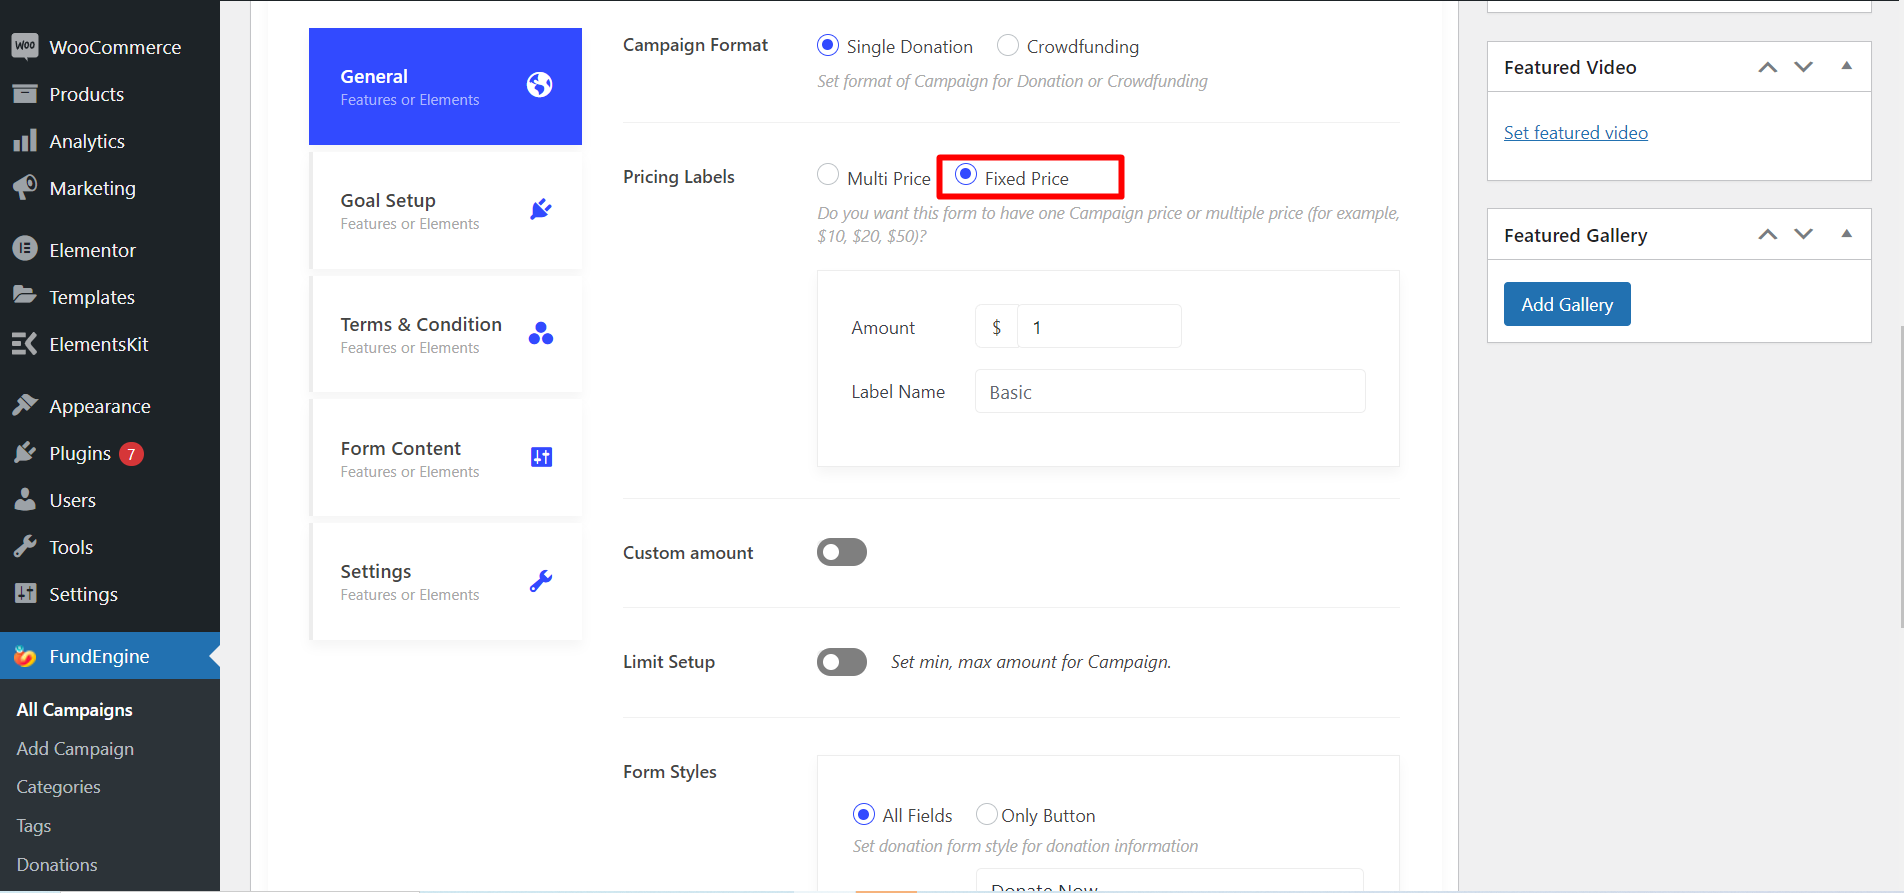
- Campaign Format– Select Single Donation from the Radio Button
- Pricing Labels– Select Multi Price or Fixed Price
Step-1: Multi Price #
- Select the Amount
- Write Label Name
- Enable Set Default. By enabling the Default button you can set an amount by default.
Finally, if you click ADD button you will be able to add multiple prices if you need.
Custom amount – If you enable this button, customers can set their custom price.
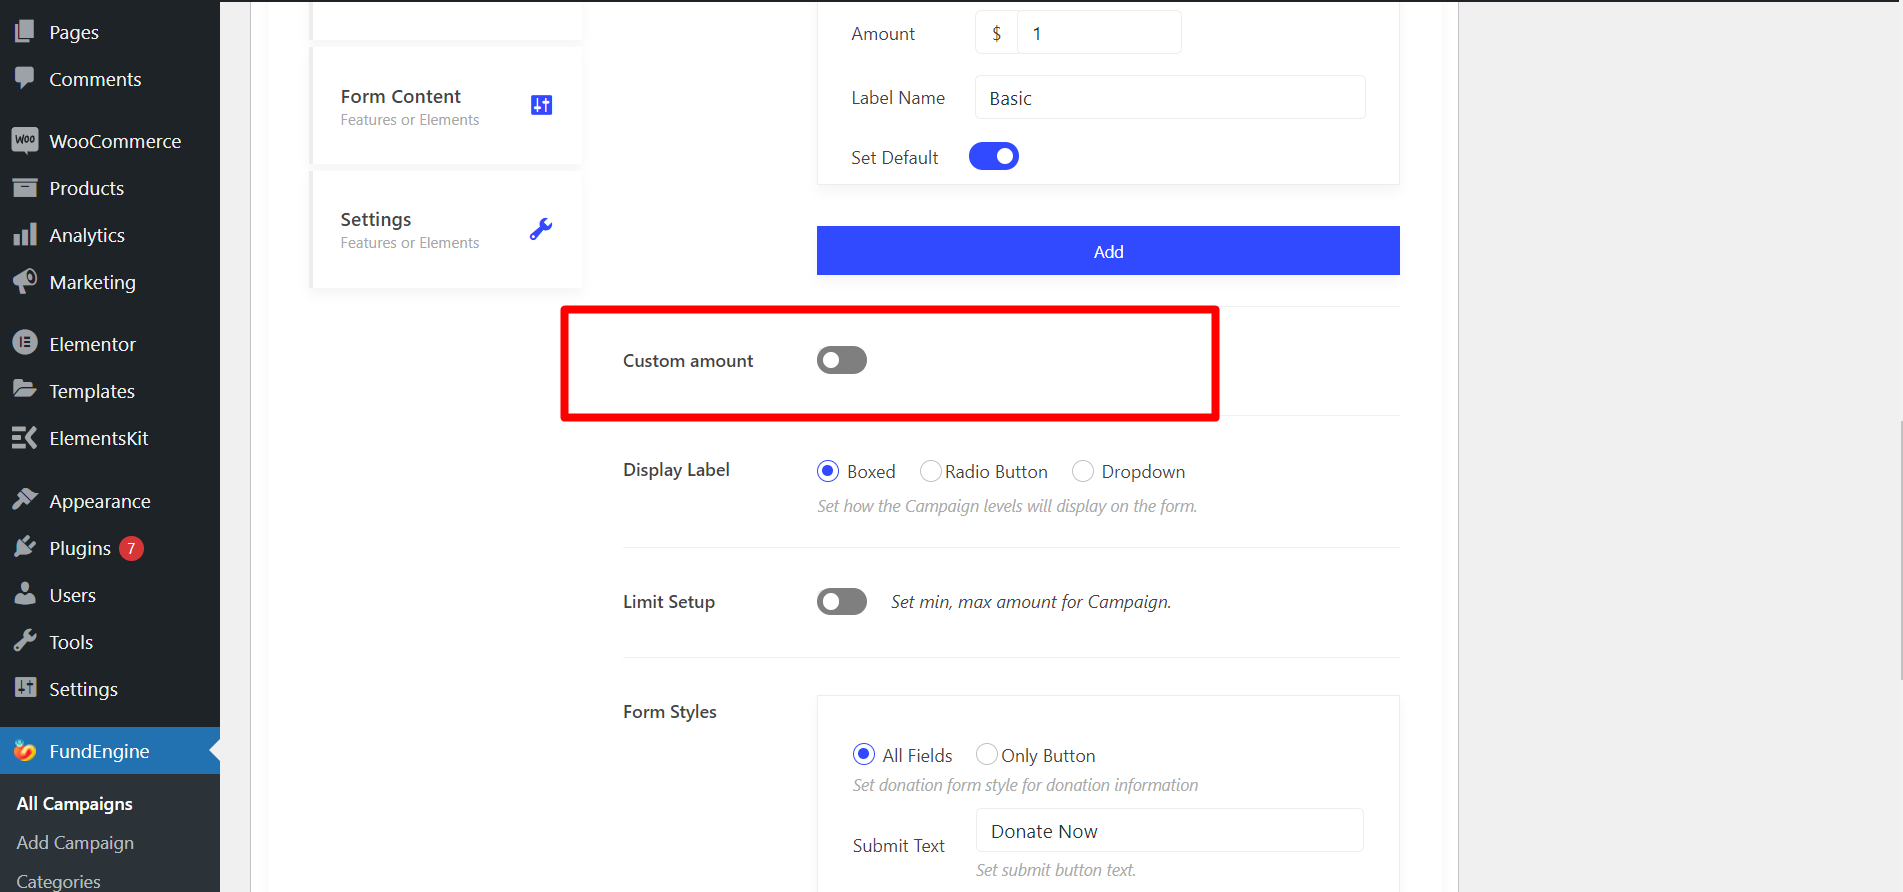
Display Label – Here, you can choose Boxed, or Radio-Button, or Drop-Down to set how the campaign will display on the form.
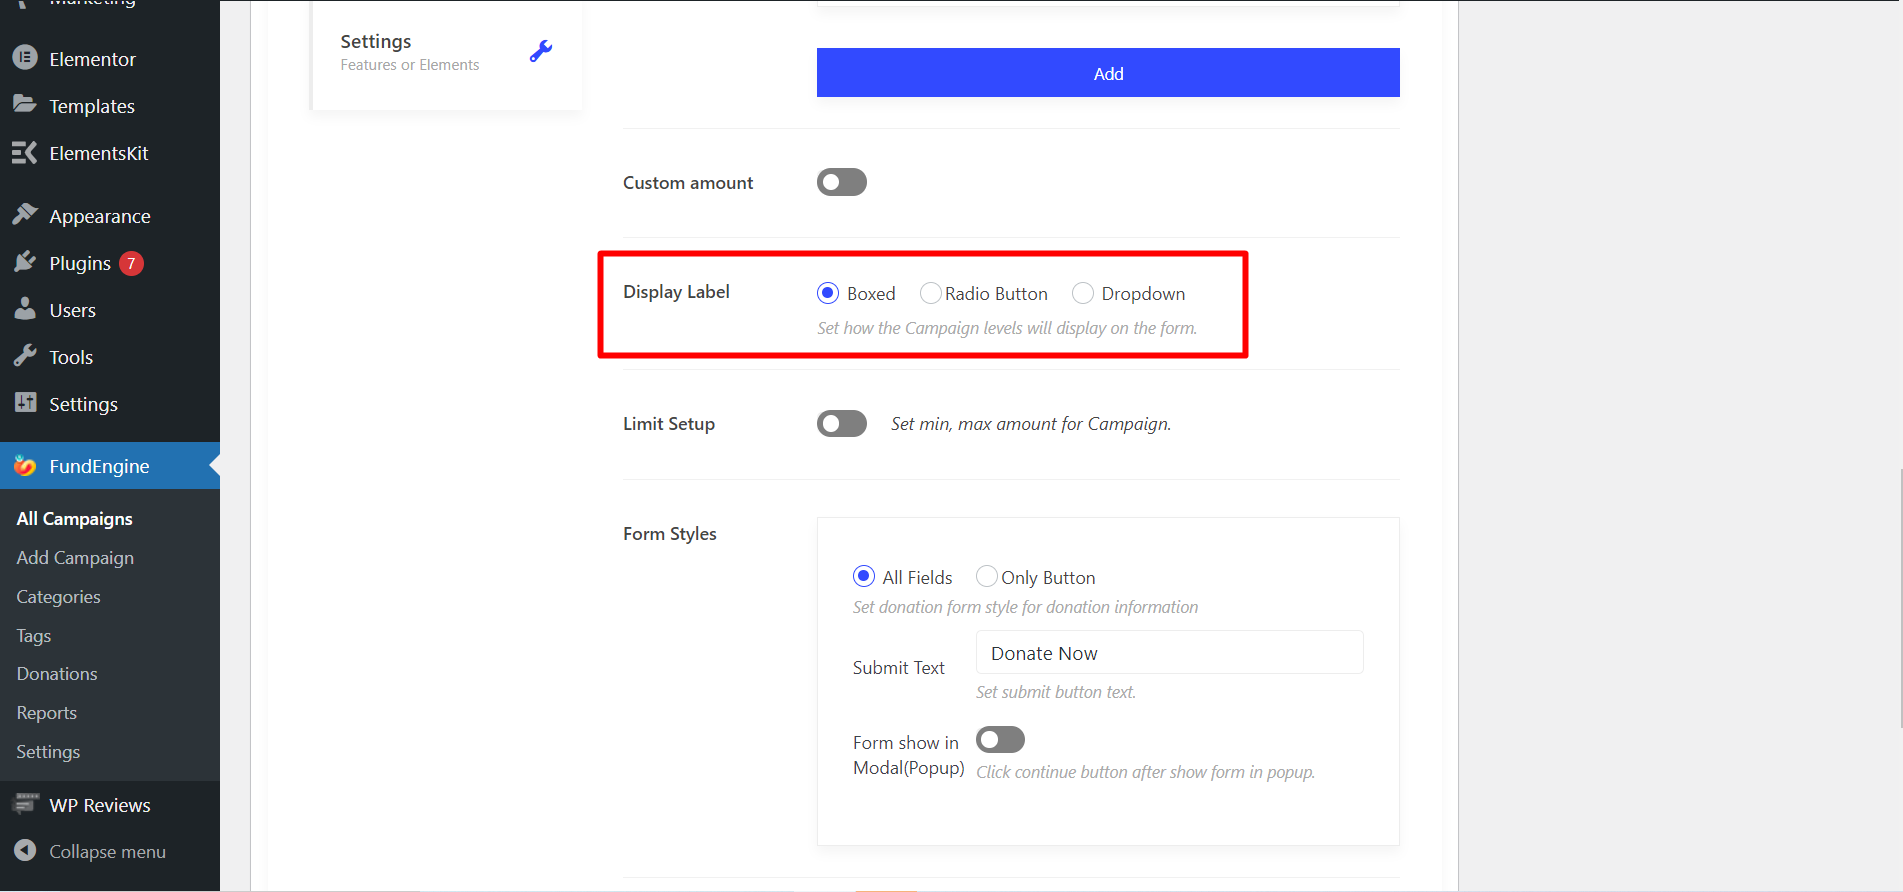
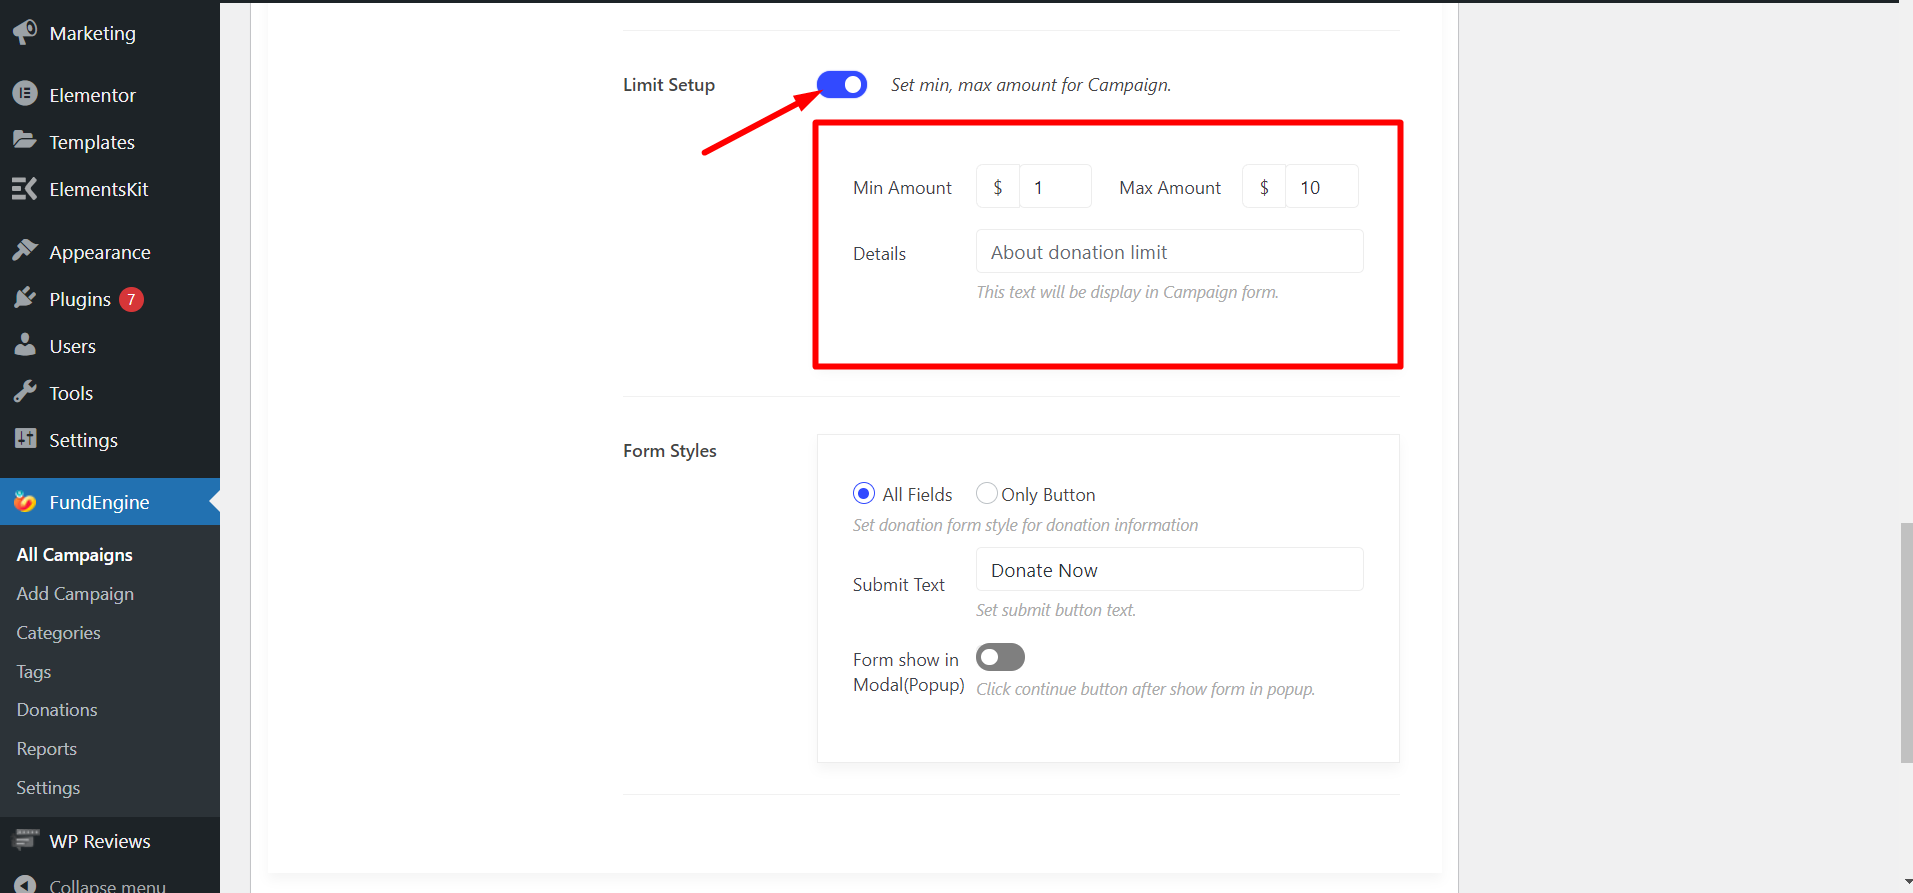
Limit Setup – You can adjust your decided amount for the campaign here.
- Set the maximum or minimum value that user can give. For example “you can give min amount 1$ and maximum amount 10$”
- Details – Show short message about donation limit.
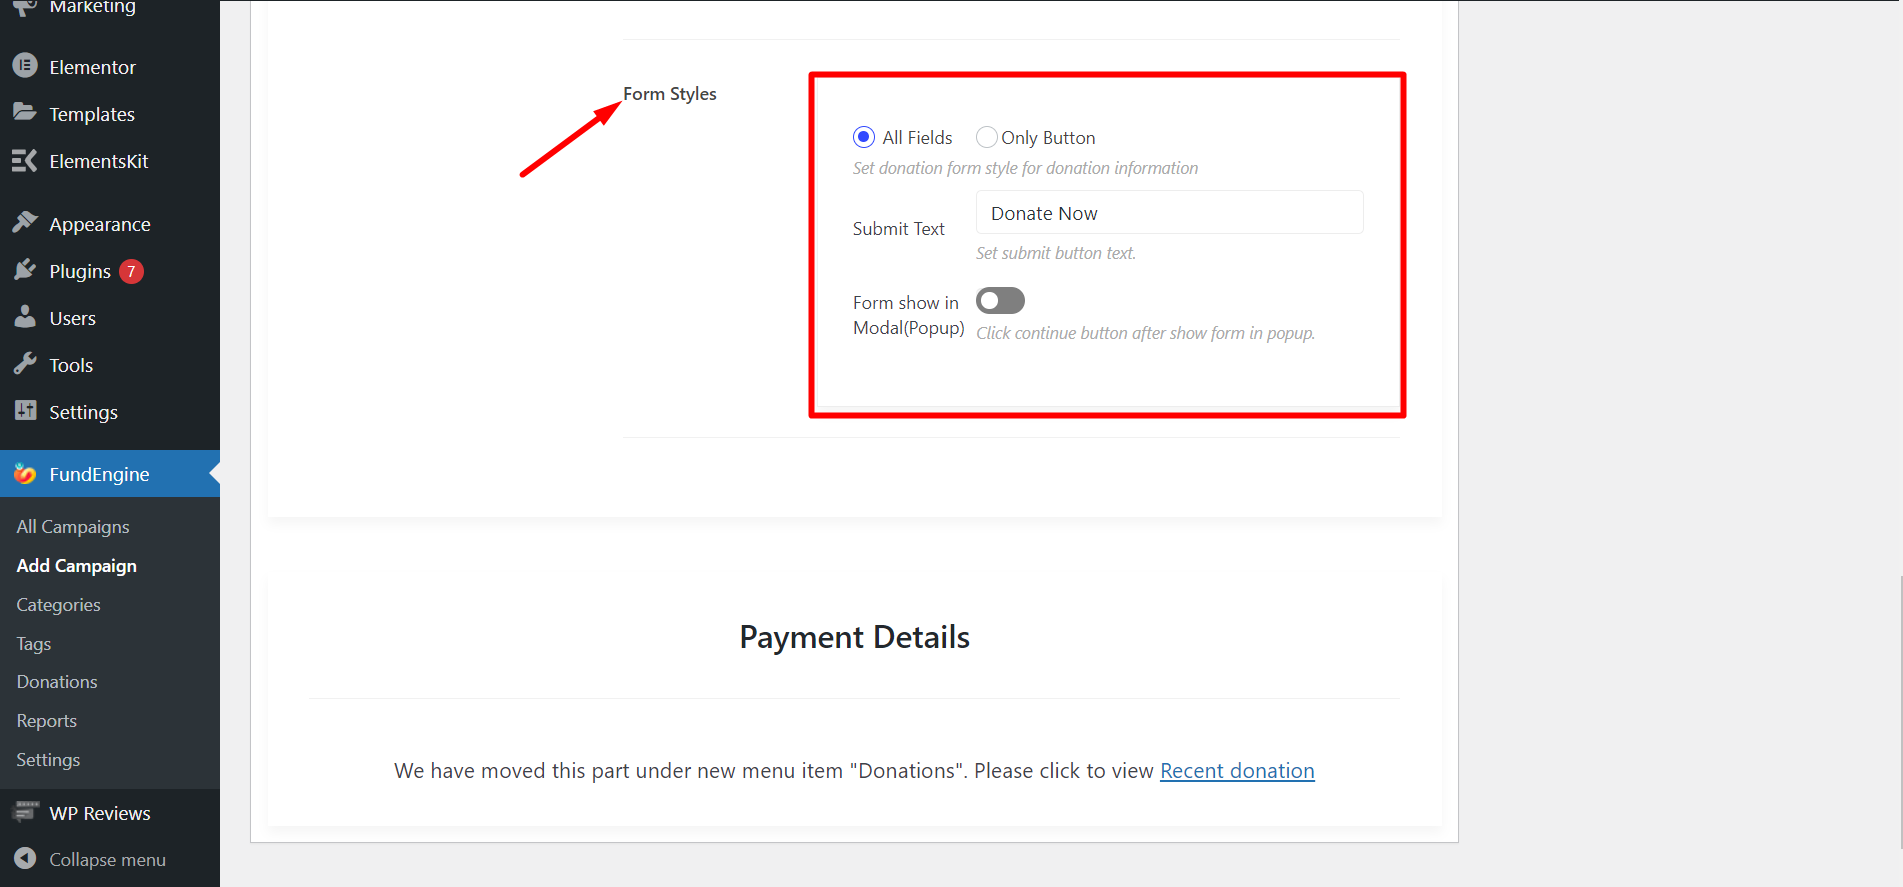
Form Styles – Select the donation form style with All Fields or Only Button.
- If you choose the All Fields option, you can change Submit Text according to your preference.
- If you choose the Only Button, you will get another option named Submit Text. After clicking the button, you will see a popup from where you can get the donate option.
Step-2: Fixed Price #
Now, you have to return back to Pricing Labels and select Fixed Price. After that, adjusting the Pricing labels, Custom amount, Limit setup, and Form Styles are the same as previously you did for Multi price.
Goal Setup #
This feature is to set up your target goal or raised amount that means you can showcase what amount of money you want to get from donor. You can also set up the finished date of your campaign with different styles and color.
From Goal Setup-> Turn on the “Display Goal Target” toggle
- Style – Display goal target in different styles. You can display it in two different styles, Progress bar or Pie chart.
- Display As – Select Percentage or Flat or Both
- Color – Select the color of your choice
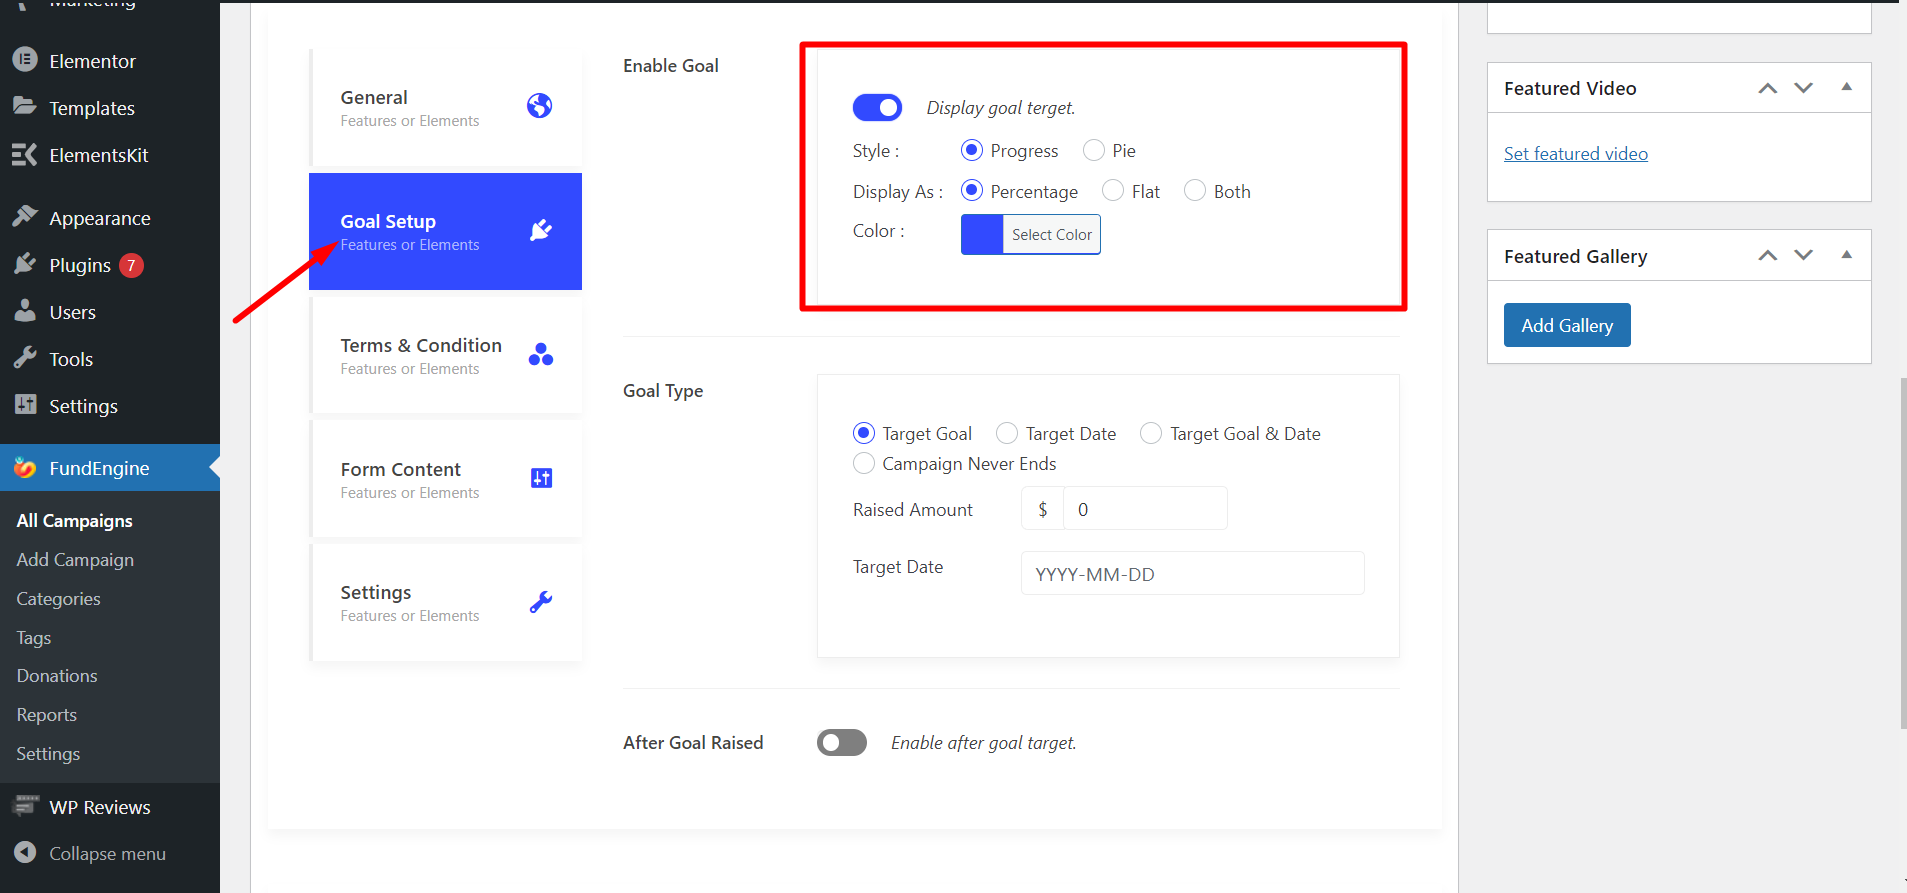
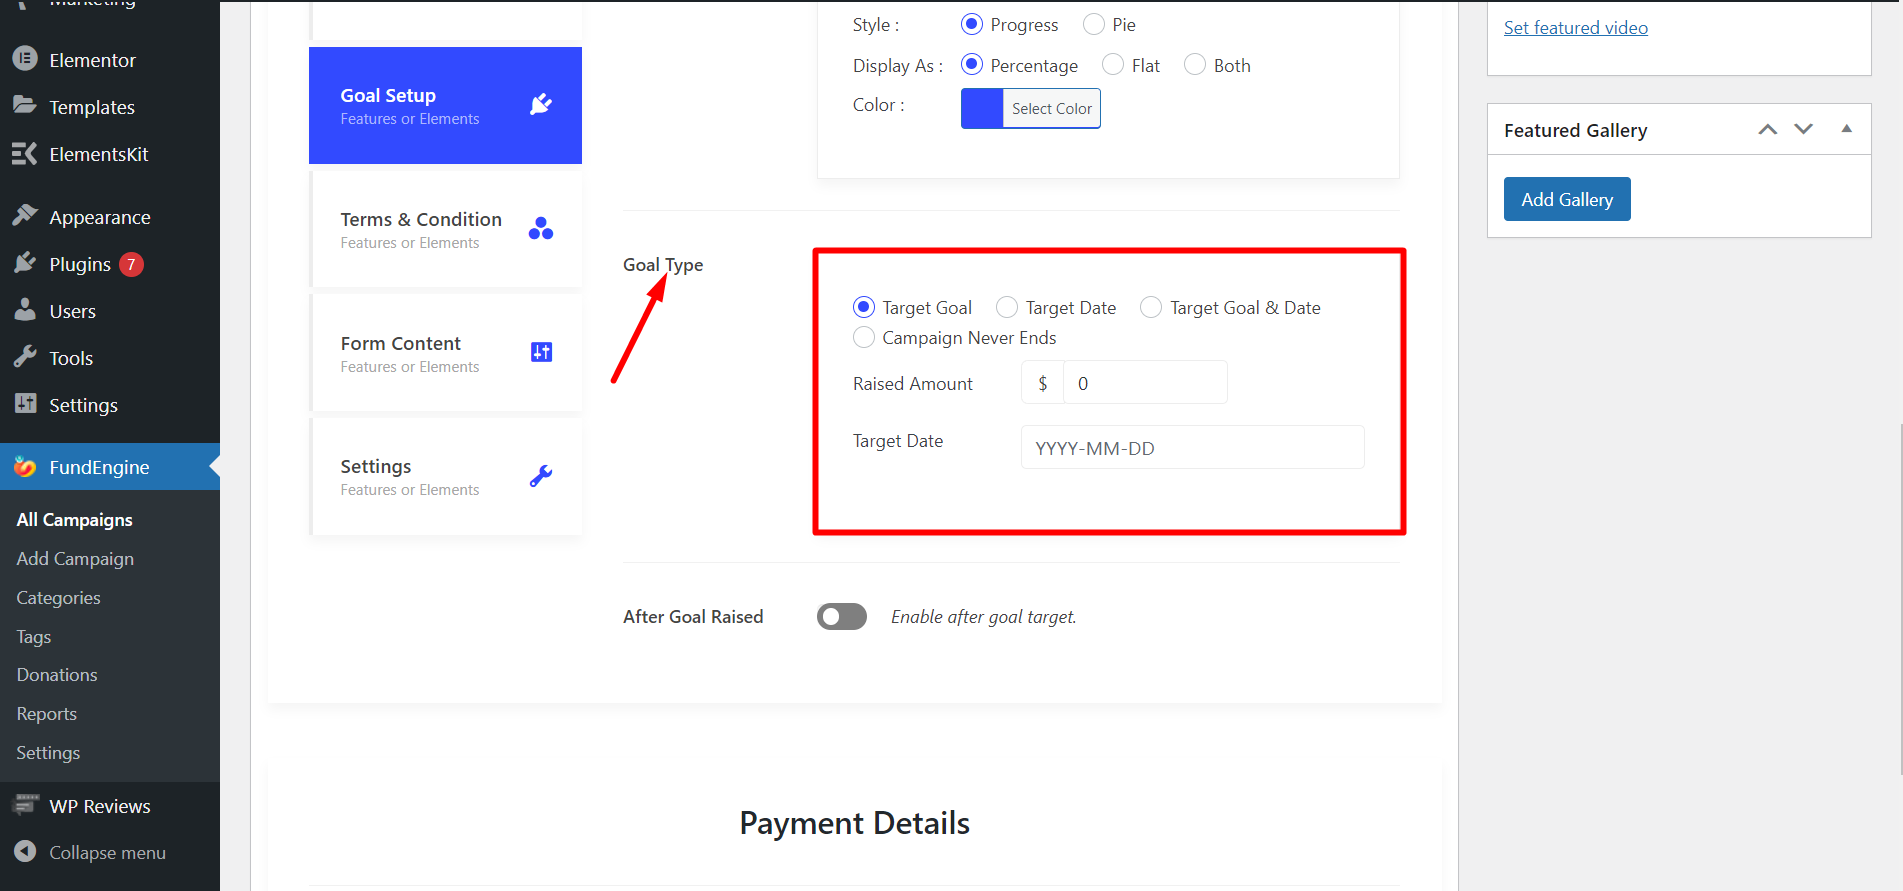
Goal Type – You have to set the goal type here.
- The goal type options are Target Goal, Target Date, Target Goal & Date both or you can also select Campaign Never Ends.
- Raised Amount – Give your Targeted Amount or Raised Amount, it means what amount of money you want for.
- Target Date – Give your Target Date at when the campaign will be stopped.
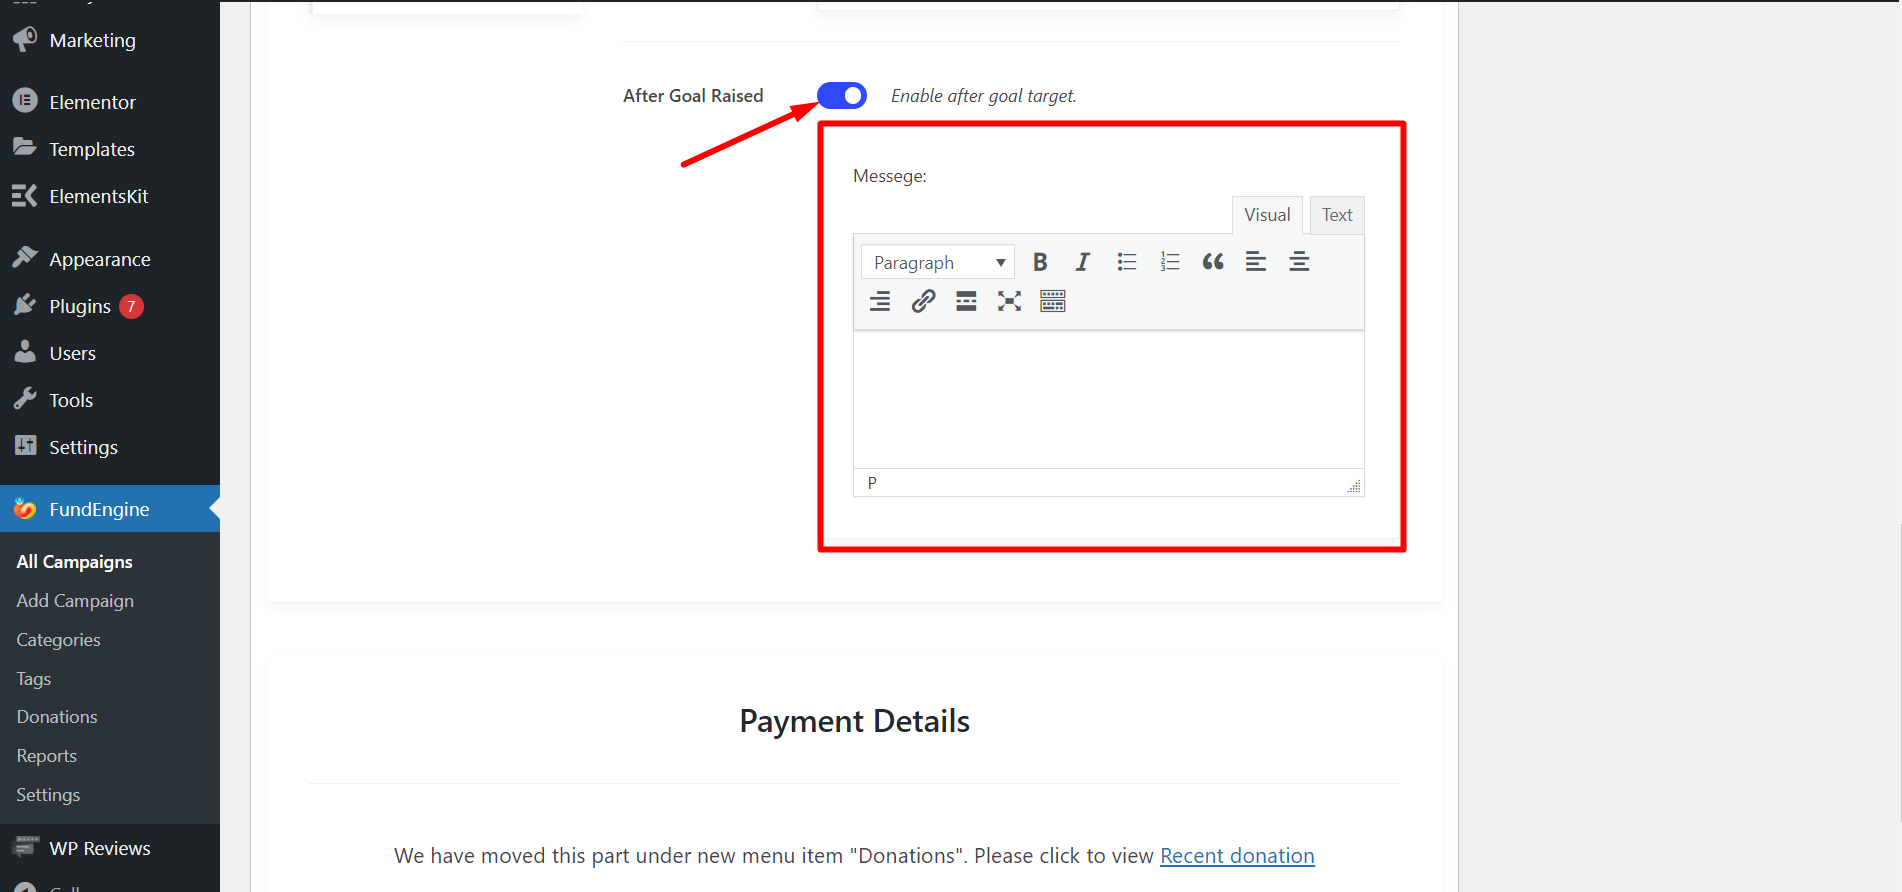
After Goal Raised- After reaching the goal you can display a Short Message to provide update. For example: “Target Amount Raised”. You have to enable the button and write the message.
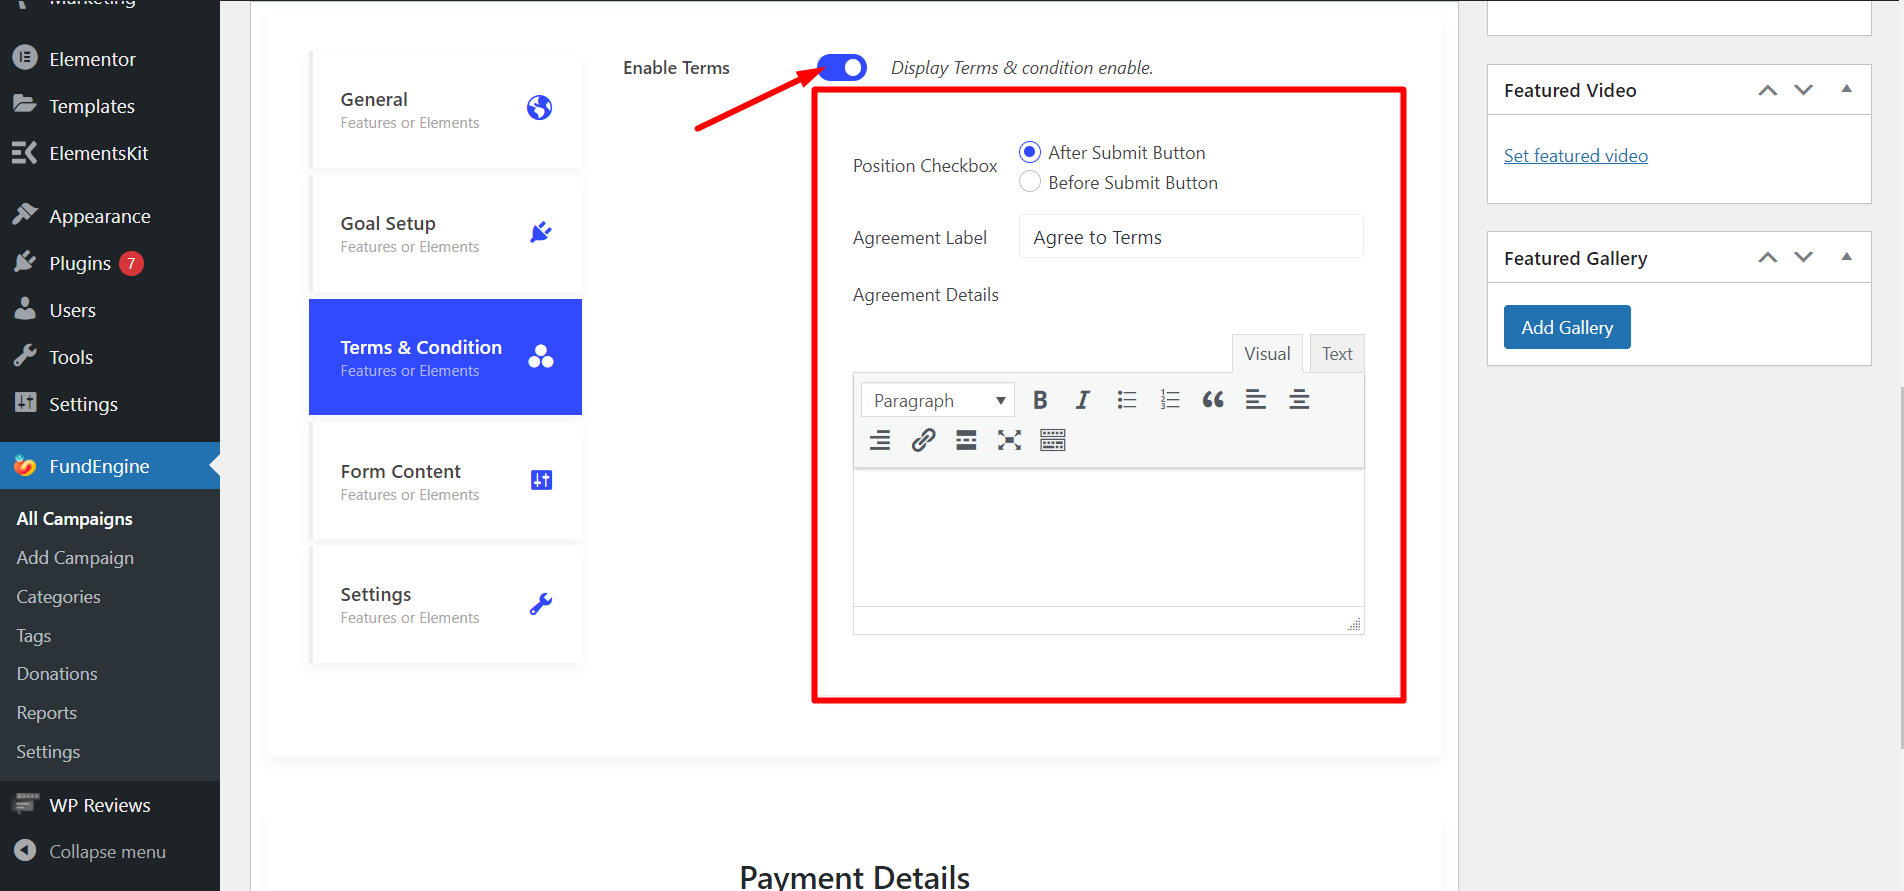
Terms & Conditions #
This field contains some set of rules and regulations between the site owner and donor. You have to make an agreement with the donor and these contracts must be followed accordingly.
Enable Enable Terms –
- Select Position Checkbox
- Give Agreement Label
- Provide Agreement Details
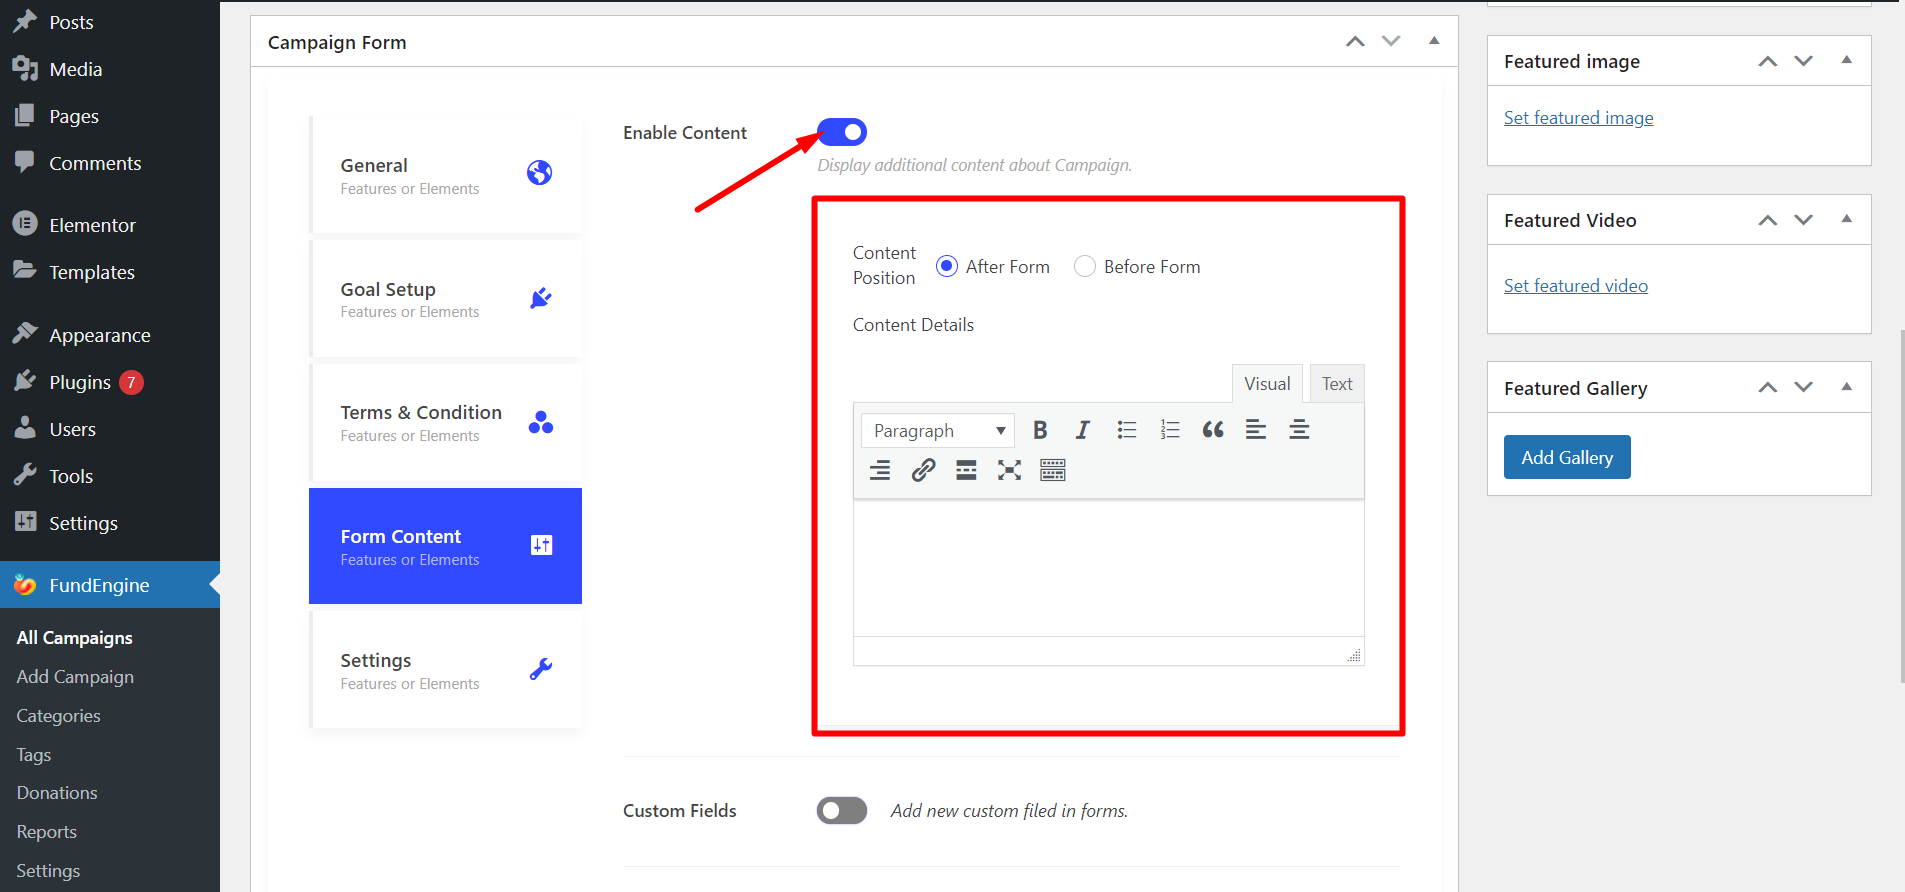
Form Content #
You can display additional content about your campaign with form content section.
Start by enabling Enable Content option
- Select content position. EX: Before Form or After Form
- Provide Content Details
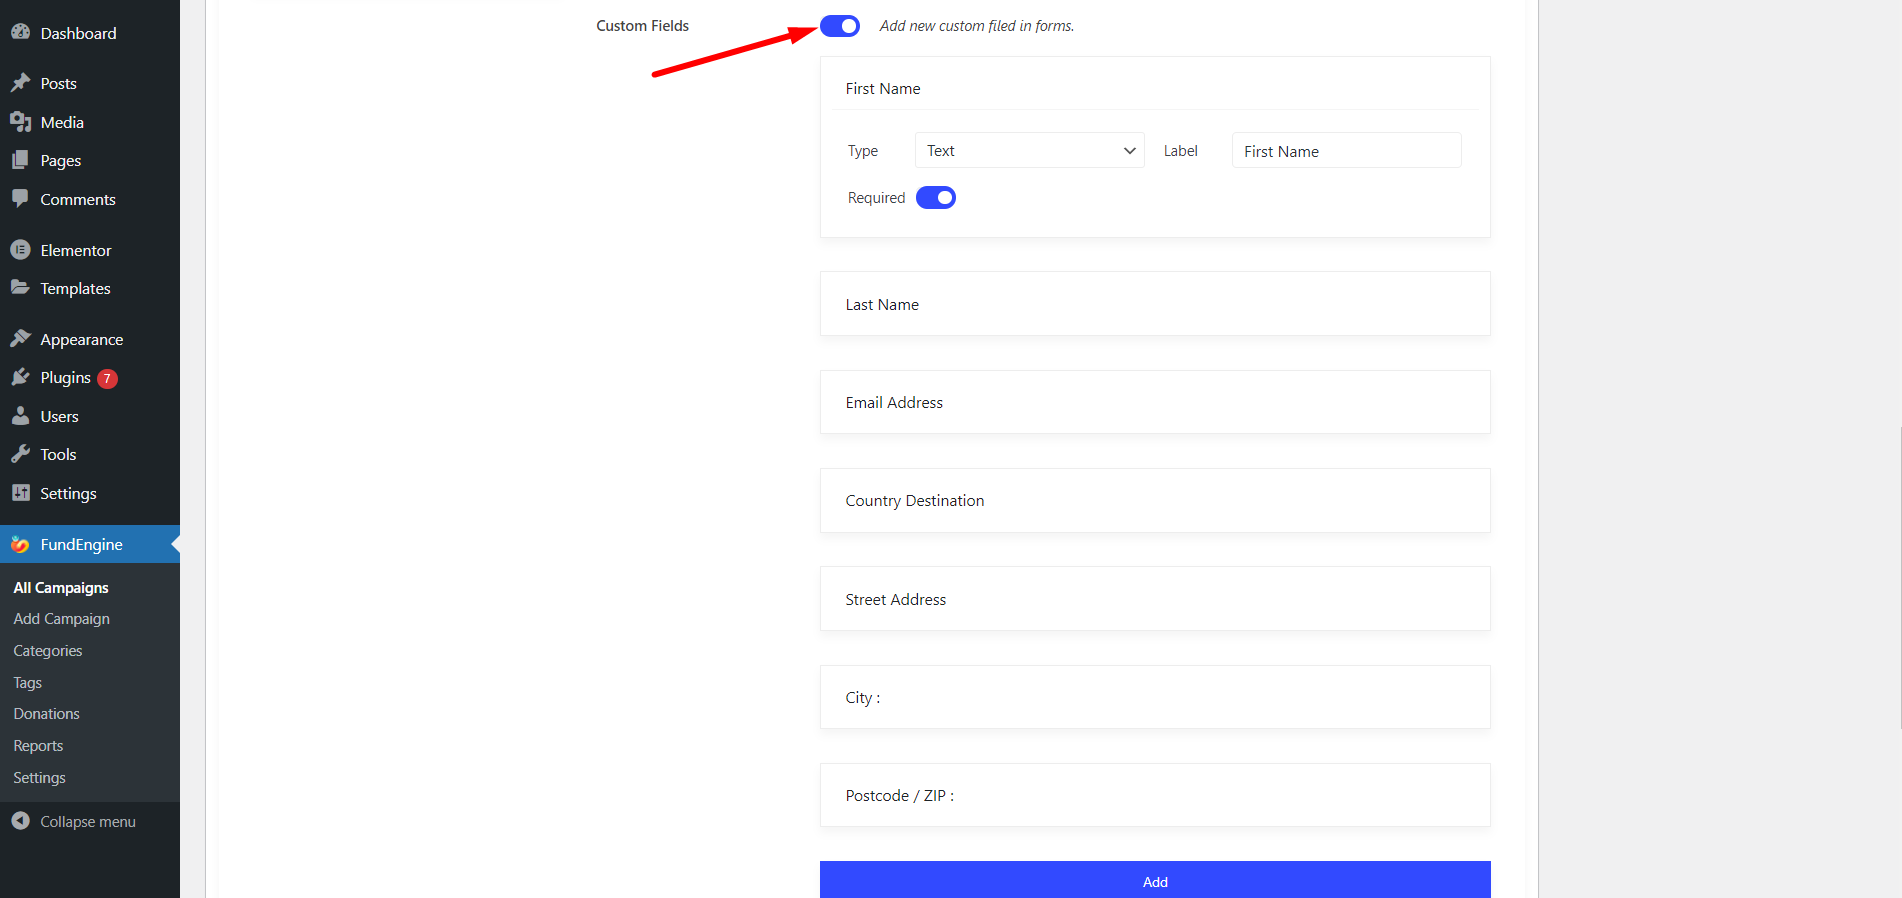
Custom Fields- You have to enable the button and add custom fields in forms. You have the opportunity to add custom fields many you want.
The fields you will get are – First name, Last name, Email Address, Country Destination, Street Address, City, Postcode/ZIP
You can adjust these options with the fields:
- Type: Text, Text-area or Number
- Label
- Required or not
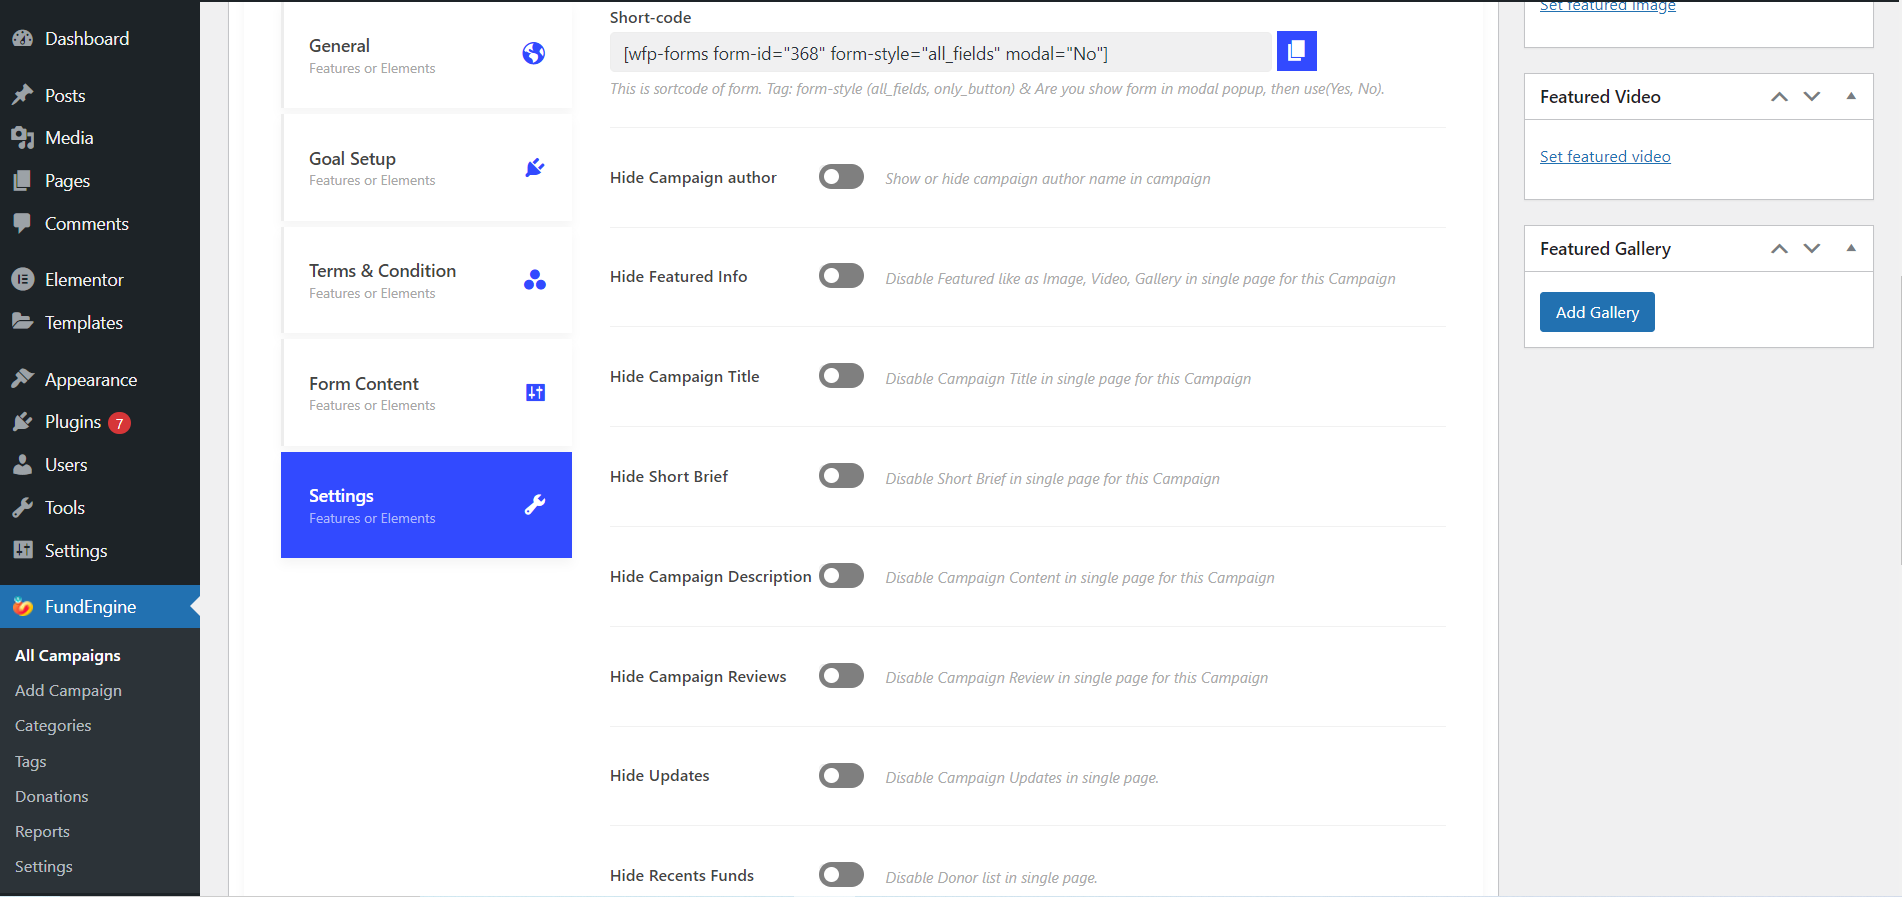
Settings #
Through settings, you can customize different sections. You can Enable or Disable the section at your own choice.
You will get settings options like – Short-code, Hide Campaign author, Hide Featured Info, Hide Campaign Title, Hide Short Brief, Hide Campaign Description, Hide Campaign Reviews, Hide Updates, and Hide Recent Funds.
- Short-code: You will get short-code of forms here. Check this documentation for clear idea 👉 Short Code
- Hide Campaign author: This option is for showing or hiding campaign author name in campaign.
The other options work according to the names, you can check the details below all the options.
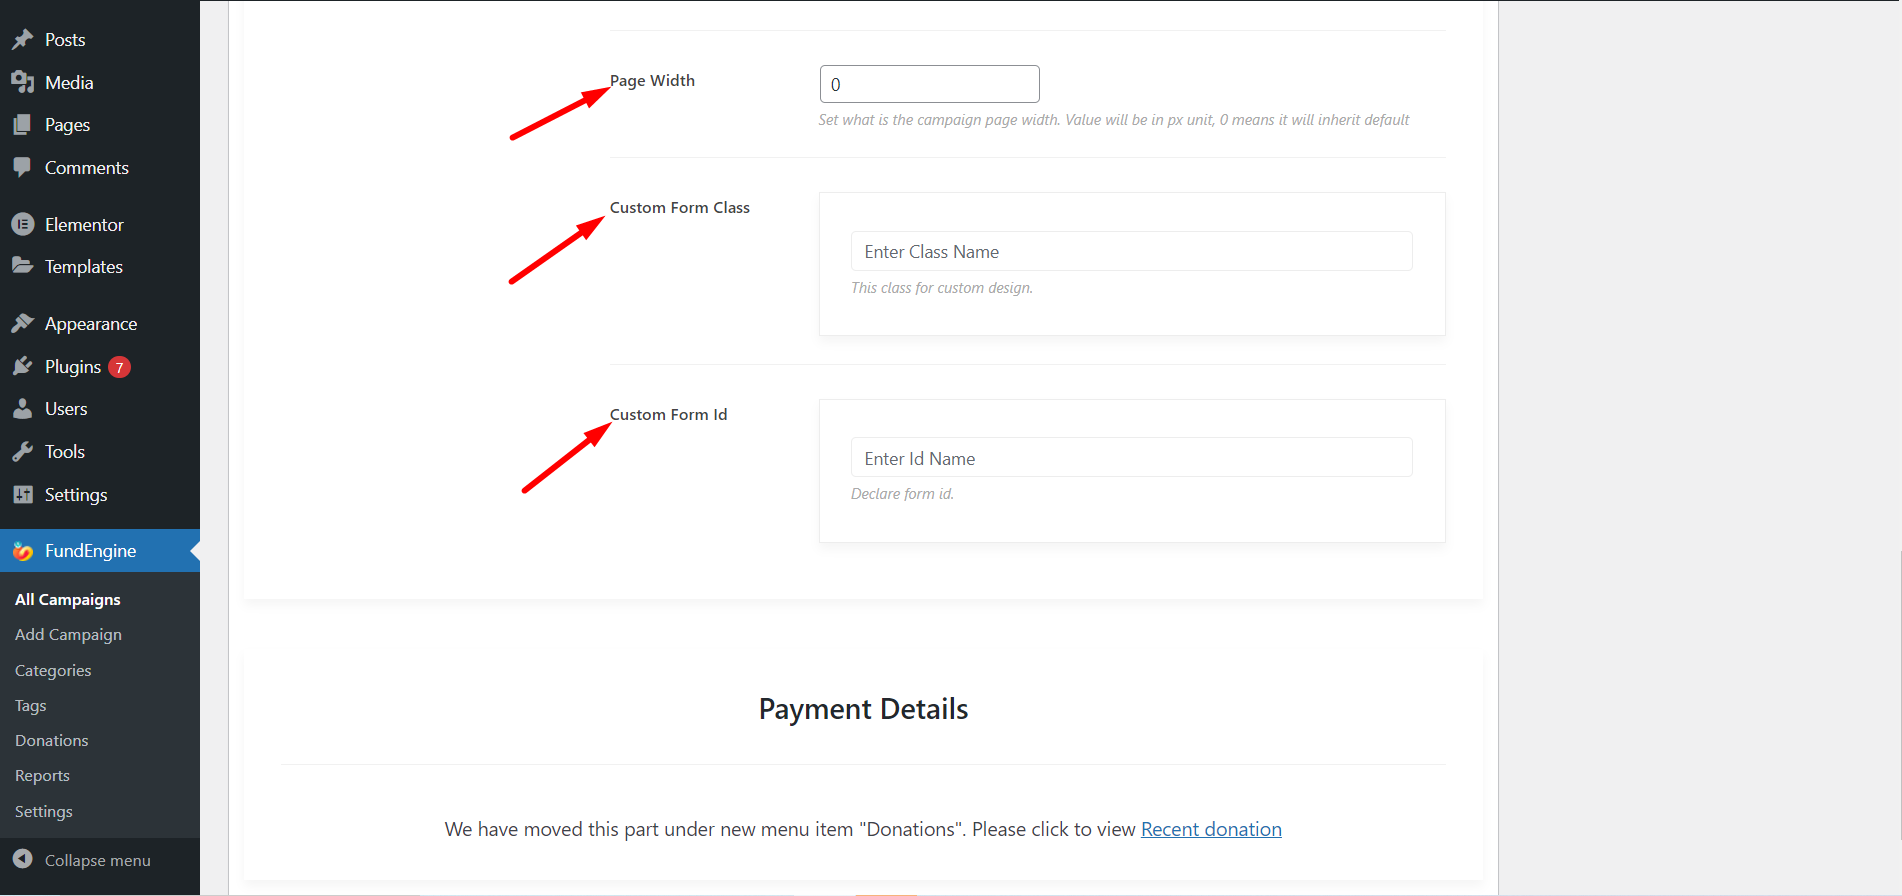
Moreover, you can find PageWidth, CustomForm class, and CustomForm ID in the settings section. So, you can set the campaign page width, add a class name, and declare form ID utilizing the fields.